The Intel Driver & Support Assistant, or Intel DSA, is a valuable tool provided by Intel to keep your hardware drivers up to date. The tool automatically detects which Intel product requires a driver update and proceeds with that. However, errors like No configuration data found in Intel driver and Support Assistant may occur while using the tool.
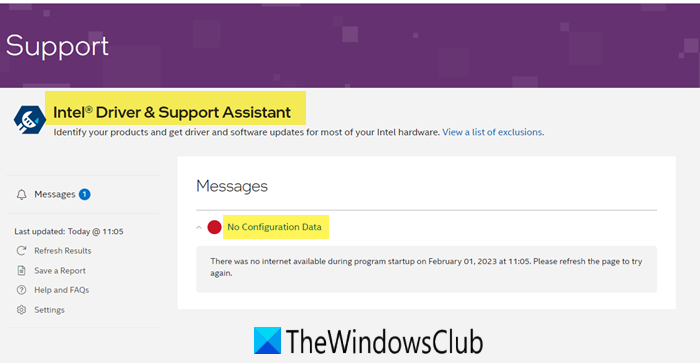
Fix Intel Driver and Support Assistant No configuration data error
If you receive No configuration data error in Intel Driver and Support Assistant when running it on your Windows PC, follow this guide to fix the issue.
- Restart the IDSA Service
- Run the tool as Administrator
- Clear IDSA Cache and Data
- Update/Reinstall the Tool
Before you proceed, ensure you have a stable internet connection. When you run it, it will open a browser to continue the test.
1] Restart the IDSA service
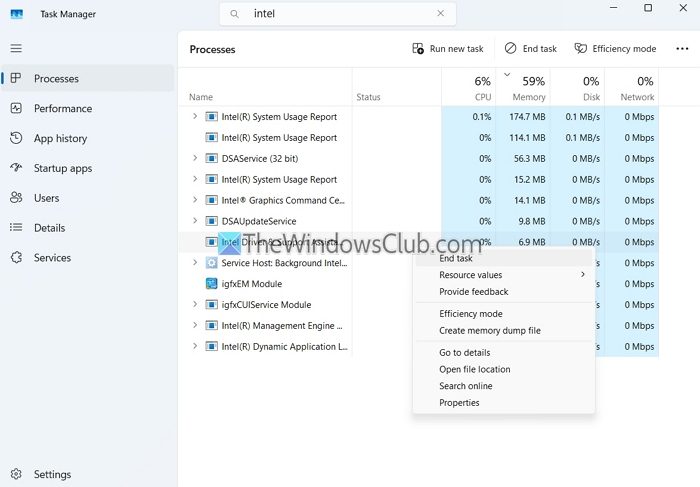
Start by restarting the IDSA server, as it will clear any temporary issues or glitches and help the tool reconnect with system data. To restart, follow these steps:
- Press Windows + X to access the Quick menu and select Task Manager.
- Look for Intel Driver & Support Assistant, right-click on it, and select End task.
- Then press Windows Key + S to open search, type Intel Driver & Support Assistant, launch it, and check if you are still getting the same error.
2] Run it as administrator
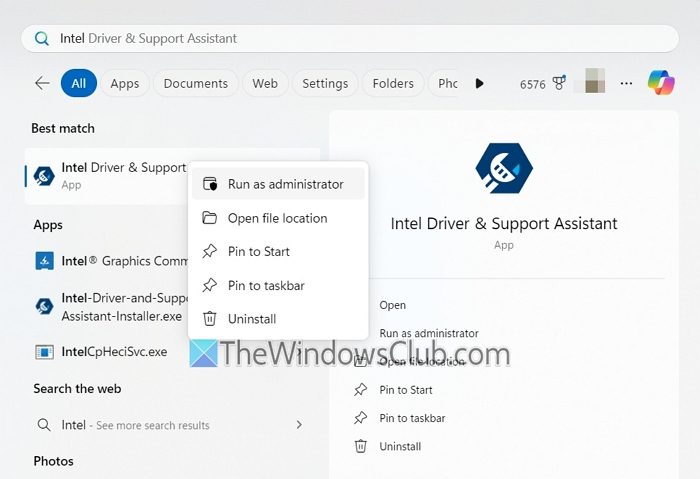
Consider running IDSA as an Administrator. This will ensure it has all the necessary permissions to access system files and configuration data.
- Search for Intel Driver & Support Assistant and then right-click on it.
- Select Run as administrator to open it with all the required permissions.
3] Clear IDSA cache and data
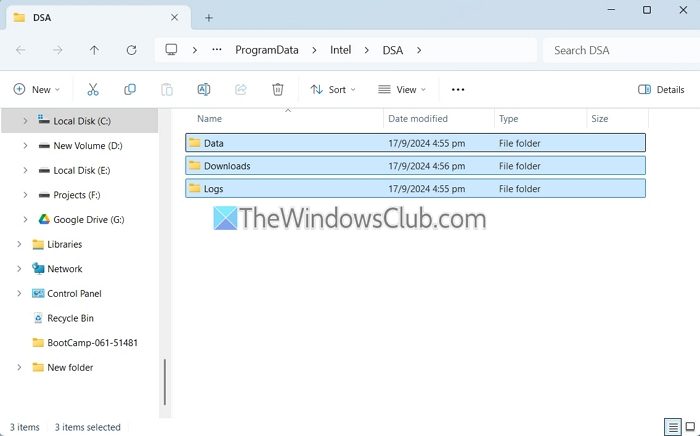
Next, try clearing IDSA’s cache and data. This will help remove any corrupted or outdated files that may be causing the trouble.
- Press Windows Key + R to open Run.
- Paste the following path and press Enter: C:\ProgramData\Intel\DSA
- Press CTRL + A to select all the files and then delete them.
- Once done, reboot your PC and check if you are getting the No configuration data error.
4] Update/Reinstall the tool
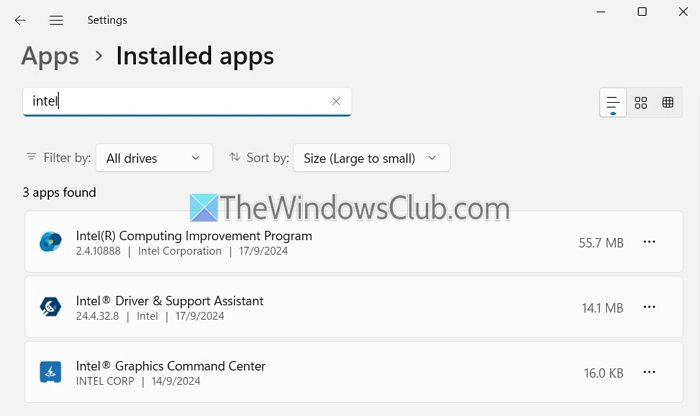
There is also a good chance that the Intel Driver & Support Assistant tool is corrupted or dated. To fix this, you can try updating or reinstalling the software.
- First, press Windows Key + I to open Settings.
- Go to Apps > Installed Apps and search for Intel Driver & Support Assistant.
- Click on the three dots icon next to it, and select Uninstall.
- Once uninstalled, download the latest version of the tool from its website and install it following all the screen instructions. Then, check if you are still getting the same error.
So, those were some of the quick fixes for Intel Driver & Support Assistant. Just make sure you are using the latest version of your web browser, as the tool requires it. Additionally, you can always use any other driver updater tool to keep track of your driver updates across all your products.
Related: Intel Driver and Support Assistant is not working
Where are Intel Driver & Support Assistant files stored?
Intel Driver & Support Assistant (DSA) typically saves downloaded drivers to C:\ProgramData\Intel\DSA\Downloads. If you prefer a different location, you can easily modify it. Simply run a DSA scan, navigate to the “Settings” menu on the left side of the screen, and select your desired download folder.
What is DSA service in Windows?
The Directory System Agent (DSA) is a crucial component of Active Directory. It manages and provides access to the directory database, which is the central repository of information about users, computers, and other network objects. The DSA runs on each domain controller and interacts directly with the physical storage (hard disk) where the directory data is stored.