Protecting your computer is a very important task, one that requires your full attention whenever there’s a new vulnerability out in the wild. Now, you may not have known before, but your motherboard can also be affected, so what to do? If we remember correctly, two of the most dangerous hardware infections are Spectre and Meltdown, and they have a knack for injecting themselves in Intel’s motherboards, more so than others. They can allow application access to memory locations, and that’s not good. The big question is, then, how does one protect their Intel motherboard from the attacks of today and those of the future?
We recently came across an interesting tool, and it’s called Intel Microcode Boot Loader. We should point out that newer computers are quite proficient in protecting hardware from infections. Therefore, the Intel Microcode Boot Loader program will likely be more useful for older computers where manufacturers no longer provide security updates.
Note that this microcode bootloader is based on the Intel BIOS Implementation Test Suite, and will only work properly from a USB drive that is FAT32 formatted. Failing to format your US flash drive the way it is intended will leave the entire thing as a useless sack.
OK, so how do we take advantage of Intel Microcode Boot Loader?
Well, first we have to do a few things before running the program, so let’s get started.
- Download and format
- Make bootable drive
- Set USB flash drive to the 1st bootable device
Once you’re done with these tasks, you should be better equipped to protect your computer even when the manufacturer no longer sends updates due to the age of the system.
Intel Microcode Boot Loader
Download & Install
The first step is to download the Intel Microcode Boot Loader tool. This can be done by simply visiting the official website at ngohq.com. The download size is under 13MB, so it shouldn’t take a very long time to complete.
After that, format your USB flash drive by going to This PC on your computer, locate the drive, right-click on it, and select Format. From there, be secure to select the FAT32 system, then get things underway.
Make bootable drive

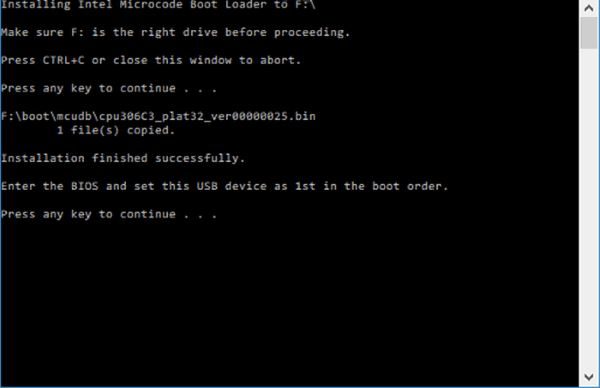
To do this, simply run the install.exe file and follow the instructions to have the tool installed on your Fat32 formatted USB flash drive.
Set USB flash drive to 1st bootable drive
Restart your Windows 10 computer system, and be sure to enter the BIOS or UEFI if your machine is recent. From there, set the USB flash drive to be the default bootable drive, which means, whenever Windows 10 is restarted in the future, it will always make attempts to boot first from this drive.
Now, once everything is up and running, you should understand that the microcode will always be updated after every fresh reboot, just as long as the USB flash drive with Intel Microcode Boot Loader installed is plugged in.
I hope this helps.
Leave a Reply