If Internet Connection Sharing (ICS) is not working or has stopped working after a Windows 11/10 computer reboot or Service restart, then this post will be able to help you remediate the problem.

Internet Connection Sharing is a method for connecting multiple computers in a LAN to the Internet through a single connection and a single IP address. ICS typically uses NAT technologies to achieve this and works with most connection technologies, including DSL, cable, ISDN, dial-up, and satellite. The device with the modem or broadband interface that establishes the connection to the Internet is called the ICS host, or gateway while the other devices that connect to the Internet via the network and the ICS host are called ICS clients.
If the ICS host fails, then all of the ICS clients lose their Internet connection.
Internet Connection Sharing not working
You’ll encounter this issue based on the following scenario.
You have a Windows 11/10 computer that has two network interfaces that connect to two different networks. You change the Internet Connection Sharing (ICS) service Startup type to Automatic and you enable ICS on one of the network interfaces and then confirm that ICS connection works. You restart the ICS service or the computer.
In this scenario, the ICS settings are lost, and the ICS connection doesn’t work.
Note: Generally, if there is no traffic on ICS for 4 minutes, the service shuts down and does not restart automatically.
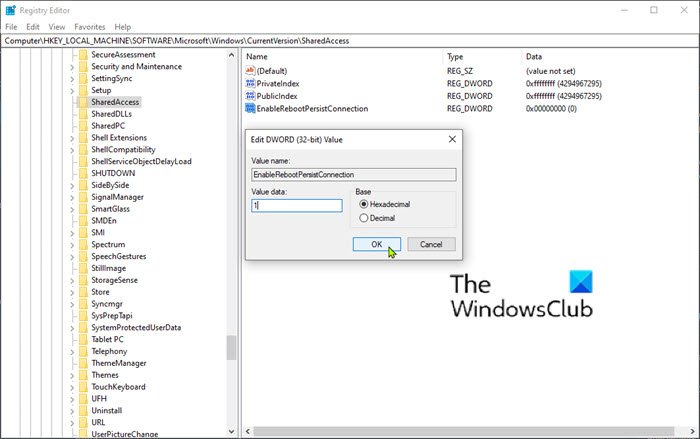
To fix this issue, you’ll need to create and configure the following Registry subkey:
EnableRebootPersistConnection: DWORD: 1

Since this is a Registry operation, it is recommended that you back up the registry or create a system restore point in case the procedure goes wrong. Once you have taken the necessary precautionary measures, you can proceed as follows:
- Press Windows key + R.
- In the Run dialog box, type regedit and press Enter to open Registry Editor.
- Navigate or jump to the registry key path below:
HKEY_LOCAL_MACHINE\Software\Microsoft\Windows\CurrentVersion\SharedAccess
- Then right-click on an empty space on the right pane.
- Select New > DWORD (32-bit) Value.
- Name the key EnableRebootPersistConnection.
- Double-click the newly created key and set the Value data to 1.
- Click OK to save changes.
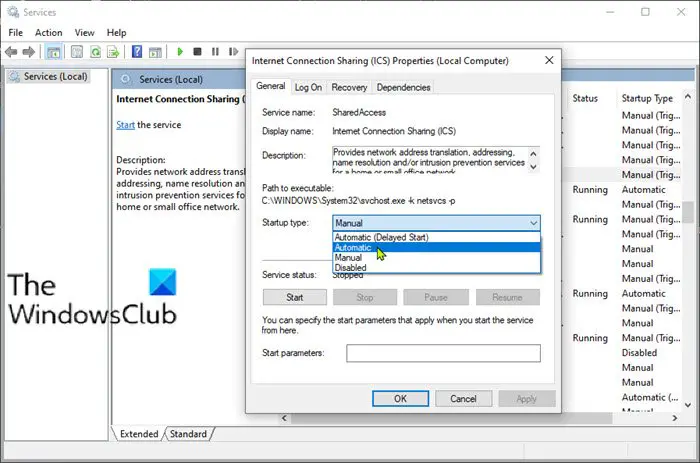
You can now exit Registry Editor and then, proceed to change the ICS Service Startup mode to Automatic.

Here’s how:
- Press Windows key + R.
- In the Run dialog box, type services.msc and hit Enter to open Services.
- In the Services window, scroll and locate the Internet Connection Sharing (ICS) service.
- Double-click on the entry to edit it’s properties.
- In the properties window, click the drop-down on the Startup type and select Automatic.
- Click Apply > OK to save changes.
Now, restart your PC and see if ICS works without issues.
Related reads:
- How to disable Internet Connection Sharing (ICS) in Windows
- An error occurred while Internet Connection Sharing was being enabled.
I hope this helps!
Leave a Reply