Even though Windows Update is meant to solve bugs and give new security updates to your computer, users have complained that it has malfunctioned something that was working fine otherwise. One such complaint is regarding the Internet; many users have experienced that the Internet stops working after an update on Windows 11/10. Therefore, in this article, we present you with some simple solutions to fix the issue.
Internet not working after an Update on Windows 11/10
These are the things you can do to fix the Internet not working after an update on Windows 11/10:
- Restart your Device
- Check your Settings
- Check if the Router is accessible
- Forget and Reconnect
- Use Network Troubleshooting
- Reset network stack
- Uninstall the problematic Update
- Use Hardware and Devices troubleshooter
- Use Network Reset.
Let us talk about them in detail.
No Internet access after Windows Update
1] Restart your Device
This is pretty basic but the most common errors in Windows 11/10 can be fixed by restarting the computer. So, if your Internet has stopped working after an update, try restarting your computer and check if the issue is fixed.
Another thing you should do is restart your Router. Just unplug it, wait for a minute or two, re-plug and check if it fixes the issue.
2] Check your Settings
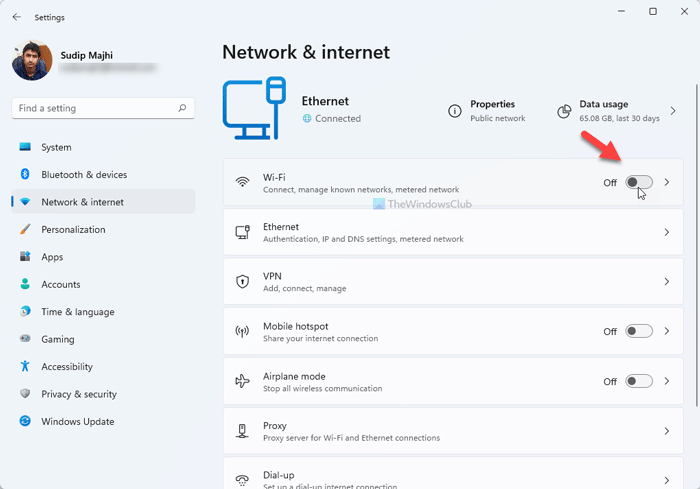
An update can turn off some network devices on your computer. Therefore, we need to check your Settings.
Enable Wi-Fi
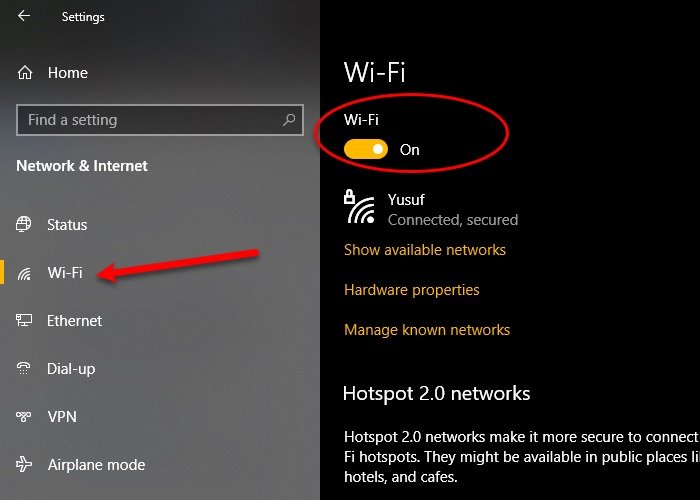
To check if your Wi-Fi is enabled, launch Settings from the Start Menu and click Network & Internet > Wi-Fi. Now, use the toggle to enable Wi-Fi.
Note: If your WiFi is enabled and connected try disconnecting and then connecting to the Network.
Enable Network Adapter
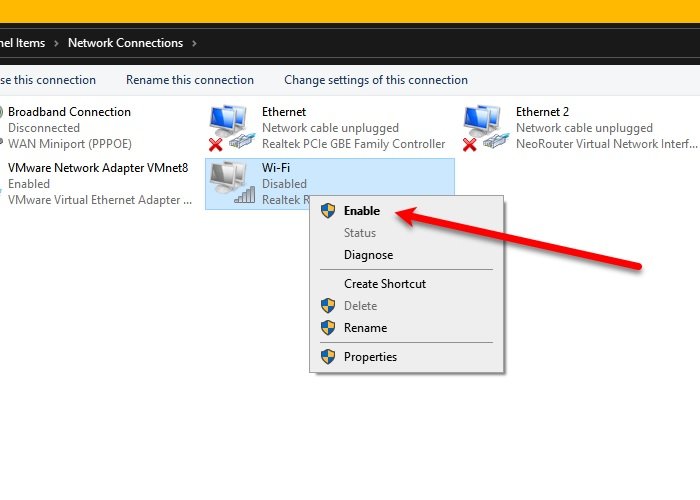
Probably the most common error one can face after an update is the disabled Network Adapter. So, let’s check if that’s your case. Launch Settings from the Start Menu and click Network & Internet > Status > Change adapter options. Right-click on your network adapter and select Enable (if it’s disabled).
If these settings are fine, check later solutions.
Read: Network icon says No internet access, but I am connected.
3] Check if the Router is accessible
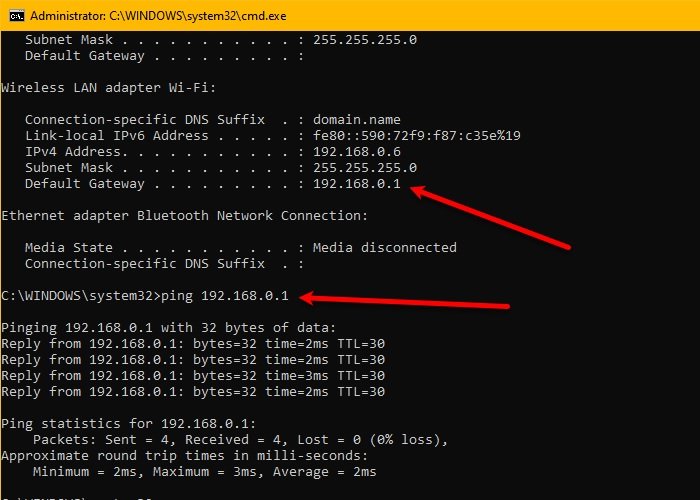
We need to confirm that the problem is not because of your ISP but your Computer before moving forward.
First, check your Default Gateway. To do that, launch Command Prompt as an administrator, type the following command and hit Enter.
ipconfig
Look for Default Gateway under “Wireless LAN adapter Wi-Fi” ( or the Ethernet section if you use that). Once you know your Router’s Default Gateway, ping it. To do so, type the following command in the Command Prompt and hit Enter.
ping <Router’s Default Gateway>
Examine the result you got. If all 4 sent packets are received, your System and Router connection is fine. You may have to contact your ISP to check if the connection between your Router and ISP is working.
Read: No Internet Access after upgrading to or installing new Windows Feature Update.
4] Forget and Reconnect
If you can’t connect to a particular network, try forgetting and then reconnecting to it. This is useful as it flushes out the stored credentials, IP address, and other network and security settings.
To do that, launch Settings from the Start Menu and click Network & Internet > Wi-Fi. Now, click Manage known networks, select your Network, and click Forget.
Now, click on the network icon from the Taskbar and reconnect to the Wi-Fi. Finally, check if it fixes your issue.
5] Use Network Troubleshooting
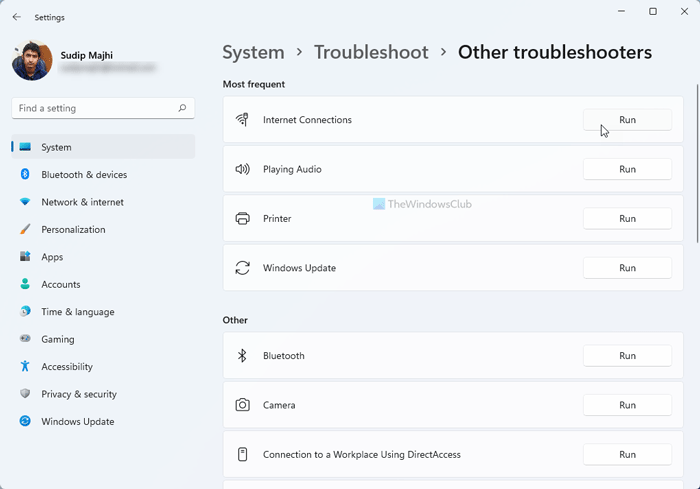
To use the Network Troubleshooting in Windows 11, do the following:
- Press Win+I to open Windows Settings.
- Make sure that you are in the System tab.
- Click on the Troubleshoot menu on the right side.
- Click the Other troubleshooters option.
- Find out the Internet Connections troubleshooter.
- Click on the Run button.
- Follow the screen instructions.
However, if you are using Windows 10, follow these steps:
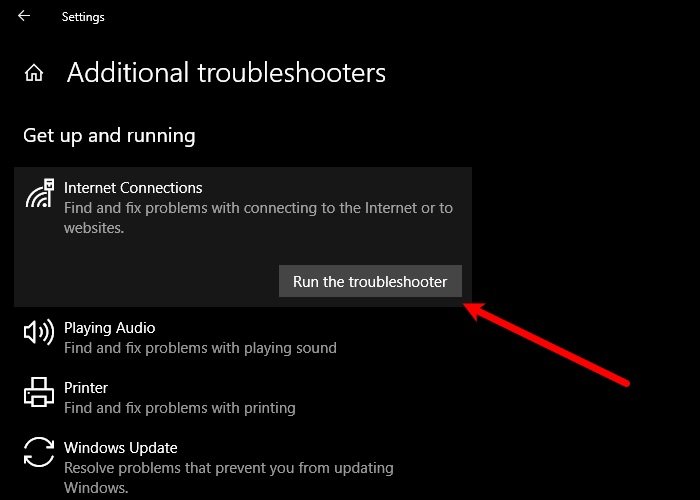
You can use Windows built-in Network Troubleshooter to fix the issue.
To do that, Settings and click Update & Security > Troubleshooter > Additional troubleshooters > Internet Connection > Run the troubleshooter.
Let it run and check if it can fix your issue.
6] Reset network stack
If Network Troubleshooting didn’t fix the issue, you should try to reset network information. To do that, launch Command Prompt as an administrator and type the following commands.
Use the following command to reset the network request handling component.
netsh winsock reset
Use the following command to reset IP Stack
netsh int ip reset
Use the following command to release network configuration
ipconfig /release
Use the following command to renew network configuration
ipconfig /renew
Use the following command to flush the DNS cache
ipconfig /flushdns
Now, restart your computer and check if it fixes the Internet not working issue for you.
7] Uninstall Updates
If none of the mentioned solutions worked for you, try uninstalling recent updates. This self-explanatory, since, the problem was caused by an update, removing it will fix the issue.
Uninstall Quality Updates
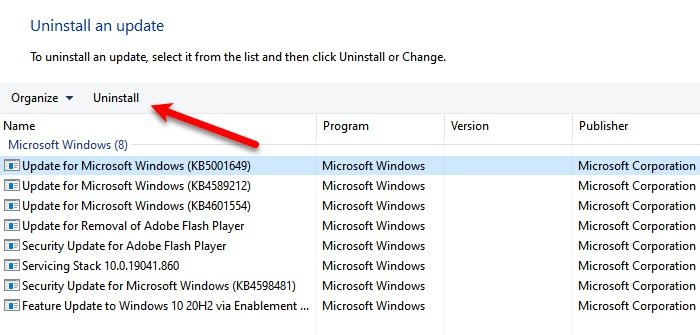
To uninstall Quality Updates follow the following steps:
- Launch Settings by Win + X > Settings
- Click Update & Security > View update history > Uninstall updates.
- Select your last update and click Uninstall.
After uninstalling the update, try restarting your computer and check if the issue is solved.
Uninstall Feature Updates
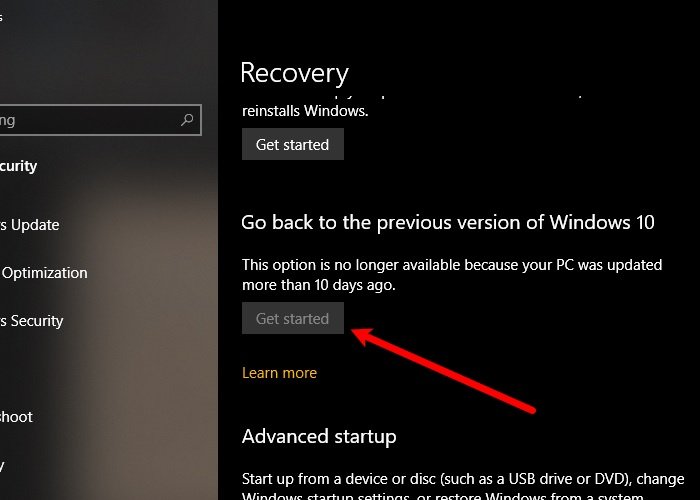
If you haven’t received a Quality update but a Feature update then you have to roll back to the previous version of Windows 10 to fix the issue. Make sure to make a full backup of your user files before proceeding.
Follow the given steps to uninstall Feature Updates in Windows 10
Launch Settings by Win + I
Click Update & Security > Recovery > Get Started from the “Go back to the previous version of Windows 10” section.
Afterward, follow the on-screen instructions to uninstall the Feature updates. Now, check if the issue persists.
8] Use Hardware and Devices troubleshooter
Run the Hardware and Devices troubleshooter.
9] Use Network Reset
Use the Network Reset feature and see if that works for you.
Hopefully, these solutions have helped you to fix the Internet not working after an update on Windows 11/10.
Why is my internet not working on Windows 11?
There could be several reasons why your internet is not working on Windows 11/10. You need to start the troubleshooting by checking the driver. Following that, you should also check if you have a valid internet connection or not. Then, you can use various troubleshooters to get rid of this problem.
Can’t connect to Wi-Fi after Windows 11 update?
If you have an old Wi-Fi adapter, you could encounter such problems after updating to Windows 11 or Windows 10. In that case, you need to confirm if your adapter is compatible with the current operating system. You can contact the manufacturer or check the official website for possible updates.
These posts offer additional troubleshooting suggestions: