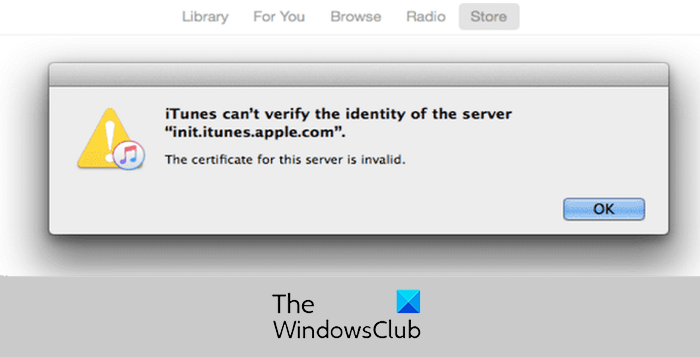
If you keep seeing the iTunes can’t verify the identity of the server error on Windows or Mac, this post will help you fix it.

Some users have reported that they keep getting this server verification error when trying to connect to the iTunes Store or cloud storage. The error message is followed by the server with which you are facing the error.
There can be different reasons behind this error. It can be caused due to incorrect date and time settings, corrupted iTunes Store cache, problematic third-party plugins, and third-party antivirus/firewall interference. On Mac, it could be certificate settings causing the error.
Fix iTunes can’t verify the identity of the server error on Windows
Here are the solutions you can use to fix the iTunes can’t verify the identity of the server error on Windows:
- Check the date and time settings on your PC.
- Check for iTunes updates.
- Run iTunes in safe mode.
- Reset the iTunes Store cache.
- Temporarily disable your antivirus/firewall.
1] Check the date and time settings on your PC
This error could be triggered due to incorrect date and time settings on your PC. So, check your date and time settings and make sure you have set them correctly. Here are the steps to do that:
- First, launch Settings using Win+I and navigate to the Time & language tab.
- After that, select the Date & time option.
- Next, switch on the toggles associated with the Set time zone automatically and Set time automatically options.
- When done, check if the error is fixed.
2] Check for iTunes updates

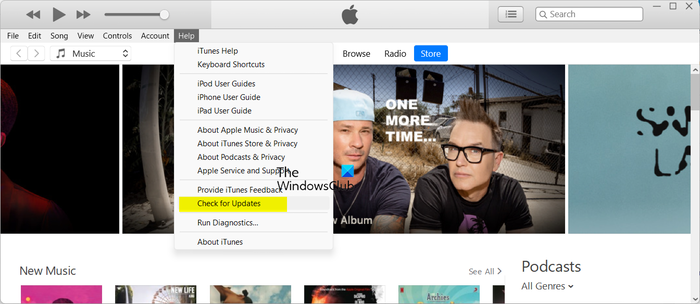
If there are software updates available for iTunes, download and install them and then check if the error is gone. To do that, open iTunes, click on the Help menu and choose the Check for updates option. Once updates are installed, restart iTunes and see if the error is fixed.
3] Run iTunes in safe mode
You can try launching iTunes in safe mode and then see if the error is fixed. Some third-party script or plugin might be interrupting the request and causing this error. So, you can check for the same by launching iTunes in safe mode. Here’s how:
- First, close iTunes and make sure it is not running in the background using Task Manager.
- Now, press the Ctrl+Shift keys and simultaneously double-click on the iTunes desktop shortcut.
- Next, in the appeared prompt, press the Continue button.
If the error is fixed in safe mode, a plugin is likely to be the main culprit. You can exit iTunes and then check for installed plugins at the below location:
C:\Users\<username>\AppData\Roaming\Apple Computer\iTunes\iTunes Plug-ins
You can copy the plugins to a different location and then delete them. After that, move one plugin at a time back to the iTunes Plug-ins folder and launch iTunes to check if the error is fixed. This way you can identify the plugin causing the error.
Read: iTunes keeps crashing or freezing on Windows PC.
4] Reset the iTunes Store cache

The next thing you can do is reset the iTunes Store cache to fix this error. Here’s how to do that:
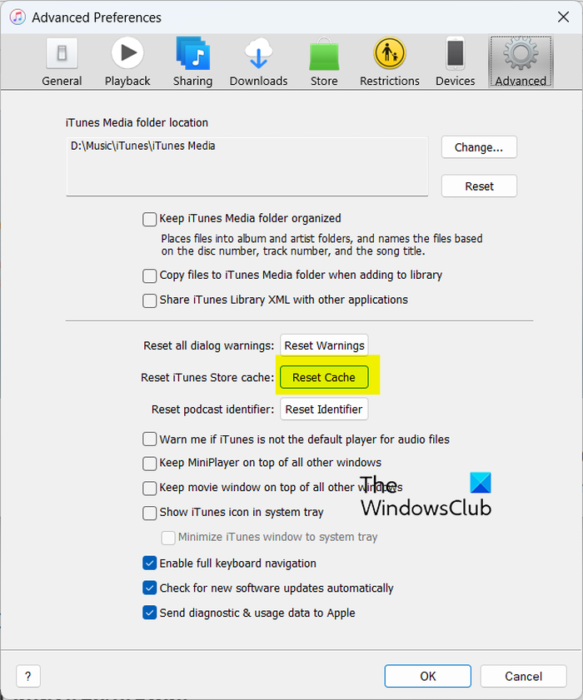
- First, open iTunes and go to the Edit menu.
- Now, select the Preferences option.
- After that, move to the Advanced tab.
- Next, press the Reset Cache button present next to the Reset iTunes Store cache option.
- Once done, press the OK button and then restart iTunes to check if the error is fixed.
See: iTunes.exe missing & cannot be found on Windows.
5] Temporarily disable your antivirus/firewall
It might be your security software including antivirus and firewall causing the error. So, try disabling your antivirus/firewall for some time and then relaunch iTunes to check if the error is fixed.
iTunes can’t verify the identity of the server on Mac
If you are experiencing the iTunes can’t verify the identity of the server error on Mac, use the below fixes:
- Correct the date and time settings.
- Change the certificate settings.
- Delete the VeriSign certificates.
- Reset the keychain login password.
1] Correct the date and time settings
To avoid this error on Mac, make sure you have set the correct date and time settings on your device.
2] Change the certificate settings
Some users have confirmed fixing the error by modifying their certificate settings on Mac. So, you can also do the same using the below steps and see if it helps.
First, close iTunes and App Store on Mac.
Now, open Finder and then navigate to the Applications > Utilities > Keychain Access app.
Next, under the Keychains section, select System Root.
After that, move to the Certificates option under Category and look for certificates with a little blue dot with a plus sign.
Now, double-click on a certificate and click on the triangle present beside Trust.
After that, set the Secure Socket Layer (SSL) option to No Value Specified and close it.
Next, reopen the certificate and set When using this certificate to Use System Defaults.
Repeat the above procedure for all certificates with a blue dot.
Once done, relaunch iTunes and see if the error is fixed.
Read: iOS device not showing up in iTunes for Windows.
3] Delete the VeriSign certificates
Another thing you can do is delete the VeriSign certificates to fix the error. This fix has been proven to work for several affected users. Here are the steps to do so:
First, open the Keychain Access app as discussed in the above fix.
Now, locate the VeriSign certificates and export them.
After that, delete the Verisign certificates and check if the error is resolved.
4] Reset the keychain login password
You can try resetting the keychain login password and see if the error is gone. Here are the steps to do that:
First, open the Keychain Access app as we did in fix (2).
Now, select login from the Keychains section in the left-side pane.
After that, open the Edit menu and select the Change Password for Keychain “login” option.
Next, enter the current and new passwords in the respective fields and click on the OK button.
Once done, restart iTunes and check if the iTunes can’t verify the identity of the server error is fixed.
What to do when iPhone Cannot verify server identity?
If you are getting the “Cannot Verify Server Identity” error on your iPhone, set up the correct date and time on your device. Apart from that, turn off the Content and Privacy Restrictions setting. If that doesn’t help, reset your iPhone settings and check if the error is resolved.
Now read: iTunes not working on Windows PC.