If Java is not working in Windows 11/10, these solutions may help you troubleshoot the issue. Although, due to the lack of NPAPI support, Java applets stopped working in Microsoft Edge, Google Chrome, and other Chromium-based browsers, you can still install and run Java on Windows 11 PCs. Here is what you can do to eliminate any possible interruption caused by your system while running Java.
Java not working in Windows 11
If Java is not working on Windows 11/10 PC, follow these solutions:
- Clear Java cache
- Uninstall older version and download offline installer
- Fix corrupt Registry files
- Edit Environment Variables
- Troubleshoot in Clean Boot
- Use Get Help
To learn more about these tips and tricks, continue reading.
1] Clear Java cache
It is the first thing you must do if Java is not working on your computer. At times, the old cache could cause issues running the program. Therefore, follow these steps to clean the Java cache:
First, you need to search for configure java in the Taskbar search box and click on the individual search result. After opening the Java Control Panel, make sure that you are in the General tab. If so, head to the Temporary Internet Files and click on the Settings button.
Then, find the Delete Files button and click on it.
Tick the Trace and Log Files and Cached Applications and Applets checkboxes and click the OK button.
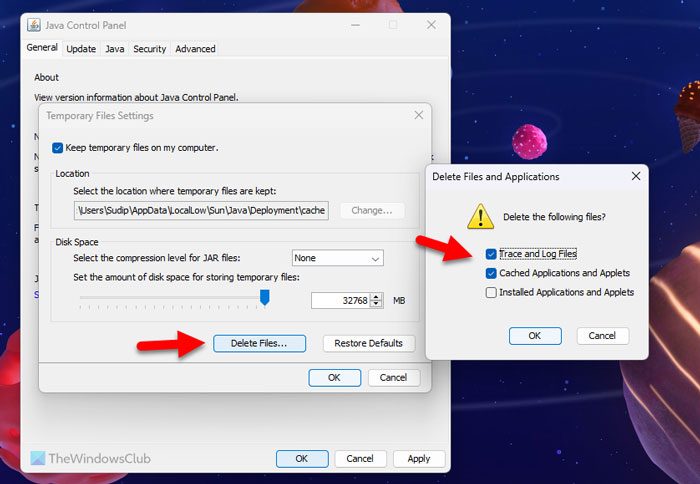
It might take a few seconds to remove it. Once done, close all the apps and restart your computer.
Read: Tips for using Java securely on Windows
2] Uninstall older version and download offline installer
If you haven’t updated Java for a long time, the problem mentioned above could arise. Instead of updating the app, you can uninstall and reinstall the latest version. To uninstall Java, using a third-party software removal tool is highly recommended since it can leave some cached files behind. It is better to use a program uninstaller tool to remove all the leftovers. Then, you can go through this guide to download and install Java on Windows 11.
Read: Java Install or Update did not complete, Error Code 1603
3] Fix corrupt Registry files
Whenever you install a program on your computer, it gets registered in the Registry Editor automatically. If there are some issues in some Registry files, it may also reflect on the program. It generally happens after a malware, adware, or ransomware attack. In that situation, it is best to repair or fix the corrupted Registry files.
4] Edit Environment Variables
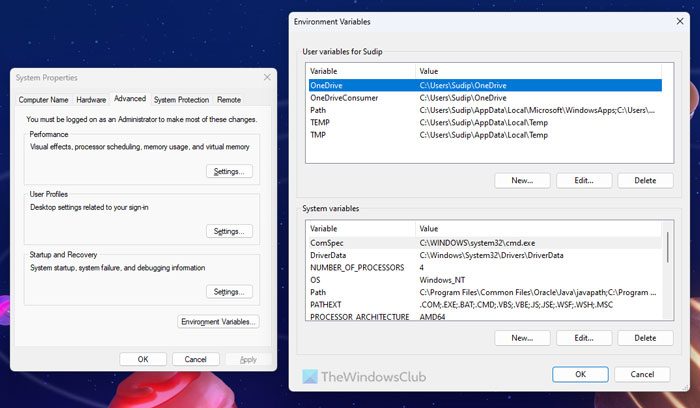
Environment Variables help the program locate the executable file while running on your PC. If you have not registered or removed it by mistake, you must add it manually. This guide will show you how to set, edit, or add Java in Environment Variables in Windows 11.
5] Troubleshoot in Clean Boot
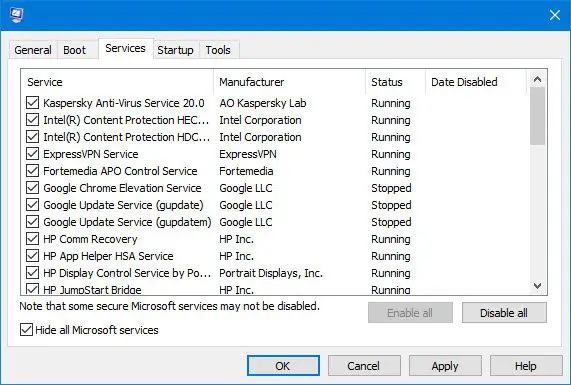
Other programs or processes could sometimes cause this issue. In such a situation, it is easy to solve the problem by performing a Clean Boot and troubleshooting while in the Clean Boot state. Therefore, perform a Clean Boot and find out about the program that is causing problems.
If you don’t know what to do, you must perform the Clean Boot first and try running Java in that state. If it works, you can enable one process at a time and repeat.
6] Use Get Help
Get Help app is the newest form of Windows Troubleshooters that you can use to find solutions to various problems. In this case, you need to use some keywords like repair apps, unable to run apps, etc., in the Get Help app and follow the respective instructions.
Read: Java Installation Not Completed, Unable to install Java, There are errors in the following switches
Java not working in VS Code
If you have followed all the instructions given above, but Java is still not working in VS Code, you need to do this:
First, you need to check the version. In other words, you need to know whether Java is already installed on your PC or not. For that, open Command Prompt with administrator permission and enter this command:
java -version
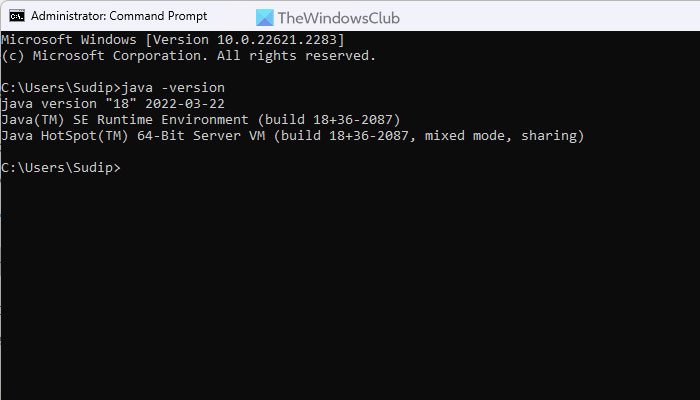
If it shows a version, you need to repair the app. However, if it doesn’t display any version number, you need to download and install Java on your PC.
Java not working in Chrome or Edge
As mentioned in the beginning, Google Chrome and all the other Chromium-based browsers do not support NPAPI, which is required to run Java applets. Having said that, if Java is not working, there is not much you can do to make it work. However, it is suggested that you follow the aforementioned tips and tricks once.
That’s all! Hope it helped.
Read: Java Platform SE binary has stopped working & is not responding
Does Java not work on Windows 11?
Yes, Java works on Windows 11. Although Google Chrome doesn’t support NPAPI technology, you can use Java in the rest of the other programs. No matter whether you want to use it in VS Code or somewhere else, there should not be any problem on Windows 11.
Read: How to open or run a JAR file on Windows
How do I enable Java on Windows 11?
There’s not much you can do to enable Java on Windows 11. However, you must download and install Java on your computer. Downloading the executable file from the official website is highly recommended. Also, it is recommended to download the 64-bit version since Windows 11 doesn’t come in x86 or 32-bit.