Windows 11/10 depends on several resources and software components to function as intended. Just for powering the machine, several smaller software components are supporting it. Some users are reporting Kernel Power Blue Screen error triggered by the Windows Kernel with usually a Windows Kernel Event ID 41 error. It randomly turns off and reboots the computer.

An example of the Bugcheck Code entry from a similar event reads-
EventData
BugcheckCode 159
BugcheckParameter1 0x3
BugcheckParameter2 0xfffffa80029c5060
BugcheckParameter3 0xfffff8000403d518
BugcheckParameter4 0xfffffa800208c010
SleepInProgress false
PowerButtonTimestamp 0Converts to 0x9f (0x3, 0xfffffa80029c5060, 0xfffff8000403d518, 0xfffffa800208c010)
The cause for this error is an issue with the Power Supply components in both Hardware and Software parts.
NOTE: If your PC is stuck in a reboot loop, you may need to carry out the following steps via Safe Mode or Advanced Startup Options screen.
Fix Kernel Power Bluescreen on Windows 11/10
To troubleshoot this kind of kernel crash issue, you need to debug the crashed system dump files. But if you are an end-user, you could try the following suggestions:
- Undo Overclocking – if done.
- Run the Power troubleshooter.
- Replace the Power Supply Unit.
- Run Memory Diagnostics tests.
- Check RAM physically.
- Update or reset BIOS.
- Disable Fast Startup.
You might want to allow the system to cool down a bit before you proceed.
1] Undo overclocking
If you have Overclocked your system, first undo the overclocking and see if that makes the BSOD go away.
2] Run the Power Troubleshooter
Run the Power Troubleshooter and let it fix the issues if any are found.
Microsoft provides a dedicated section for the user to be able to run different types of troubleshooters inside the Windows 10 Settings app.
Open the Settings App and navigate to the following path: Update & security > Troubleshoot. Select the option that reads Power.
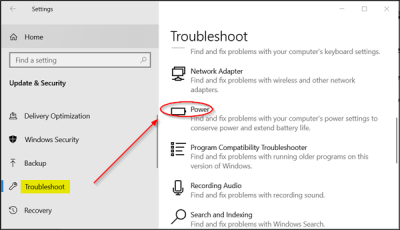
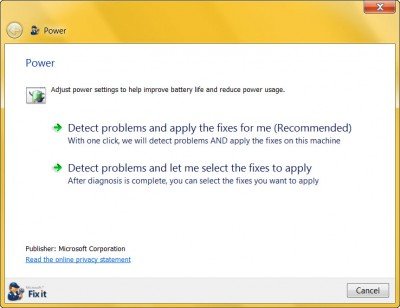
Finally, select Run the troubleshooter. Follow the onscreen instructions to detect and fix the issue.
3] Replace the Power Supply Unit
You can also try to physically replace the PSU or Power Supply Unit of your computer and check if that fixes your issues.
4] Run Memory Diagnostics tests
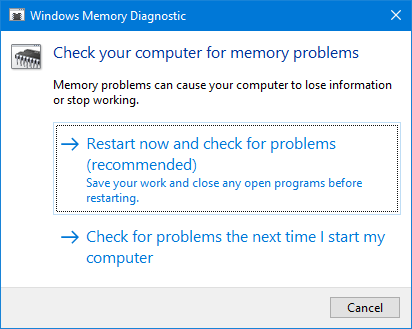
You can type, mdsched.exe in the Run box found in the WIN + X buttons and then hit Enter. It will launch the Windows Memory Diagnostic Tool and will give you the following options:
- Restart now and check for problems (Recommended)
- Check for problems the next time I start my computer
As per your choice, a scan will take place in the memory and will fix any issues found automatically.
Alternatively, you can use Memtest and check if that fixes your issues.
5] Check RAM physically
It is a bit tricky and technical. If you tend to use multiple physical RAMs on your computer, you need first to check if they are of the same frequency. And after that, verify that the chip is properly compatible. If the sockets are attached using some adapter or non-recommended apparatus, it can cause some issues while giving a performance hit to the computer.
If you find such setup, make sure that to call in someone, and install the hardware correctly.
6] Update or reset BIOS
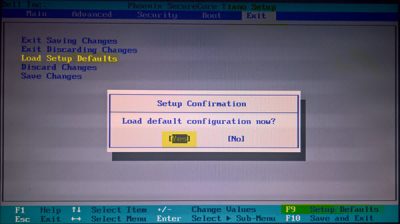
The primary solution for this error is to update the system BIOS. If it does not help you may reset BIOS and see. Follow the link to the guide to understand the reset procedure.
7] Disable Fast Startup
Fast Startup helps your computer to boot faster than usual. We suggest that you disable the Fast Startup. Reboot the computer, and monitor if you get the issue again. If it is resolved – good – else reverse the changes made.
If nothing helps you may need to contact your local hardware technician or Microsoft Support.
Leave a Reply