If your LWindows laptop battery indicator light keeps blinking while charging, then this article will help you fix this problem. Usually, this issue can occur due to a faulty battery, a faulty charging cable, outdated or corrupted battery drivers, etc.
Laptop battery indicator blinking while charging in Windows 11/10
Before you proceed with further troubleshooting steps, we suggest you check for Windows Update. If a Windows update is available, install it. Having done that, use these fixes to resolve the issue.
- Hard reset your laptop
- Disable Hibernate mode
- Clear CMOS battery
- Reinstall and update the battery driver
- Update BIOS
- Take your laptop for repair
Let’s start.
1] Hard reset your laptop
The first step you should do is hard reset your laptop. This process will clear up residual charge from the capacitors that may be causing this problem. Perform a hard reset and see if it changes the situation. Use the below steps:
- Turn off your laptop and remove all the peripherals and the charger.
- Remove the battery. If your laptop has a non-removable battery, skip this step.
- Press and hold the power button for 30 to 45 seconds.
- Connect the charger and turn on your laptop.
You can also perform the hard reset via the pinhole button. Some laptops have a pinhole reset button. Check if your laptop has this button. Insert a pin into this pinhole to press the button. This process will reset your laptop. Check if it makes any changes.
2] Disable Hibernate mode
We also suggest you try disabling the Hibernate mode and see if it works or not. If the issue gets fixed after disabling the Hibernate mode, then your laptop may have this feature where the battery indicator blinks when the Hibernate mode is active. To check this you can check your manual or you can contact support.
3] Clear CMOS battery
Sometimes clearing the CMOS battery can help fix this issue. This process will also reset BIOS to default settings. If the Laptop battery light blinks while charging due to a misconfigured BIOS setting, resetting BIOS to its default values will fix the issue.
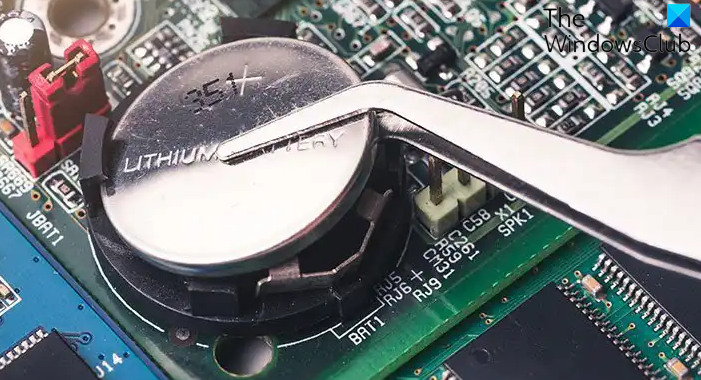
This CMOS battery is small in size like a coin-shaped battery. You can reset the BIOS setting to its default values by removing and re-inserting the CMOS battery. To clear the CMOS battery, you have to open your computer case. Turn off your computer and disconnect the power cord to avoid electric shock.
After turning off your computer properly, locate the CMOS battery on the motherboard, remove it, and wait for a few minutes. This will reset the BIOS to its default settings. Reinsert the battery and try booting again.
Make sure you install the battery in the right orientation; otherwise, your computer will not boot.
4] Reinstall and update the battery driver
An outdated or corrupted battery driver can also create the problem. Reinstalling the battery driver can help fix the issue. Check the following instructions for reinstalling your battery driver:
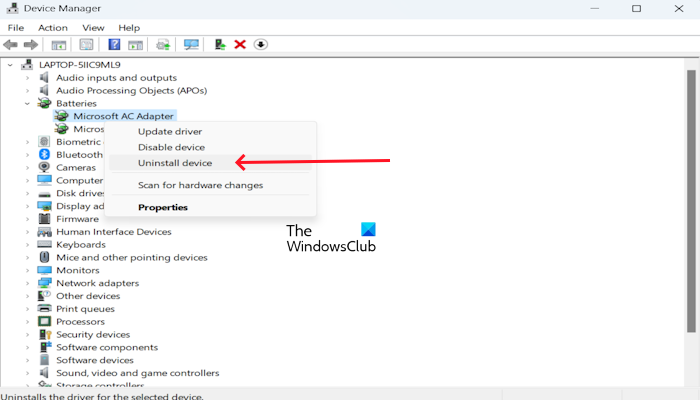
- Open the Device Manager.
- Expand the Batteries section.
- Right-click on your battery driver and click on Uninstall device.
Now, restart your laptop to reinstall the battery driver. Your driver will automatically be installed. Alternatively, you can do a Scan for hardware changes to reinstall your battery driver. To do so, click on the Action tab and click on Scan for hardware changes.
If this does not work, you can also download the latest Battery driver from the official website of your laptop manufacturer (if available) and install it.
5] Update BIOS
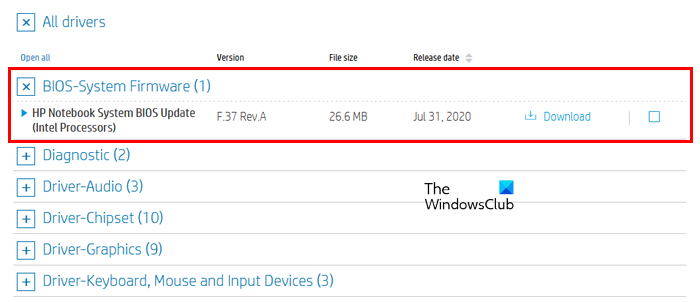
Make sure your BIOS is up to date. Check for BIOS updates (if available). If an update is available, install it. Therefore, before updating the BIOS, you need to check the version of BIOS from the System Information or Command Prompt. Also, you can download the latest BIOS update from the official website of your computer manufacturer.
Read: Harsh sound in laptop after switching from Mains to Battery power
6] Take your laptop for repair
If despite trying the above fixes, you are still facing the same issue, then we suggest you take your laptop for repair. They will properly diagnose the problem and suggest the best solution.
That’s it, I hope this helps.
How do I fix my laptop battery not charging Windows 11?
If your laptop battery is not charging, you can try some solutions. Here are some troubleshooting steps that you can try, perform a Hard Reset, update BIOS, calibrate the battery, perform a Battery check, etc. Also, this issue can occur due to a faulty laptop battery. To check this, you can get help from a professional.
How do I know if my laptop battery is bad Windows 11?
If your laptop battery is bad, then you will notice these signs of symptoms. Here are the most common symptoms: slow charging, frequent fast battery drain, battery heating issues, etc.
Read next: Laptop Caps lock blinking continuously
Leave a Reply