If your laptop screen dims when it is unplugged from the power supply, the solutions provided in this article will help you. Some users reported that the screen of their laptop becomes dim when they unplug the charger. Incorrect power plan setting is one of the possible causes of this problem.

Laptop screen dims when unplugged in Windows 11
Use the following suggestions if your Windows laptop screen dims when it is unplugged.
- Check the battery saver settings
- Disable Adaptive Brightness
- Disable the Sensor Monitoring Service
- Change AMD Display Settings (if applicable)
- Change your Power Plan or create a custom power plan
Below, we have explained all these fixes in detail.
1] Check the battery-saver settings
Windows 11 has a battery-saving setting that saves your battery power if you turn this feature on. When the battery saver is turned on, your laptop’s screen brightness will automatically dim.
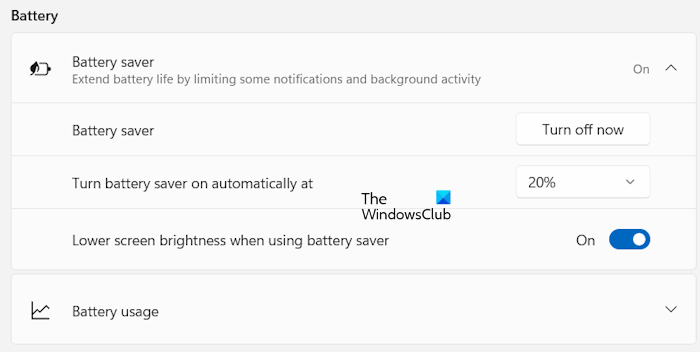
Check the battery-saver setting of your laptop. The following instructions will guide you on this:
- Open Windows 11 Settings.
- Go to System > Power & battery.
- Expand the Battery saver tab.
- If it is turned ON, you will see the Turn off now button. Click on that button to turn off the Battery saver.
Alternatively, you can also turn off the “Lower screen brightness when using battery saver” option. This will not lower your screen brightness even if the Power Saver is turned ON. However, the Battery Saver will not work properly in this case because your screen brightness will consume the required power.
You can also select the percentage below which Windows 11 automatically turns on the Battery Saver.
2] Disable Adaptive Brightness
Adaptive Brightness can also be responsible for this issue. We suggest you disable this feature and see if it helps. Previously, this feature was available in the Control Panel. In Windows 11, Microsoft moved it to Settings. Follow the steps provided below to turn off Adaptive Brightness on Windows 11:
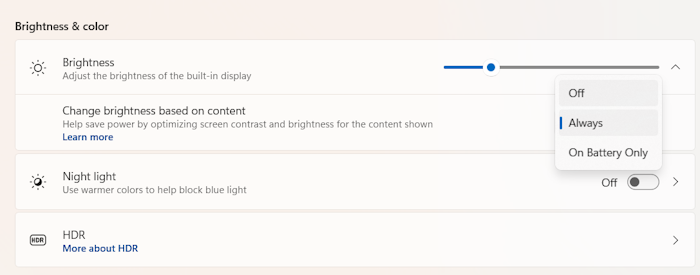
- Open Windows 11 Settings.
- Go to System > Display.
- Expand the Brightness tab.
- Select Off in the Change brightness based on content drop-down menu.
3] Disable the Sensor Monitoring Service
If the issue persists, we suggest you disable the Sensor Monitoring Service. The Sensor Monitoring Service monitors various sensors to expose data and adapt to system and user state. If this service is stopped or disabled, the display brightness will not adapt to the lighting conditions, and other system functionality may be affected.
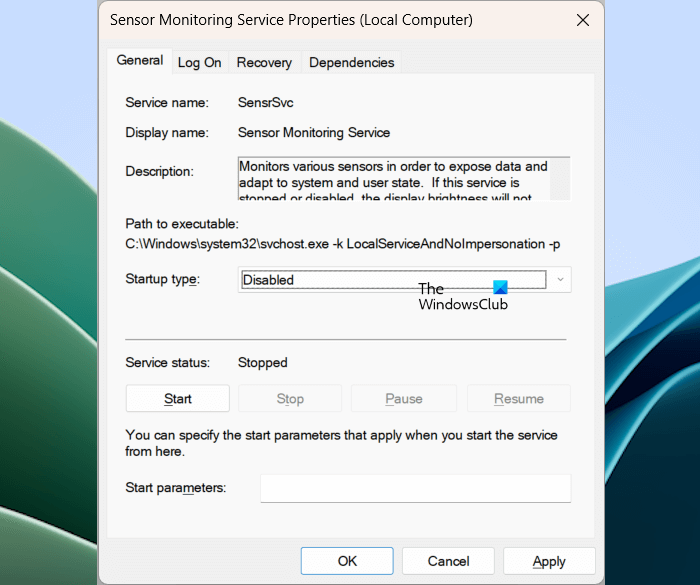
Follow the steps provided below:
- Open Windows Services Manager.
- Scroll down the list of services and look for the Sensor Monitoring Service.
- Right-click on it and select Properties.
- Under the General tab, set its Startup type to Disabled.
- Click Apply and then click OK.
- Restart your computer.
If you start experiencing other issues on your system after disabling this service, turn it on again.
Read: Sensors Troubleshooter will fix Sensor, Motion & Location problems
4] Change AMD Display Settings (if applicable)
If your system has AMD graphics, you might be experiencing this issue due to the Vari-Bright feature of AMD Software: Adrenalin Edition (if this software is installed on your system).
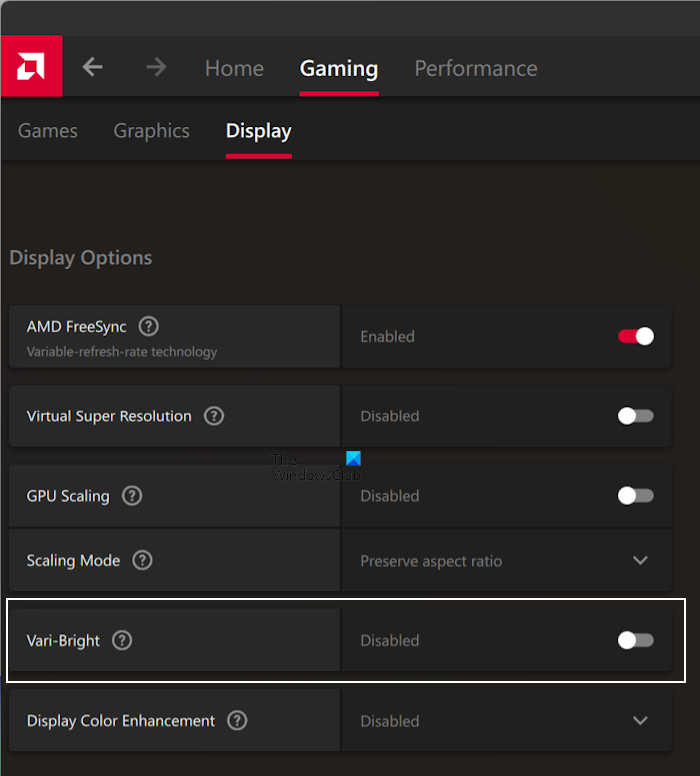
The following instructions will guide you on this:
- Open AMD Software: Adrenalin Edition.
- Select the Gaming tab.
- Go to the Display tab.
- Turn off the Vari-Bright option under the Display Options section.
5] Change your Power Plan or create a custom power plan
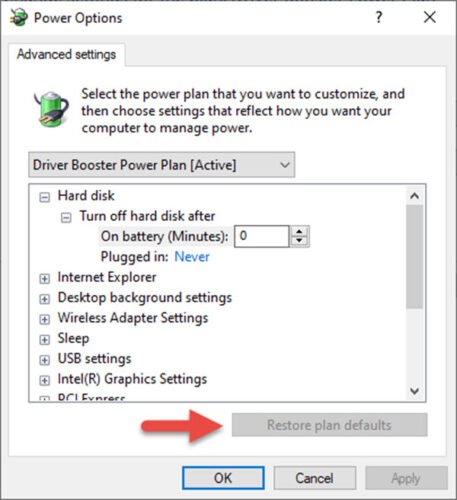
Restore the Power Plan settings to default and see if it helps.
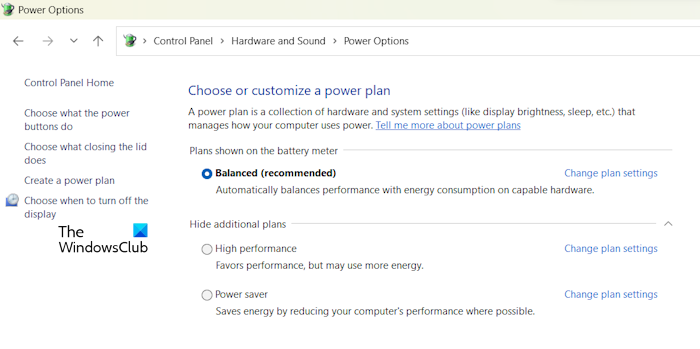
You can also change your power plan or create a new custom power plan. You can change the power plan in the Control Panel. If only the Balanced Power Plan is available there, you can restore the missing default power plans by executing the required commands in the elevated Command Prompt.
If the commands to restore the missing default power plans do not work, the Modern Standby S0 Mode might be active on your system. In such a case, first, you need to disable the Modern Standby S0 Mode.
To create a new power plan, open the Power Options page in the Control Panel and then click on the Create a power plan link on the left side.
That’s it. I hope this helps.
How do I stop my laptop screen from dimming Windows 11?
To stop your laptop screen from dimming on Windows 11, you can turn off the Adaptive brightness and disable the battery saver. If you do not want to disable the battery saver, you can stop Windows 11 to lower the screen brightness when the battery saver turns on.
Why does my laptop screen dim randomly?
Adaptive brightness is the main reason why your laptop screen dims randomly. If you have AMD graphics, the Val-Bright feature might be enabled. You can check this in AMD Software: Adrenalin Edition. If this feature is turned on, turn it off.
Read next: Screen brightness keeps changing in Windows.
Leave a Reply