Periodic Scanning in Windows Defender is a useful feature available in Windows 11/10. Windows 11/10 is the most secure operating system Microsoft has ever shipped and it continues to make it better and more secure.

Periodic Scanning feature in Windows Defender
This new feature, Periodic Scanning improves system security by using Windows 10 built-in Windows Defender as an additional scanner if you have installed any third-party antivirus. This feature is offered only when you have installed a 3rd-party antivirus software and Windows Defender is disabled.
These periodic scans will utilize Automatic Maintenance – to ensure the system chooses optimal times based on minimal impact to the user, PC performance, and energy efficiency – or customers can schedule these scans. Limited Periodic Scanning is intended to offer an additional line of defense to your existing antivirus program’s real-time protection, says Microsoft.
With this feature of Periodic Scanning, one can configure Windows Defender to scan the system periodically even when other third-party antivirus software is installed and will provide additional Malware protection. So, Microsoft is making malware detection and protection seamless and easier, even if the customer uses a third-party antivirus.
By default, Periodic Scanning is not enabled. When enabled, Windows 11/10 will use the built-in Windows Defender scanning engine to periodically scan the PC for threats and remediate them. These Periodic scans will make use of Automatic Maintenance thus ensuring the system chooses optimal times based on minimal impact on the user and PC performance. Customers can also schedule these scans. Periodic Scanning offers an additional line of defense to the existing antivirus program.
Enable Windows Defender Periodic Scanning

Periodic Scanning becomes available when you have installed and run any third-party antivirus solution. It is not enabled by default. So if you are not using the built-in Windows Defender as your antivirus program, one can enable Periodic Scanning as follows:
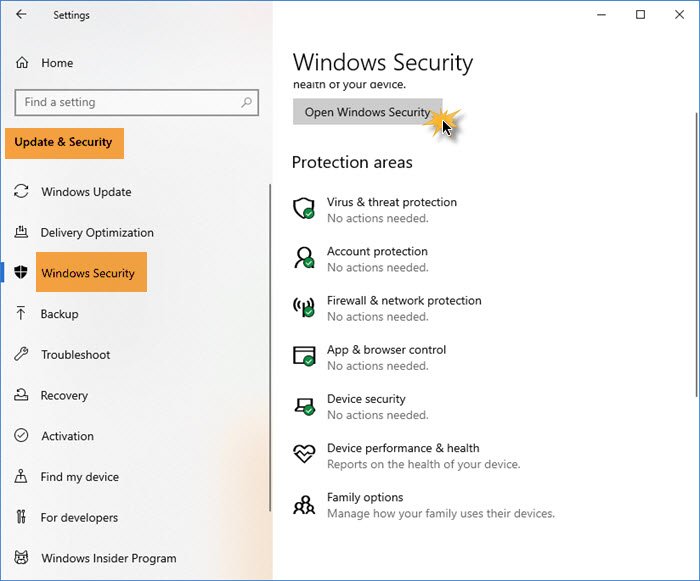
- Open Windows Settings
- Click open Update & Security settings
- Select the Windows Security section from the left side
- Press the Open Windows Security button
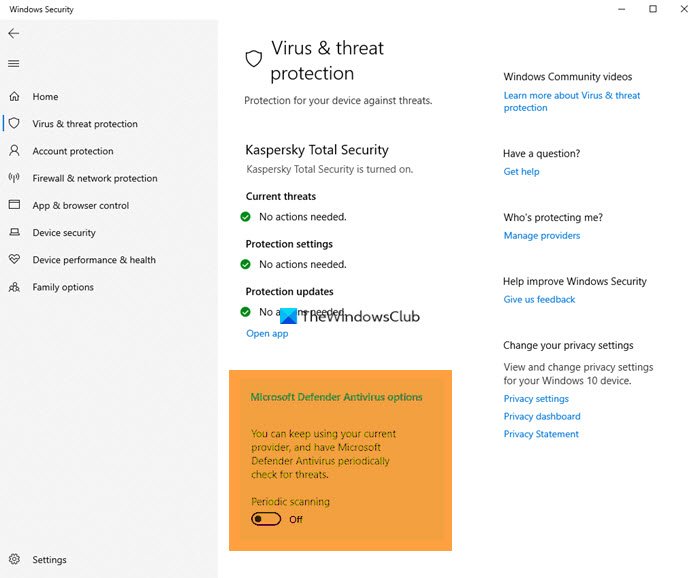
- Windows Security will open
- Select Virus and Threat Protection
- Click the Microsoft Defender Antivirus options blue link
- Turn Periodic Scanning On.

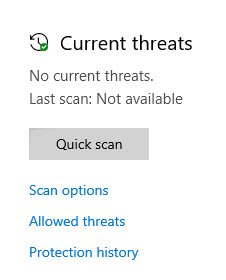
When this feature is turned ON and when you are not using Windows Defender for real-time protection, the Windows Defender UI and History tab will show any additional threats that have been detected. 
Clicking on the notification will open Windows Defender where you can further review the threat that was found and the action that was automatically taken.

Clicking on the History tab will show you the history.
In most cases, Windows Defender will also automatically take action on the threat.

If you are already using Windows Defender as your antivirus program on Windows 11/10, you should ensure that this feature is enabled.
We hope you find the post useful.
How to set Windows Defender to scan automatically?
To set Windows Defender to scan automatically, open the Task Scheduler, navigate to Windows Defender Scheduled Scan, double-click it, go to the Triggers tab, and select New. Then, specify the frequency and start time for automatic scans.
How do I turn on real-time scanning in Windows Defender?
To turn on real-time scanning in Windows Defender, go to Settings > Update & Security > Windows Security > Virus & threat protection. Click on ‘Manage settings’ under Virus & threat protection settings, and switch the Real-time protection toggle to On.
This is garbage.. i upgraded to the latest version of Win 10 and now I can’t disable Limited Periodic Scanning…. WHY MICROSOFT???.. WHY? – – I don’t want Limited Periodic Scanning at all… give us back the option to disable it without having to install a third party antivirus.
Switch it on/off wíth this command
“C:windowssystem32SystemSettingsAdminFlows.exe” Defender SideBySideOff
or
“C:windowssystem32SystemSettingsAdminFlows.exe” Defender SideBySideOn