Audio/video experience on computers has come a long way. The tech involved has advanced greatly so as to bring us as close to living these experiences as possible. But there are a few things that haven’t quite balanced out yet. If you have played different types of audio, you would agree that some parts of it can sometimes be too loud while the others stay rather quite at a static volume level. This can irk users as it requires them to change the volume level constantly. The solution to the problem is as easy as the commonality of the problem itself. All it requires for you is to enable Loudness Equalization on your Windows 11/10 computer.
Loudness Equalizer is a Windows feature that solves the aforementioned problem by bringing both loud and low-frequency audio to parity, to a constant audio level. This helps you avoid changing the volume repeatedly while listening to music or watching videos on your computer. It modifies the audio to bring both loud and low audio close to an average sound level.
You may, however, sometimes not have this feature at your disposal i.e., the Enhancement tab is missing as a result of which the Loudness Equalization may not be a part of your Windows setup. There can be a couple of solutions for this problem, which is what we will be discussing in this post today.
Loudness Equalization is missing in Windows 11/10
1] Update device’s sound drivers
The most common reason behind the absence of Loudness Equalization from your computer is that your device’s audio card doesn’t provide the relevant audio enhancement services. Thankfully, updating your computer’s sound drivers is very convenient and involves just a few steps.
- Open Device Manager on your computer by searching for it in the search pane on the taskbar or by pressing the Windows+X key combination to open the Power User Menu and selecting it from there.
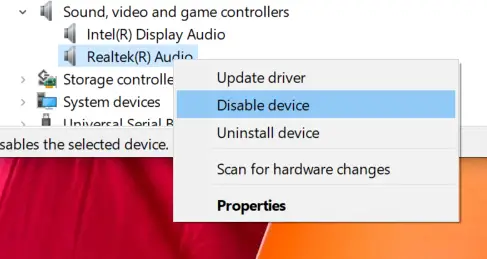
- Here, click on Sound, video and game controllers and further right-click Realtek(R) audio.
- Click on ‘Disable device’. Your computer’s audio device will stop operating hence, which you can verify with the mute icon on your System tray.
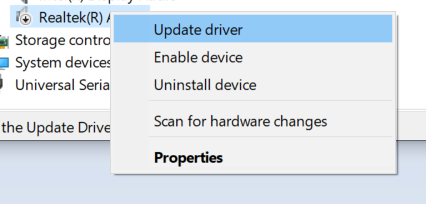
- Look for Sound, video, and game controllers again, right-click your computer’s Realtek audio device and select ‘Update Driver’.
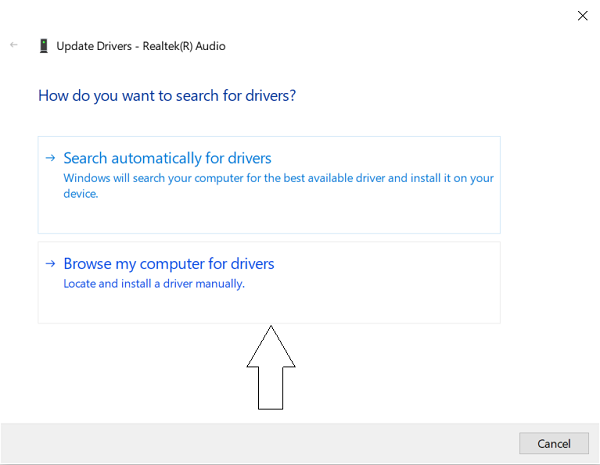
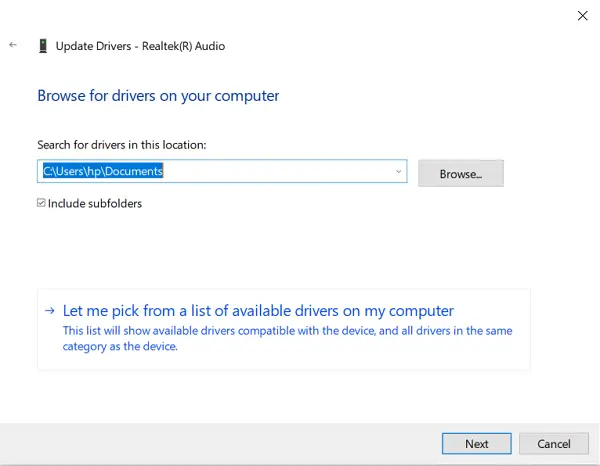
- This will open a window that presents you with two options; either to let the computer look for relevant updated drivers automatically or you browse your computer for drivers manually. Select the latter.
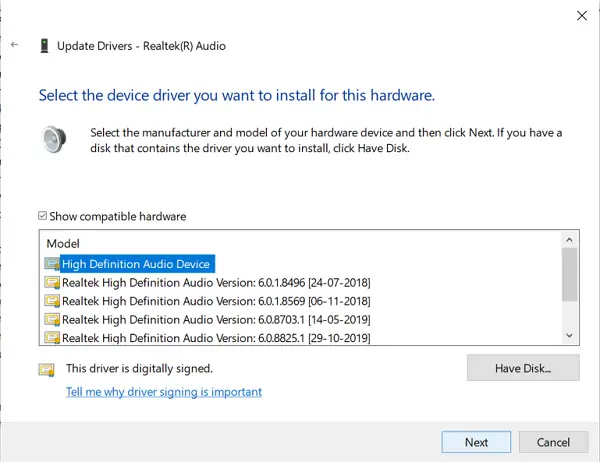
- Click on Let me pick from the list of available drivers on my computer.
- This presents you with a list of available drivers. Select ‘High definition audio device’.
- You will then be presented with a warning prompt. Select ‘Yes’ and wait for the driver to get updated.
- After it is updated, restart your PC and check if you are now able to use the Loudness Equalization feature.
2] Download third-party software
The process mentioned above usually does the trick, but if you still cannot use Loudness Equalization, you still have a handful of options to modulate the various audio levels of your media files.
Several free software programs exist that provide the exact same features as the default Sound Enhancement settings on Windows 11/10 and then some. The list of freeware includes Equalizer APO, RealTek HD Audio Manager, and several more. In this article, we discuss such free audio equalizers and the features they offer to stabilize varied audio levels on your media and make your listening/watching experience as seamless as possible.
Read: How to open the Sound and Volume Mixer in Windows.
How to add Loudness Equalization in Windows 11?
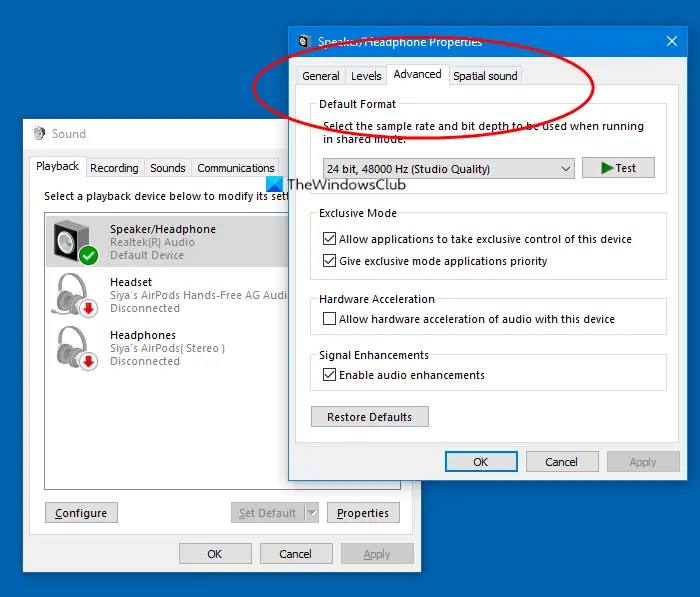
To add Loudness Equalization in Windows 11, right-click the speaker icon on your taskbar and select ‘Sound settings’. Under ‘Advanced’, click ‘More sound settings’. In the ‘Playback’ tab, double-click your active audio device. Go to the ‘Enhancements’ tab, and check ‘Loudness Equalization’. Apply the changes to enhance audio levels.
Should I keep Loudness Equalization on?
Keeping loudness equalization on is beneficial to protect your hearing and enhance quieter sounds, especially in gaming. However, if sound quality is a priority, you might prefer to disable it. It offers a balanced audio experience by reducing volume variations, making it ideal for consistent listening environments.

Leave a Reply