Windows Automatic Maintenance allows a user to be in complete control of maintenance activity. However, the responsiveness of an OS gets reduced during the process. And when you open the Action Centre, you may see ‘Maintenance in progress’ message. Automatic Maintenance automatically stops currently running maintenance activities if the user starts interacting with the computer. Maintenance activity will resume when the system returns to idle status. While one should allow it to run as it is good for your computer, you can disable Automatic Maintenance via Windows Registry if you find it taking too long or being stuck. Here’s how!
Maintenance in progress message in Windows 11/10
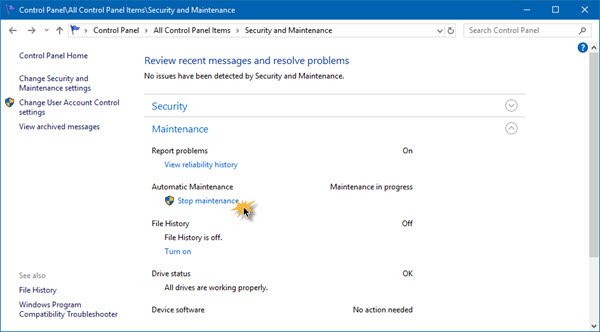
Open Control Panel and access Change Action Center settings. Then, selecting ‘Maintenance’ section and choosing ‘Stop maintenance’ button to disable the option.

You can also change Automatic Maintenance settings after stopping maintenance and then clicking on Change maintenance settings.
Automatic Maintenance keeps running and never stops
But if the Action Center is unable to stop Automatic maintenance you might need to edit the Registry.
Action Center cannot stop Automatic maintenance
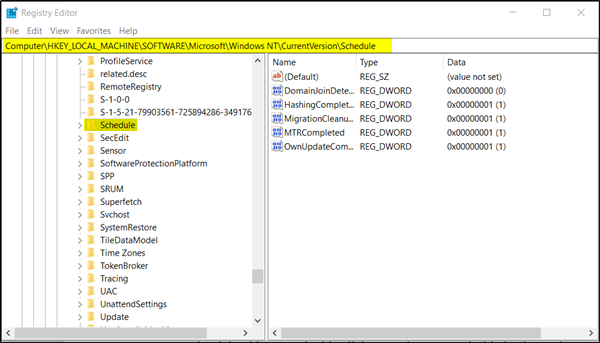
Press Win + R from your keyboard to open the ‘Run’ dialog box. When the box appears, type regedit in the empty field, click OK button to open the Registry Editor and navigate to the following path:
HKEY_LOCAL_MACHINE\SOFTWARE\Microsoft\Windows NT\CurrentVersion\Schedule\

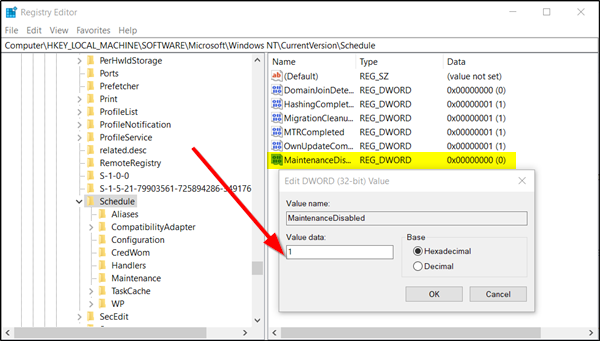
Expand Schedule and then select the Maintenance folder. Now on the right side select MaintenanceDisabled.
If it doesn’t exist, right-click on an empty area to create a 32-bit DWORD value. Even if it is 64-bit Windows, create the 32-bit DWORD value. When done, name it MaintenanceDisabled and assign it ‘1’ value.

Exit the Registry Editor and start your PC again.
That is it!
This post will help you if Windows is unable to run Automatic Maintenance.
Leave a Reply