If you are experiencing any problem with your Microsoft Surface device, you can request service online. However, it would be best if you kept certain things in check before taking the final call. Follow the instructions given below to prepare your Surface for service.
How to prepare your Surface for service
Before you send your Surface for a service, make sure you
- Register your Surface device
- Remove accessories
- Save your data to the cloud (OneDrive)
- Back up your files to a USB drive via File History
- Create a manual backup for Outlook Data Files.
Here’s how to go about it!
1] Register your Surface device
Visit Microsoft.com here and register your Surface device with your Microsoft account.
Related read: Precautions to take before sending your PC or Laptop for repair.
2] Remove Accessories
Remove the following accessories unless Surface Support has specifically informed you to send them with your Surface. These include,
- Surface Typing Cover (Touch Cover or Type Cover)
- Keyboard
- Flash Drive/ Memory card
- Mouse
- Power supply
- Surface Dock
- Headphones, audio adapter, and other audio cables.
3] Save Your data to OneDrive
Before sending your Surface for the service, you can copy your files and folders to OneDrive by signing in with your Microsoft account. All your personal settings and preferences are stored in OneDrive and synced back to your device once it is back from service and you opt to sign in with the same Microsoft account.
For this, open File Explorer and go to the files/folders that you want to move to OneDrive.
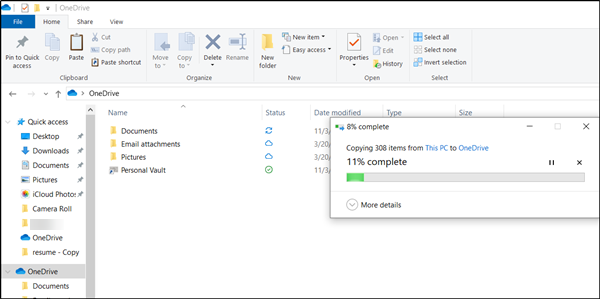
Right-click your selections and select ‘Copy’. Then right-click your OneDrive folder and select ‘Paste’.
You also can drag the files you selected to the OneDrive folder to move them.
You can also do the same from OneDrive.com. To do so, go to OneDrive.com and sign in with the account you use to sign in to your Surface.
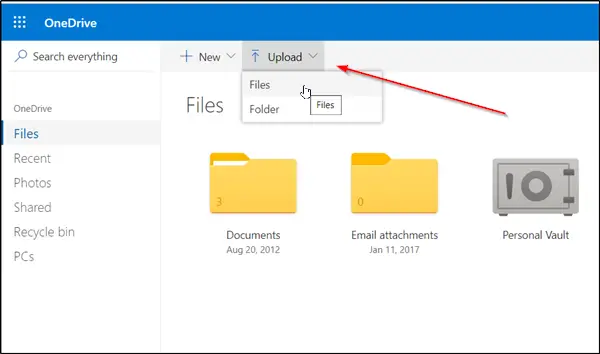
Find and select ‘Upload’ option.
Next, browse to your file and select ‘Open’.
4] Backup your files to a USB drive via File History
File History is built-in to Windows system. As such, it comes across as a simple solution to get started with backing up your personal files. This feature can back up to an external drive or network location. For this,
Select Start button?, choose ‘Settings’ and go to ‘Update & Security’ section.
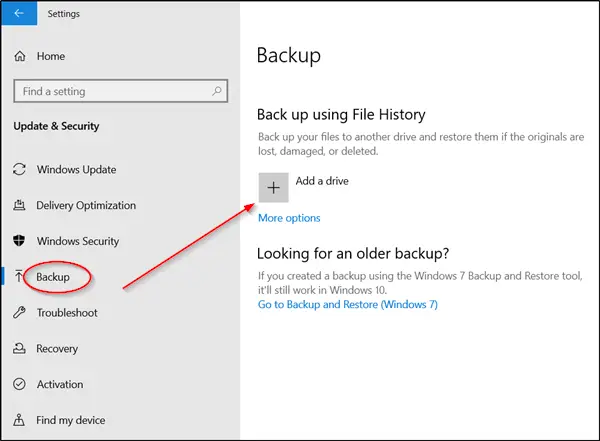
There, select ‘Backup’ > ‘+’ (Add a drive), and choose an external drive or network location for your backups.
5] Create a manual backup for Outlook Data Files
If you’re using the Outlook app to connect to your email account, you are probably using Outlook Data Files (.pst and .ost files). It’s good for you to back up these files manually.
Open Outlook, select the ‘File’ tab to go to ‘Account Settings’.
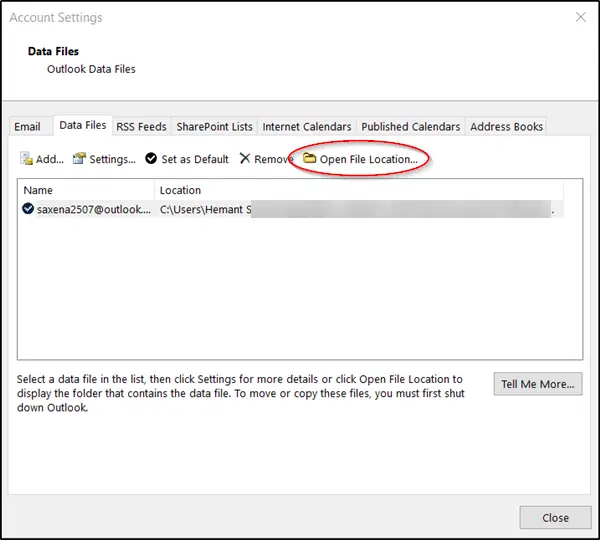
There, under ‘Account Settings’ switch to ‘Data Files’ tab and when found search for an entry where the location has a file ending with .PST extension.
When seen, select ‘Open File Location’.
Copy the Outlook Data Files to another storage location in File Explorer, like a USB flash drive.
Please note that the data on your Surface gets erased as part of the service process. So, you must take measures to back up your data should you decide to send your Surface in for service.
Read next: Things to do after you receive your Surface device after Service.
Leave a Reply