If you want to show, hide, edit, or manage Facebook Shortcuts that appears on the left-hand side on the official website, then this article will be handy for you. These shortcuts appear automatically based on your visits to those groups, pages, etc. However, if you want to organize them manually, here is how it can be done.
A regular Facebook user often likes, manages, joins, plays various games, groups and pages. If you are one of them who often want to play a game or visit a group quickly, these shortcuts help a lot. It works something like the “most visited sites” that some browsers offer. Likewise, Facebook detects such pages, groups, games, etc. and show them on the left-hand side of your screen. From here, you can click on it to open that particular page or group.
Change, edit and manage Facebook Shortcuts
To manage Facebook Shortcuts, follow these steps-
- Open the Facebook website.
- Log in to your account.
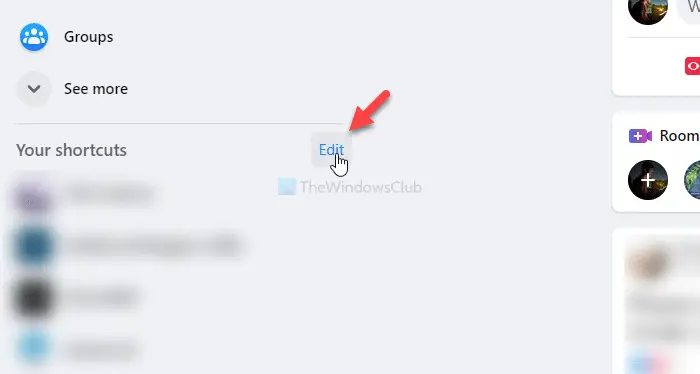
- Hover your mouse over the Your Shortcuts.
- Click the Edit button.
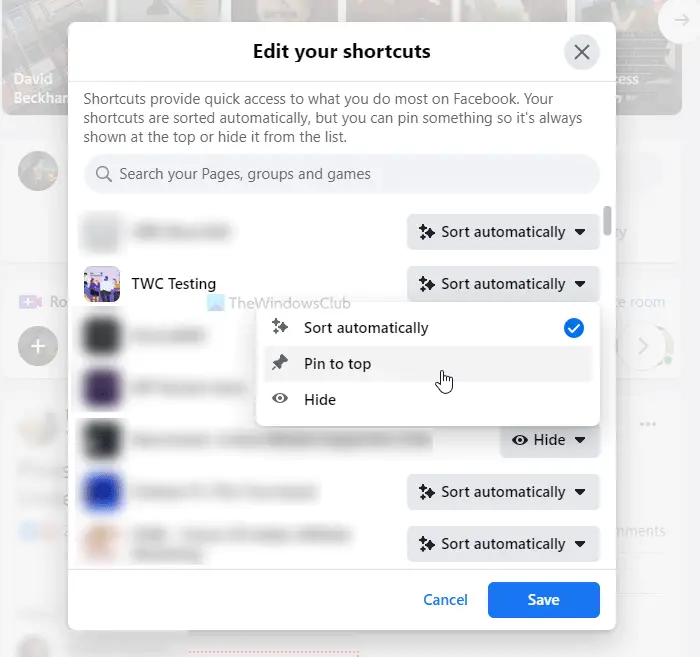
- Search for a group/page/game.
- Click the drop-down menu.
- Select Pin to top or Hide.
- Click the Save button.
Keep reading to know more about these steps in detail.
To get started, open Facebook’s official website and enter your login credentials to sign in. After that, find the Your Shortcuts heading on the left-hand side and hover your mouse over it. Click the Edit button to start removing or adding.

Now, please search for a group, page, or game so that you can show or hide it from the Shortcuts list. Following that, click on the drop-down menu and select Pin to top or Hide.
This list contains three options, and they are-
- Sort automatically: It is the default setting for all existing pages/groups/games. It indicates that the corresponding game or page will appear based on the number of visits.
- Pin to top: It helps you show the page or group on the top.
- Hide: If you want to hide a particular page, group, or game, choose this option.

At last, click the Save button.
That’s all!
I hope this simple tutorial will help you.