At times, users experience trouble using Windows Update. While there are several ways to troubleshoot various Windows Update issues, if this happens frequently, it would be a good idea to reset Windows Update settings to default. This can be useful if your Windows Updates fail to Install.
We have already seen how to reset Windows Update Agent to default using the Reset Windows Update Components Tool. Our Fix WU Utility re-registers all Windows Update related dll files and resets other settings to default. But if you want to know how to manually reset each Windows Update component individually to default in Windows 11/10/8/7, then this post is what you are looking for.

Reset Windows Update Components in Windows 11/10
Here is the summary of all the steps you need to take to reset Windows Update Components to defaults in Windows 11/10:
- Stop Windows Update Services
- Delete the qmgr*.dat files.
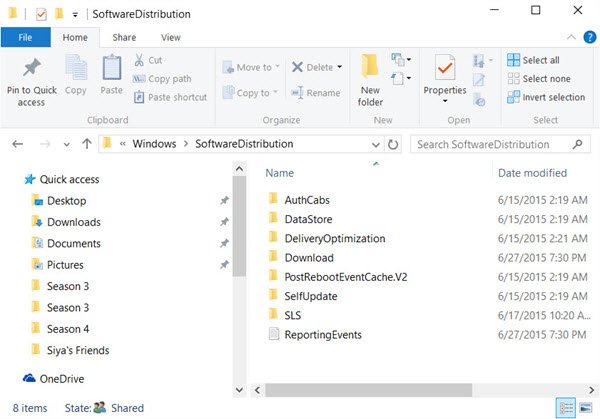
- Flush the SoftwareDistribution and catroot2 folders
- Reset the BITS service and the Windows Update service to the default security descriptor
- Re-register the BITS files and the Windows Update related DLL files
- Delete incorrect Registry values
- Reset Winsock
- Restart Windows Update Services.
1] Stop Windows Update Services
First you will need to stop the Background Intelligent Transfer, Windows Update, Cryptographic Services. The services basically allow Windows to download all files and update that are used by Automatic Windows Update and other Windows components. It uses the idle bandwidth of network connection when your connection is idle and silently downloads files in the background. It is, therefore, the best practice to disable the BITS service before proceeding.
To do so, in an elevated command prompt window, type the following commands and press Enter after you type each command.
net stop bits
net stop wuauserv
net stop appidsvc
net stop cryptsvc
2] Delete the qmgr*.dat files
Next, you need to delete the qmgr*.dat files. In order to reset Windows Update components, you will need to delete the files. To do this, at a command prompt, type the following command, and then press Enter:
Del "%ALLUSERSPROFILE%\Application Data\Microsoft\Network\Downloader\qmgr*.dat"
It’s worth mentioning here that if this is the first time you are trying to resolve your Windows Update issues by following the steps in this post, it is advisable to skip this very step and jump directly to the next step. The step should only be followed for troubleshooting when you see no solution in sight despite trying all steps outlined in the article except this step since the step is performed by the “Aggressive” mode of the Fix it Solution.
3] Flush the SoftwareDistribution and catroot2 folders

Rename the SoftwareDistribution and catroot2 folders. To do this, at a command prompt, type the following commands. Make sure that you press Enter after you type each command.
Ren %systemroot%\SoftwareDistribution SoftwareDistribution.bak
Ren %systemroot%\system32\catroot2 catroot2.bak
Read: Windows Update keeps disabling itself automatically.
4] Reset the BITS service and the Windows Update service to the default security descriptor
To do this, at a command prompt, type the following commands. Make sure that you press Enter after you type each command.
sc.exe sdset bits D:(A;;CCLCSWRPWPDTLOCRRC;;;SY)(A;;CCDCLCSWRPWPDTLOCRSDRCWDWO;;;BA)(A;;CCLCSWLOCRRC;;;AU)(A;;CCLCSWRPWPDTLOCRRC;;;PU)
sc.exe sdset wuauserv D:(A;;CCLCSWRPWPDTLOCRRC;;;SY)(A;;CCDCLCSWRPWPDTLOCRSDRCWDWO;;;BA)(A;;CCLCSWLOCRRC;;;AU)(A;;CCLCSWRPWPDTLOCRRC;;;PU)
Now, in the command prompt window that is opened, type the following command, and then press Enter:
cd /d %windir%\system32
5] Re-register the BITS files and the Windows Update related DLL files
Re-register the BITS files and the Windows Update related dll files, in the command prompt window, type the following commands. Do not forget to hit the Enter key after every command you type.
regsvr32.exe atl.dll

regsvr32.exe urlmon.dll

regsvr32.exe mshtml.dll

regsvr32.exe shdocvw.dll

regsvr32.exe browseui.dll

regsvr32.exe jscript.dll

regsvr32.exe vbscript.dll

regsvr32.exe scrrun.dll

regsvr32.exe msxml.dll

regsvr32.exe msxml3.dll

regsvr32.exe msxml6.dll

regsvr32.exe actxprxy.dll

regsvr32.exe softpub.dll

regsvr32.exe wintrust.dll

regsvr32.exe dssenh.dll

regsvr32.exe rsaenh.dll

regsvr32.exe gpkcsp.dll

regsvr32.exe sccbase.dll

regsvr32.exe slbcsp.dll

regsvr32.exe cryptdlg.dll

regsvr32.exe oleaut32.dll

regsvr32.exe ole32.dll

regsvr32.exe shell32.dll

regsvr32.exe initpki.dll

regsvr32.exe wuapi.dll

regsvr32.exe wuaueng.dll

regsvr32.exe wuaueng1.dll

regsvr32.exe wucltui.dll

regsvr32.exe wups.dll

regsvr32.exe wups2.dll

regsvr32.exe wuweb.dll

regsvr32.exe qmgr.dll

regsvr32.exe qmgrprxy.dll

regsvr32.exe wucltux.dll

regsvr32.exe muweb.dll

regsvr32.exe wuwebv.dll

regsvr32.exe wudriver.dll
6] Delete incorrect Registry values
Open Registry Editor and navigate to the following key:
HKEY_LOCAL_MACHINE\COMPONENTS
Right-click COMPONENTS. Now in the right-pane, delete the following if they exist:
- PendingXmlIdentifier
- NextQueueEntryIndex
- AdvancedInstallersNeedResolving
Restart your computer.
Related: Windows Update fails to install or will not download.
7] Reset Winsock

It is a technical specification that defines how Windows network software should access network services, especially TCP/IP. Windows OS comes with a Dynamic Link Library (DLL) file called winsock.dll which implements the API and coordinates Windows programs and TCP/IP connections. Due to some reason, Windows Sockets popularly referred to as Winsock may get corrupted. As such, a user may experience difficulty in establishing a connection to the Internet. It, therefore, becomes necessary to repair Winsock by resetting it.
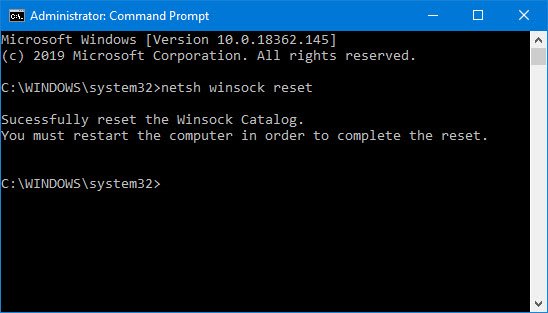
To Reset Winsock, in the command prompt window, type the following command, and then press Enter:
netsh winsock reset
Related:
- PowerShell Script to reset Windows Update Client
- Reset Windows Update Tool will restore settings & components to default automatically.
8] Restart Windows Update Services
Once all is done, restart the BITS service, the Windows Update service, and the Cryptographic service. To do this, switch back to the command prompt and enter the following commands. Again, make sure that you press Enter after you type each command.
net start bits

net start wuauserv

net start appidsvc

net start cryptsvc
Finally, make sure that you have installed the latest Windows Update Agent on your computer.
Restart your computer to complete the process.
The Windows Update Troubleshooter basically automated the entire manual process and helps you fix Windows Update problems in a click.
How do I get rid of Windows 11 Update permanently?
There are many ways by which you can block Windows 11 automatic updates. The easiest method is to pause the update for 1 to 5 weeks. After that, you can extend this time in Windows 11 Settings manually. You can permanently disable Windows Updates by using Windows Group Policy Editor and Registry Editor. These two methods are for advanced users. If you do not want to modify the Windows Registry, you can enable the metered connection. Windows 11 does not download updates automatically when you are connected to a metered connection.
What happens if Windows 11 update is stuck?
If the Windows update is stuck downloading on Windows 11 or on any other version of the Windows operating system, first, check your internet connection. Your internet connection should be working fine in order to install Windows Updates. Also, make sure that your hard disk has enough space to download and install Windows Updates.
I hope this helps.