In Microsoft Word, people can mark their document as final to not make changes to it. When the user marks the document as final, the document changes to read-only, and some of the ribbon buttons are unavailable. You will see a banner on top of the document stating the document is marked as final. There is a permission flag on the info page on the backstage view that indicates that the document is marked as final, and a mark as final icon pops up on the status bar if the user wants to make changes to the document the user has to remove the mark a document as the final designation.
In this tutorial, we will explain how to mark a document as final and how to remove Mark a document as final.
What is Mark as Final in Microsoft Office?
Mark as Final is a designation that informs the reader that the document is final and cannot or should not be changed.
How to Mark a Document as Final in Word
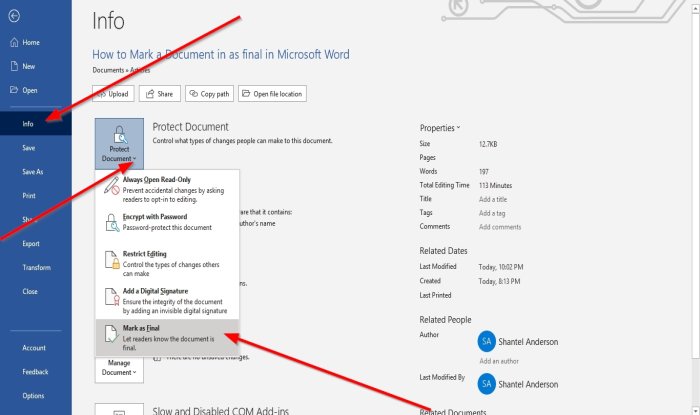
Go to File.

On the Backstage View, click the Info page.
Click the Protect Document button.
In the Protect Document drop-down list, click Marked as Final.
A Microsoft Word dialog box will appear stating that the document will be marked as final; click OK.
Then a message box will pop up stating that the document is marked as final; click OK.
The document is marked as final.
How to Unmark a Document as Final in Word

There are two methods to remove the Mark as Final designation
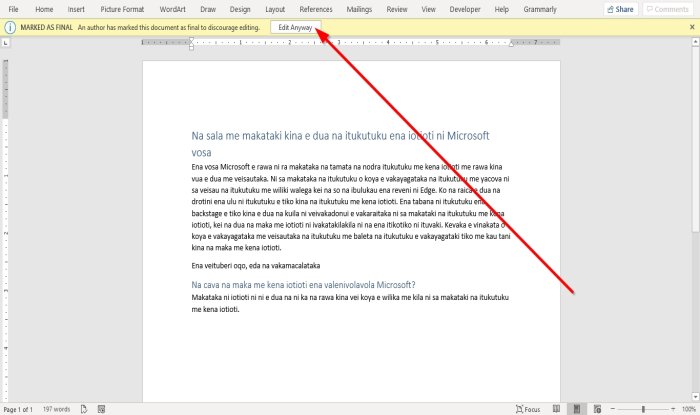
Method one is to go to the top of the document; you will see the Marked as Final banner; click Edit Anyway.

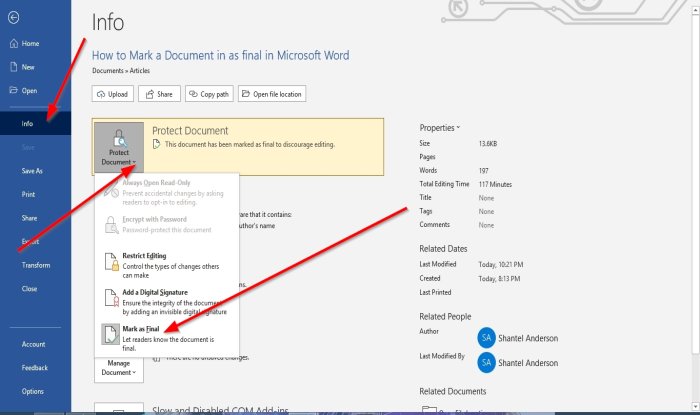
Method two is to go to the Info page on the Backstage View and click the Protect Document button.
In the drop-down list, click Mark as Final.
The Mark as Final designation is removed.
Read: How to Add, Copy, Remove & Apply Text Boxes in Word.
I hope this helps; if you have questions, please comment below.
Leave a Reply