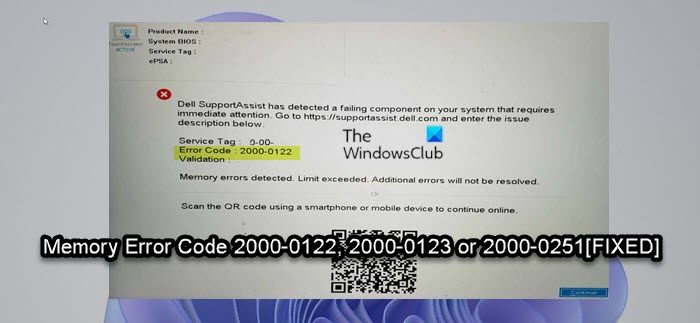
In previous posts, we have covered Windows-powered Dell computer-specific error codes/issues like Processor Fan Error Code 2000-0511, Hard Drive Error code 2000-0142 and 2000-0146, as well as ePSA (Enhanced Pre-Boot System Assessment) Error Code 2000-0415. In this post, we will provide the solutions to the Memory Error Code 2000-0122, 2000-0123 or 2000-0251 on Windows 11 or Windows 10 computer.

You’ll encounter any of these errors due to the following reasons;
- RAM fails to perform any test.
- No physical memory available in your system.
- Excessive booting of your device.
- Bad or faulty RAM.
Fix Memory Error Code 2000-0122, 2000-0123 or 2000-0251
If you have encountered any of the Memory Error Code 2000-0122, 2000-0123 or 2000-0251 on your Windows 11/10 computer, you can try our recommended solutions below in no particular order and see if that helps to resolve the issue on your Dell system.
- Run Memory Test
- Run Hardware Diagnostics on the computer
- Check and Remove the RAM Module
- Update BIOS
Let’s take a look at the description of the process involved concerning each of the listed solutions.
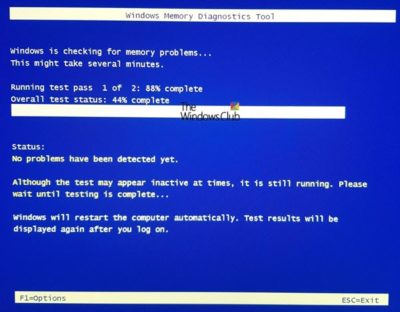
1] Run Memory Test

You can begin troubleshooting to fix the Memory Error Code 2000-0122, 2000-0123 or 2000-0251 that occurred on your Dell Windows 11/10 computer by running a memory test. Windows will initiate checking for the abnormalities in RAM as corruption in RAM can potentially make Windows OS unstable.
2] Run Hardware Diagnostics on the computer
With bad RAM you might not be able to run diagnostics since the system will likely not even POST and get to the Dell splash screen. But if you can get to the Dell splash screen, then you can run a built-in or offline diagnostic test at Dell.com (also called Preboot System Assessment) with the Dell Support Assist. This ‘Custom Test’ is an advanced diagnostic test and is capable of producing more reliable results.
In order to run the hardware test, start your PC and repeatedly tap on the F12 key on the keyboard to access the one-time boot menu. In the boot menu screen, select Diagnostic to run the hardware scan. Alternatively, you can also run the diagnostic by pressing and holding the Fn key on the keyboard – while holding the Fn key, power on the system, once it starts running the test release the Fn key. Once you run the full hardware diagnostics to check the RAM in particular, pay special attention to the RAM results.
3] Check and Remove the RAM Module

Due to some technical faults, the RAM may fail and stop functioning and possibly trigger any of the error in view on your Windows 11/10 PC. In this case, you need to check the RAM module.
To check the RAM module, do the following:
- Press Windows key + I to open Settings app.
- Select System.
- Scroll down on the right pane and click on About.
If you’re running Windows 10, you can press Windows key + X to open the WinX Power User Menu, then tap Y on the keyboard to open About page.
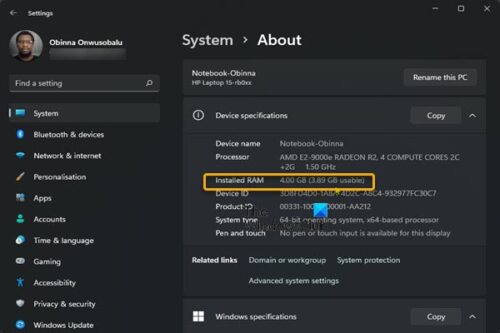
- Now, under Device specifications for Installed RAM, check your computer’s RAM usage.
If the RAM usage is showing accurately, confirm if the error still persists. But if the RAM usage is not showing accurately, you can restart your PC and then check the RAM usage; if still inaccurate, try the following:
Note: You may require the services of a PC hardware technician to perform this task.
- Open the laptop or desktop PC casing.
- Locate the RAM modules and make sure it’s properly seated/connected to the slot.
- Now, remove the RAM modules one by one. If you have 2 stick of RAM installed, put one in and leave the second out. If it still fails, try it again. Now remove it and put the other one in and do the same. If both the RAM modules failed in together, and you tried the 3rd time and it still fails, then you need a new RAM. If you have 1 RAM stick installed, you can try it in the other DIMM slot. If that does not help then it’s the RAM that’s faulty and needs to be replaced.
4] Update BIOS

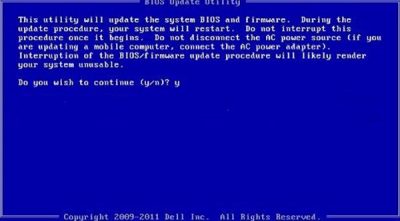
This solution requires you to update the BIOS for your system. But first, if you have previously made changes to the BIOS settings on your PC, you can reset the BIOS to default settings and see if that helps.
All OEM manufacturers have utilities that help you easily update, BIOS, firmware, and drivers. This is the safest way to update the BIOS. So, to update the BIOS for your Dell laptop, you can head over to Dell.com, or you could use Dell Update Utility.
After the BIOS update, run the hardware diagnostics once again.
Hope this helps!
How do I fix error code 2000-0511?
To fix Processor Fan Error Code 2000-0511 on your Dell system, try the following suggestions:
- Modify Fan configuration settings.
- Run Hardware Diagnostics on the computer.
- Reseat the Fan.
- Update BIOS.
- Replace Fan.
How do I fix error code 2000-0333?
If you have encountered error code 2000-0333 on your Dell Windows 11/10 computer, it simply means you ran the graphics test without responding to the required input (Y/N after each screen). If everything other than that is OK, re-run the tests and respond when prompted. If there’s something preventing you from seeing the test screens, that’s entirely another issue.
Leave a Reply