Memory integrity is one feature of Core isolation which regularly verifies the integrity of the code running those core processes in an attempt to prevent any attacks from altering them. This post provides solutions to Memory Integrity greyed out or won’t turn On or Off for Device Security in Windows Security app on Windows 11 or Windows 10 computer.
Unable to turn on Core Isolation

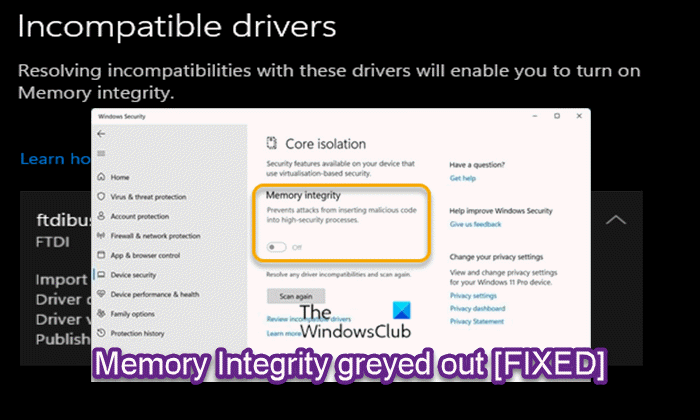
Windows Security – Device security – Core isolation – Memory integrity can’t be turned on, Try resolving any incompatibilities with your drivers.
Memory Integrity greyed out or won’t turn On/Off
If Memory Integrity is greyed out or won’t turn On or Off on your Windows 11/10 PC, you can try our recommended solutions below in no particular order and see if that helps to resolve the issue.
- Initial checklist
- Update drivers
- Disable Nested Virtualization (if applicable)
- Enable Core Isolation and Memory Integrity via Registry Editor
- Perform Reset This PC, Cloud Reinstall or In-place Upgrade Repair Windows
- Clean Install Windows
Let’s take a look at the description of the process involved concerning each of the listed solutions.
1] Initial checklist
Before you try the solutions below, do the following and after each task check if you can turn on or off Memory integrity without issues:
- Restart PC.
- Make sure that Hardware Virtualization is enabled in BIOS firmware.
- Check for corrupt system files and bad or damaged system images. Run SFC scan and depending on the outcome follow up with DISM scan.
- Reset Windows Security app. This can resolve the issue assuming the Memory integrity button is greyed out due to a software/app glitch that a PC restart didn’t fix.
- Update Windows. Install any available bits on your Windows 11/10 device and see if the issue in focus is resolved. On the other hand, if the error started after a recent Windows update, you can perform System Restore or uninstall the update.
- If you see This setting is managed by your administrator, it is possible a Group Policy has been applied to your computer. In this case, contact your IT admin or system admin as Credential Guard might need to be disabled. However, if your system is not part of a domain, you can try the other fixes suggested in this post.
Related: Core Isolation Memory Integrity Page not available in Windows 11
2] Update drivers
If Memory Integrity is greyed out or won’t turn On or Off on your Windows 11/10 PC, it could be due to Windows cannot load the drivers required for the device. In this case, to resolve the issue, you can do either of the following:
- Install an alternate or updated driver from the OEM: The driver you are currently using may be outdated or has a vulnerability because of which Windows is not loading the driver. If Windows Update cannot find a suitable driver for you, then you can download the latest version of the driver from the hardware manufacturer’s website.
- Install a generic driver: Microsoft offers generic drivers for any hardware. It will make sure that you can use the device, but with limited functionality. To install a generic driver, simply uninstall the driver for the device in question, and then restart your PC – on boot, Windows will scan for hardware changes and automatically reinstall the generic driver.
- If you have an unsigned driver that will work, you can install the driver but first you need to disable Driver Signature Enforcement.
3] Disable Nested Virtualization (if applicable)
The Memory Integrity uses system’s virtualization hardware, which is found under the BIOS/UEFI, and this hardware can only be used of one application at a time. Therefore, if you have enabled Nested Virtualization on Hyper-V or any of your virtual machines, this will prevent you from enabling the Memory Integrity at the same time. In this case, to resolve the issue, you need to disable Nested Virtualization.
To disable Nested Virtualization on Hyper-V for a stopped virtual machine, run the cmdlet below in elevated PowerShell mode. Replace the <VMName> placeholder with the actual name of the VM.
Set-VMProcessor -VMName <VMName> -ExposeVirtualizationExtensions $false
For third-party virtualization software, check their respective settings for how to disable Nested Virtualization.
4] Enable Core Isolation and Memory Integrity via Registry Editor
Since the On/Off button for Memory integrity is greyed out in Windows Security app, you can try and see if you can successfully enable Core Isolation and Memory Integrity via Registry Editor on your Windows 11/10 PC.
You will have to visit:
HKEY_LOCAL_MACHINE\SYSTEM\CurrentControlSet\Control\DeviceGuard\Scenarios\HypervisorEnforcedCodeIntegrity
Here change the value of Enabled key from 0 to 1.
If the issue persists after carrying out this task, you can proceed with the next solution.
Related: Incompatible driver turns off Memory Integrity in Windows 11
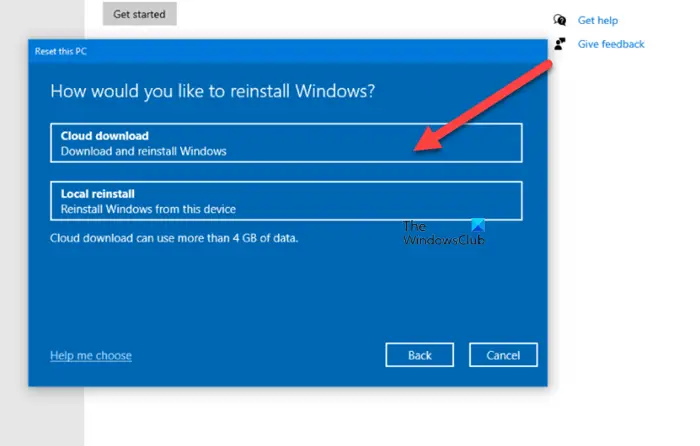
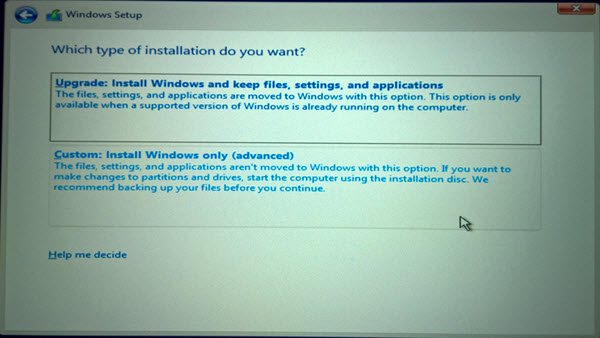
5] Perform Reset This PC, Cloud Reinstall or In-place Upgrade Repair Windows

The issue in hand is most likely due to some kind of system corruption that cannot be resolved conventionally. In this case, the applicable solution here is that you can try Reset This PC, or Cloud Reinstall to reset every Windows component. You may also try In-place Upgrade Repair and see if that helps.
6] Clean Install Windows

As a last resort, if none of the solutions has worked for you, you can back up your files and clean install Windows.
Any of these solutions should work for you!
NOTE: diwul62 suggests below in the comments that you could also navigate to:
HKEY_LOCAL_MACHINE\SYSTEM\CurrentControlSet\Control\DeviceGuard\Scenarios\CredentialGuard
Change the value of Enabled key from 0 to 1.
Memory integrity can’t be turned on in Windows 11

Turning on the Memory integrity setting would block these incompatible drivers from loading. Because blocking these drivers might cause unwanted or unexpected behaviors, the Memory integrity setting is turned off to allow these drivers to load. If you want to restore the Memory integrity setting, you can try to resolve a driver incompatibility by seeing if an updated and compatible driver is available through Windows Update or from the driver manufacturer. Microsoft does not recommend that you delete drivers to attempt to restore this setting.
If Device Security displays a notification Memory integrity can’t be turned on, then you need to resolve incompatibilities with your drivers. You need to identify the driver and remove it. To do this, follow these steps:
- Click on the Review incompatible drivers link in Windows Security
- You have to update that driver either through Windows Update or by visiting the manufacturer’s website and downloading it.
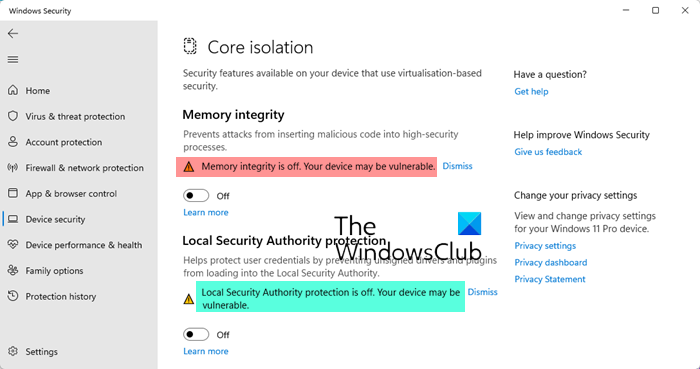
Memory Integrity is off

If you see Memory Integrity is off message, update your Windows and check as Microsoft has released an Update to fix this issue. If it does not help, follow the suggestions laid down above, in this post.
Should Memory Integrity be turned on?
Memory integrity is one feature of core isolation which regularly verifies the integrity of the code running those core processes in an attempt to prevent any attacks from altering them. It’s recommended that you leave this setting on, if your system supports the security feature.
Does virtualization-based security affect performance?
Microsoft’s Virtualization-based Security feature can indeed slow down your system performance – sometimes by a lot. Security is key to Windows 11—and also one of the reasons Microsoft is breaking with the long-held tradition of legacy hardware support.
Can’t turn on Memory Integrity in Core Isolation because of Driver
Obsolete or incompatible drivers like mfehidk.sys, ssdudfu.sys and mbtusbser.sys can cause problems when you try to turn Memory Integrity in Core Isolation. In this case, you need to identify the driver software and either update it or download and install its latest version.