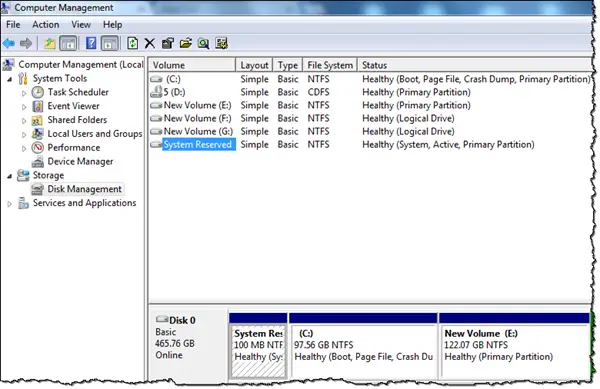
If you have noticed in Disk Management, a part of your hard drive says Healthy (OEM partition), and occupies space in GBs, then it is normal. There is nothing to worry about except that part of the storage space is not available. Even if you right-click on it, only the Help menu displays. In this guide, we will share how you can merge or delete an OEM Partition in Windows 11/10.
What is an OEM Partition

Also called as System Reserved Partition, it is placed by the OEM to help you recover your computer or go back to the same state as it was when you bought the computer.
Merge or Delete an OEM Partition in Windows

Windows Disk Management tool will not let you delete/merge the OEM partition. You will have to use the built-in command line tool called Diskpart.
Be careful before you decide to run the commands, lest you mess up – you should know what you are doing:
- Open the Run prompt, type diskpart, and hit Enter.
- Type, and enter list disk to list the disks.
- Select the disk you want to manage – say it is Disk Z
- Then type select disk z and hit Enter.
- Enter list partition and hit Enter to display all the volumes.
- Type select partition x and hit Enter. Here x stands for the partition you want to delete.
- Finally, type delete partition override and hit Enter to delete it.
- Now type Extend to merge the OEM partition with the adjoining value.
If you want only to merge part of the partition, then use extend [size=<size>] command. To extend size by 5GB, type-
Extend size=5000
Here size is the size you choose from the OEM partition. It will extend the selected volume by size in megabytes (MB). So like you can see, delete and merge partition commands work hand to hand. You need first to delete it and then merge it existing partition.
If Diskpart tool is not to your liking, you may use a free partition manager software like EaseUS that has this feature, to do it quickly and safely.
Leave a Reply