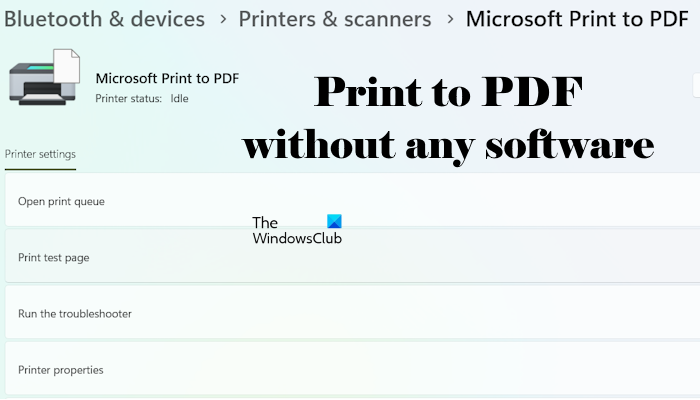
Windows 11/10 allows you to Print to PDF natively, using Microsoft Print to PDF, which is built into Windows 11 and Windows 10. Now, you no longer need to use any third-party software to print files to PDF. In this article, we will show you how to print to PDF in Windows 11/10 without using any software.
Microsoft Print to PDF in Windows 11/10
Microsoft Print to PDF is a feature, built into Windows 11/10, that lets you create a PDF file from several file formats. If you do not have a printer, you can still use this feature to save your files into PDF format, so you can print them later.
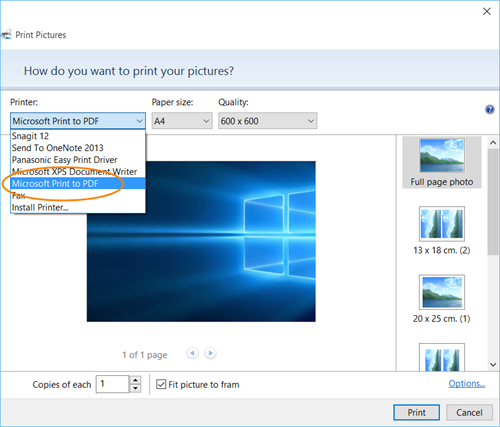
If you right-click on a file and select Print, you will see Microsoft Print to PDF as one of the print options available. Select that option and click on the Print button. Windows will save your file in PDF format.
If you do not find this option, it might be disabled on your system by mistake.
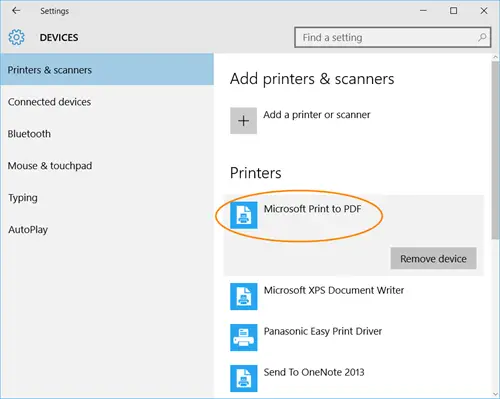
To verify this, Open Start > Settings > Devices > Printers & Scanners. Here, under Printers, you will see Microsoft Print to PDF.
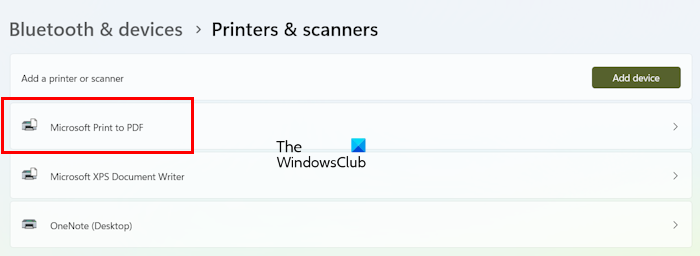
If you are a Windows 11 user, open your system Settings and go to Bluetooth & devices > Printers & scanners. See if the Microsoft Print to PDF is available there. If you do not see this feature there, it is disabled and you have to enable it in order to use it.
Read: How to repair PDF files.
Microsoft Print to PDF missing
If the Microsoft Print to PDF feature is missing or not available on your system, you can enable it through the following steps:
- Open the Control Panel.
- Select the View by mode to Category.
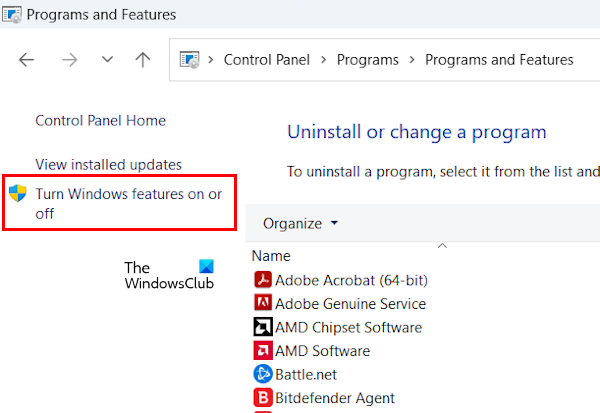
- Select Programs > Programs and Features.
- Now, click on the Turn Windows features on or off link on the left side.
Alternatively, you can also search for Windows Features in Windows 11/10 Search and select the Turn Windows features on or off option from the search results.
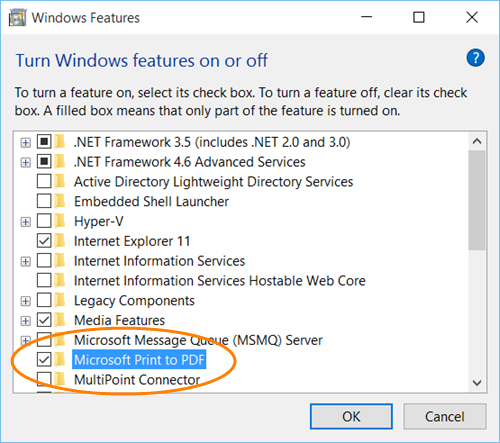
When the Windows Features window appears on your screen, look for the Microsoft Print to PDF feature. Make sure that its checkbox is selected. If not, select the checkbox and click OK.
You may have to restart your Windows 11/10 computer after enabling this feature through the Windows Features.
Related: How to show or hide Microsoft Print to PDF printer
Reinstall Microsoft Print to PDF
If the Microsoft Print to PDF feature is not working, uninstalling and reinstalling it can fix the issue. For this, you can use the following instructions:
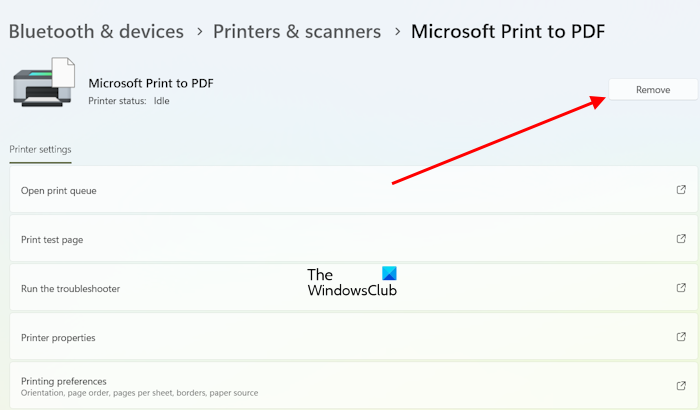
Open the Printers & scanners page in Windows 11/10 Settings and select the Microsoft Print to PDF option. Now, click Remove. Restart your computer and then open the Windows Features screen. You will find the Print to PDF checkbox deselected. Select it and click OK. Windows will search for the required files and then install this feature. You may have to restart your computer again after the installation is finished.
Make Microsoft Print to PDF as default on Windows 11
You can also make this feature as default on your Windows 11 computer. The following instructions will help you with that:
- Open Windows 11 Settings.
- Go to Bluetooth & devices > Printers & scanners.
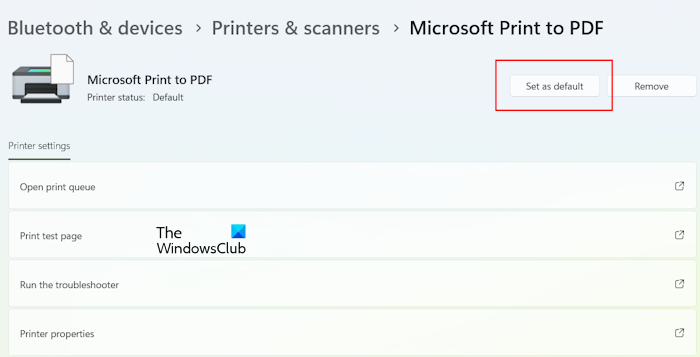
- Select Microsoft Print to PDF and click on the Set as default button.
If you do not see the Set as default button, turn off the Let Windows manage my default printer option under Printer preferences on the Printers & scanners page.
Hope this helps!
How do I print to PDF without Adobe?
Windows 11/10 has a built-in feature, called Microsoft Print to PDF. You can use this feature to save your files in PDF format. After saving the files to PDF format, you can easily print them. This feature is available in Settings on the Bluetooth & devices page.
How to enable Print to PDF in Windows 10?
By default, Microsoft Print to PDF is installed on Windows 11/10. If it is installed on your system, there is no need to enable it. You can also make this feature as the default on your system. However, if this feature is not available on your system, you have to install it to enable it. You can install it through Windows Features.
This post will help you if you ever need to cancel a jammed or stuck Print Job queue.
Hey Anand, I discovered this feature right after I installed Windows 10. As a long-time user of the third-party product CutePDF, I was surprised and pleased that printing to PDF is now a core feature of Windows. The feature works perfectly and I use it quite a bit for my publishing tasks. I’m glad you pointed it out to the Windows Club readers — nice job.
True, I should have written abut this even earlier, but it just slipped my mind. :)
I also have ‘Print as PDF’, and that’s also from Microsoft… ?
The one in my PC says Microsoft Print To PDF.
Does anyone know if it is possible to add custom paper sizes? I want to generate documents for display on tablet devices, and I currently use a 3rd party “PDF Printer” that lets me customize the paper size, so the document size fits the screen without extra borders.
Thanks in advance,
Mike
Correction, if you accidentally removed the feature (as I did when I installed some other printer driver), you will not find it in Advanced printer setup. For me following worked:
In “Turn Windows features on/off” uncheck, press OK, then check again, press OK. This will add “Microsoft Print to PDF” back to your Printers.
I haven’t seen this either, and it’s a deal breaker for me / us. Back to PrimoPDF!
It’s not that great. There’s no option to automatically open the PDF after creation so you have to hunt for it.
It only prints at 600 DPI, which often is much too much.
Yes ! Is there any way to change it?
I have a problem changing the paper size from letter to A4 and preferences/advanced. It allows me to effect the change, ut after clicking apply and ok, it reverts back to letter. Any advice?
i am not able to print from “Microsoft print to PDF” printer. once I select the printer it opens a save as dialogue box and after choosing the name it does not save the document as pdf Or does nothing.
Foxit is a good PDF reader, and have have this funtion built in. better than what is built into 8.1 and 10.