If you own a Surface device and now find that, maybe after the Windows Update, the display is not rotating, then this post will help you resolve the problem. We know that your Surface was designed to rotate content on the screen whenever you twist and turn it, which is the same as your smartphone. Now, when the screen fails to rotate as expected, the first thing on many users’ minds is that the product is defective.
Fix Surface screen is not rotating
In most cases, this is not the case at all. Rotation relies on the software; therefore, we can assume that changes were made to Windows unknowingly to you that caused the rotation to fail. We will look into a few options for you to determine the cause, so keep reading, ladies and gentlemen.
How to make Surface screen auto-rotate
If the screen of your Surface device is not rotating automatically, then try the following suggestions to fix Surface auto-rotation problems:
- Remove the Surface Cover or any external screen
- Take a look at the Auto Rotation Settings
- Restart your Surface
- Install the latest Windows 10 and firmware updates
- Run the Sensors Troubleshooter
- Restore your Surface.
1] Remove the Surface Cover or any external screen
When the Surface typing cover is attached or an external display, the screen is stuck in landscape mode for the entire time. To get things to rotate, the best option is to disconnect the Surface cover or the external display.
After doing these things, check if your display now autorotates without issues.
2] Take a look at the Auto Rotation Settings
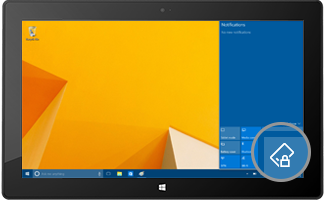
If you are still having problems, it may have more to do with the auto-rotation settings than anything else. To check on this, please remove the cover and swipe from the right edge of the screen to reveal the Action Center.
From here, you should see the Auto Rotation lock. If it’s dimmed, that means it’s deactivated. To activate it, tap the lock with your finger or mouse.
Note that auto-rotation locks automatically once the Surface Cover is attached and is in a typing position. Folding back the cover should activate the auto-rotation unless it’s locked in the first place.
3] Restart your Surface
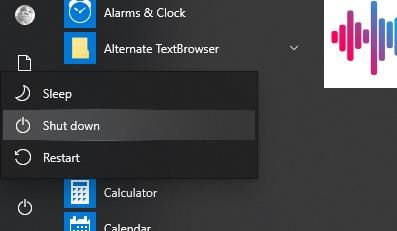
We have one of the basic fixes for anything related to Windows. In most cases, a simple computer restart is good enough to get the job done, so that’s what we’re going to do right now, OK?
To turn off your computer, click the Windows button, then navigate to Power > Shut down. After the Surface is down, please press the physical power button to get it up and running again. From there, check to see if the rotation works as it should.
4] Install the latest Windows and firmware updates
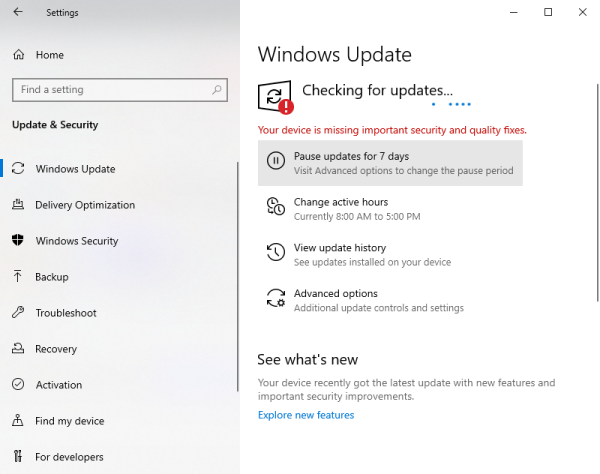
Chances are, the latest version of Windows 11/10 and Surface drivers & firmware is not installed on your computer; therefore, we have to fix that. Bear in mind that your Surface computer requires both firmware and Windows 11/10 updates to stay at optimal performance.
Updating your Windows 11/10 operating system on Surface is simple. Just click on the WinKey + I to fire up the Settings app, then navigate to Updates & Security. Finally, click on Windows Update > Check for Updates, and that’s it.
5] Run the Sensors Troubleshooter
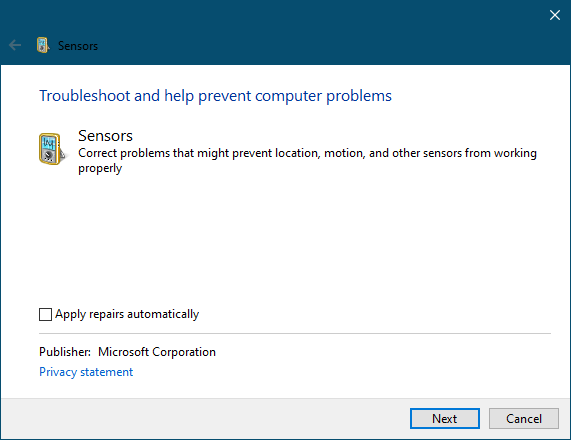
Running the troubleshooter is super easy. Just open the Sensors Troubleshooter, then follow the instructions on your display, and that’s it for that.
6] Restore your Surface
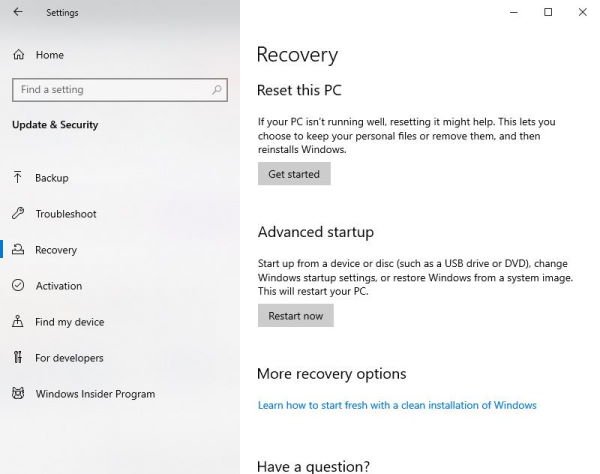
Today’s final step, which should always be a last resort, is restoring your Surface computer to how it was before. Remember that restoring could remove recently installed apps and drivers, so please keep that in mind before going any further, old chum.
To restore your Surface to a previous version of Windows, please navigate to Select Start > Settings > Update & Security > Recovery. You must now go under the section that says Go back to the previous version of Windows and click on Get Started to begin the process.
Read next: Screen Auto-Rotation not working or grayed out in Windows Table Mode.
Leave a Reply