During Miracast set up on your Windows 11 or Windows 10 PC, you may encounter the Your PC doesn’t support Miracast error. If you set it up successfully but find that Miracast disconnects randomly then this post is sure to help you resolve the issue.
Miracast keeps disconnecting randomly on Windows PC
If Miracast randomly disconnects on your Windows 11/10 device, you can try our recommended solutions below in no particular order and see if that helps to resolve the issue.
- Run Network Troubleshooter
- Update driver
- Change Network Adapter Power Management
- Configure Unicast Response
- Reset Network Adapter
- Run Hardware and Devices Troubleshooter
Let’s take a look at the description of the process involved concerning each of the listed solutions.
Before you try the solutions below, you can do the following, and after each task see if Miracast can successfully connect normally and stay connected without issues:
- Restart PC. Also turn off, then turn on your wireless display.
- Remove and reconnect display. Select Start > Settings > Devices > Bluetooth & other devices. Under Wireless displays & docks, select the wireless display or adapter, then select Remove device > Yes. Try reconnecting.
- Update TV/display software. Refer to the user manual. Software updates enable you to get the latest updates and features that can help you deal with the mirroring issue.
- Check your wireless connection. Ensure that the display and your PC are not more than 15.2 meters and remove any obstacle in this space. Otherwise, consider using a wireless booster. If you’re using Microsoft Wireless Display Adapter, see the guide on how to fix Microsoft Wireless Display Adapter issues.
- Check the display Power Saving mode. When a device is on power-saving mode, most features won’t work.
- Update Windows. Check for updates and install any available bits on your Windows 11/10 device and see if the issue in hand is resolved. On the other hand, if the error started after a recent Windows update, you can perform System Restore or uninstall the update – you may want to perform either of the task as a last resort.
- Disable AV. This largely depends on the security software you have installed. Refer to the instruction manual.
1] Run Network Troubleshooter
Since Miracast runs on the Wi-Fi network, you can run the Network Troubleshooter and see if the Miracast randomly disconnects issue on your Windows 11/10 device will be resolved. If not, try the next solution.
2] Update driver
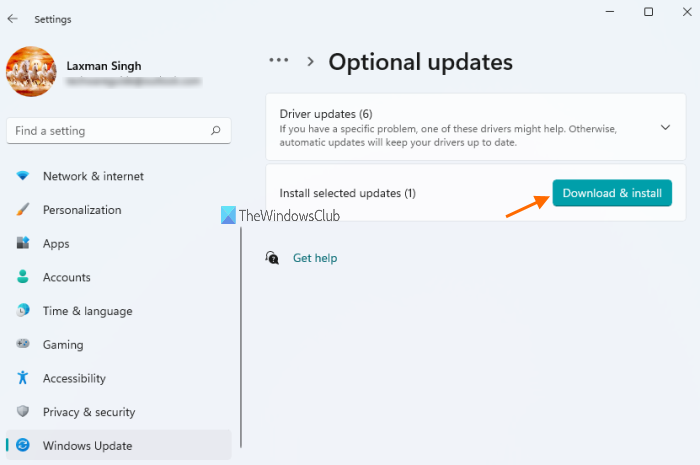
Your Miracast not working problem is probably being caused by driver issues – you may have the wrong, outdated or corrupt device drivers on your computer. So you should update your device drivers to see if it fixes your problem. Below are your options to carry out this task:
- You can get the driver updates (if available) on the Optional Updates section under Windows Update.
- If you have already downloaded the .inf or .sys file for the driver, you can manually update drivers via Device Manager or update driver via Command Prompt.
- You may also download the latest version of the driver from the hardware manufacturer’s website.
If updating drivers wasn’t helpful or your drivers are already updated, but the issue persists, you can proceed with the next solution.
3] Change Network Adapter Power Management
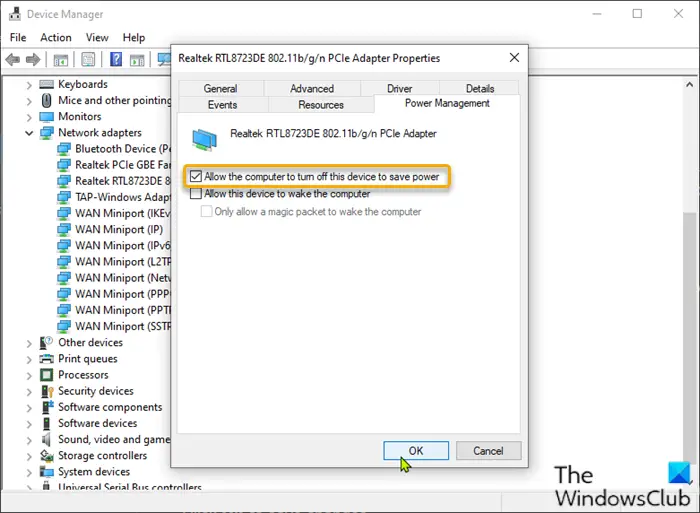
To change network adapter power management simply entails turning off Network Adapter Power Saving mode. Here’s how:
- Press Windows key + X to open the Power User Menu.
- Tap M key on the keyboard to open Device Manager.
- Once you’re inside Device Manager, scroll down through the list of installed devices and expand the Network adapters section.
- Next, double-click your network adapter to edit its properties.
- In the Properties sheet, click Power Management tab.
- Now, uncheck Allow the computer to turn off this device to save power option.
- Click OK to save changes.
- Exit Device Manager.
- Restart PC.
4] Configure Unicast Response

Unicast is a one-to-one transmission from one point in the network to another point; that is, one sender and one receiver, each identified by a network address. Unicast Response option is useful if you need to control whether your PC receives unicast responses to its outgoing multicast or broadcast messages. The recommended state for this setting is: No.
If this setting is enabled and your PC sends multicast or broadcast messages to other computers, Windows Firewall with Advanced Security waits as long as three seconds for unicast responses from the other computers and then blocks all later responses. On the other hand, if the option is disabled, and your computer sends a multicast or broadcast message to other computers, Windows Firewall with Advanced Security will block the unicast responses sent by those other computers
To configure Unicast Response, do the following:
- Press Windows key + R to invoke the Run dialog.
- In the Run dialog box, type secpol.msc and hit Enter to open Local Security Policy Editor.
- In the snap-in console that opens, click on the chevron (arrow head) next to Windows Defender Firewall with Advanced Security to collapse the section.
- Now, right-click Windows Defender Firewall with Advanced Security – Local Group Policy Object.
- Select Properties from the context menu.
- In the Properties sheet, click the Public Profile tab.
- Click the Customize button under Settings.
- Click the drop-down for Display a Notification option and select Yes.
- Next, click the drop-down for Allow unicast response option and select Yes(default).
- Click OK all through to save the changes.
- Restart PC.
If the issue in view persists, try the next solution.
5] Reset Network Adapter
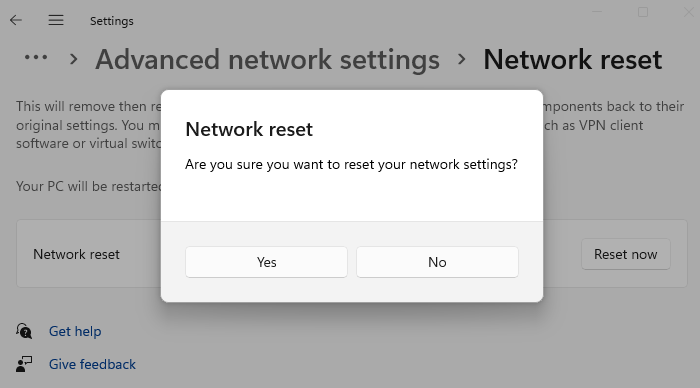
Miracast uses WiFi Direct technology and Bluetooth. However, both are part of the protocol stack or network stack which is an implementation of a computer networking protocol suite or protocol family.
This solution requires you to reset the network adapter and see if that helps. If resetting the network adapter on your Windows 11/10 PC didn’t help to resolve the issue at hand, you can try a wireless USB dongle. If that solves the problem, you can have a PC hardware technician replace your inbuilt wireless adapter or simply keep using the dongle.
6] Run Hardware and Devices Troubleshooter
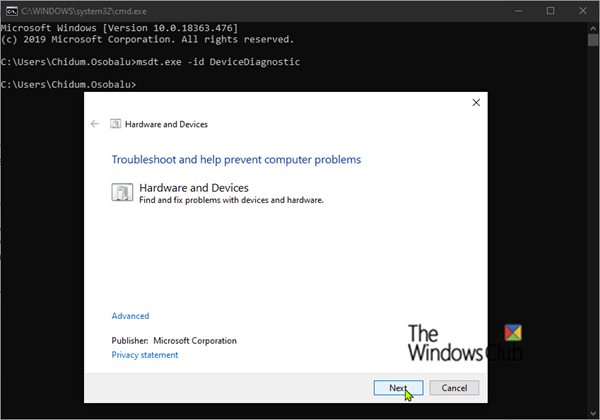
To rule out the possibility of a faulty display, that might require replacing, you can run the Hardware and Devices Troubleshooter. You can also try connecting the wireless display to another PC and see if the issue in focus persists.
Hope this post helps you!
Related post: Bluetooth audio devices, Wireless Displays not connecting
Why does my Miracast keep disconnecting?
If Miracast keeps disconnecting or not working on your Windows 11/10 device, it is probably due to driver issues – which could be outdated or corrupt device drivers on your computer. In this case, you should update your device drivers to see if it fixes your problem.
Also read:
- OpenGL apps do not run on Miracast wireless display
- Miracast may stop working after Windows Updates.
Does Windows 10 support Miracast?
Windows 10 supports Miracast from a software perspective. This means it has all the abilities for Miracast built-in, and it does not require further software. However, the specific hardware that ships with your computer must also support the Miracast standard.
How do I mirror screen in Windows 11?
To mirror the screen in Windows 11, do the following:
- Select Start > Settings > System > Projecting to this PC.
- Under Add the Wireless Display optional feature to project to this PC, select Optional features.
- Select Add a feature, then enter wireless display.
- Select the check box next to Wireless Display from the list of results.
- Select Install.
Is Miracast safe?
Miracast is a peer-to-peer wireless screen casting standard supported in Windows devices with WPA2 encryption support so shared information is safe.
Leave a Reply