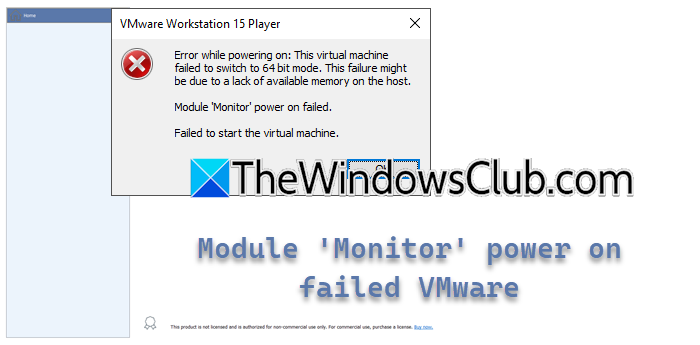
When starting a virtual machine in VMware Workstation, we encountered an error that implied that the Monitor module had failed to turn on. Due to this, the machine fails to start and throws the following error message.
Error while powering on: This virtual machine failed to switch to 64 bit mode. This failure might be due to a lack of available memory on the host.
Module ‘Monitor’ power on failed.
Failed to start the virtual machine.

In this post, we will see what to do if the Module Monitor mode power on failed in VMware.
What would cause the VM to fail to power back on?
A VM may fail to power back on due to issues like conflicts with hardware virtualization settings such as nested virtualization or Hyper-V, corrupted VM configuration files, or software conflicts. In the next section, we are going to explore an in-depth analysis of the causes.
Fix Module Monitor mode Power on failed in VMware
If you encounter Module Monitor mode Power on failed in VMware, execute the solutions mentioned below.
- Disable Nested Virtualization
- Disable Hyper-V
- Disable Windows Hypervisor platform and Virtual Machine platform
- Re-import the VM
- Consult VM support
Let us get started with the troubleshooting guide.
1] Disable Nested Virtualization

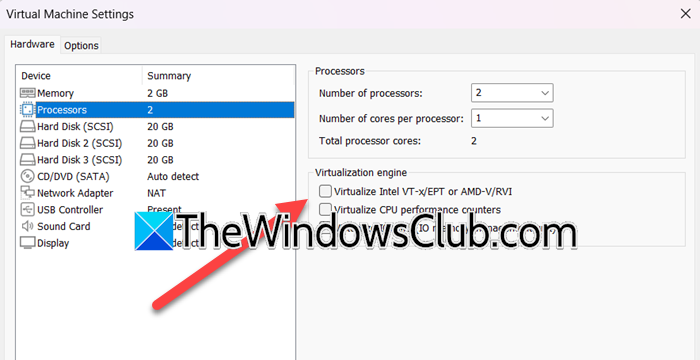
Nested Virtualization allows users to run a Hypervisor inside a Virtual Machine, however, it can lead to conflicts, especially if the VM is not configured to handle it properly. We recommend disabling Nested Virtualization as this ensures that VMware Workstation can directly utilize the hardware’s virtualization capabilities without interference. Here’s how to do the same.
- Launch the VMware workstation, right-click on the Virtual Machine, and select the Settings option.
- Navigate to the Processor tab, and uncheck the option for Virtualize Intel VT-ex/EPT or AMD-V/RVI.
- Hit the OK button to save the changes.
After completion, reboot the PC, and ensure that the issue is resolved. If not, move to the next solution.
2] Disable Hyper-V

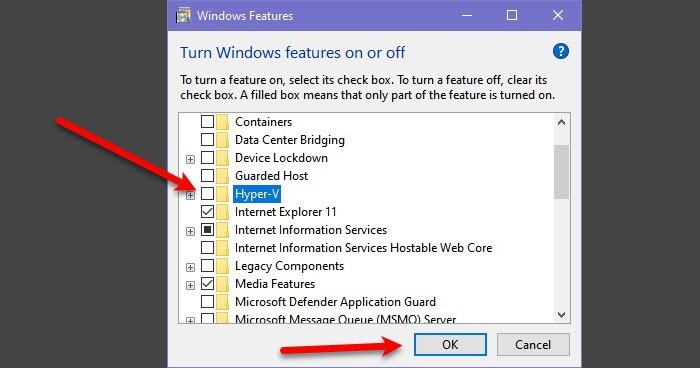
Hyper-V is Microsoft’s proprietary virtual machine utility. If it is enabled, VMware, which is independent of this platform will not be able to allocate system resources as they will be busy serving Hyper-V. So, we recommend you disable this feature. To do so, follow the steps mentioned below.
- Click Win + R to open the Run Dialog box, and execute the following command to open Windows Features.
OptionalFeatures.exe
- Look for Hyper-V, and unchecked it boxes along with any other related features.
- Click OK and reboot the PC.
Once done, check if the issue persists.
3] Disable Windows Hypervisor platform and Virtual Machine Platform

When enabled, the Window Hypervisor and Virtual Machine platforms control the system’s hardware virtualization features. This again prevents VMware from using it and leads to startup issues with Virtual Machine. In this solution, we are going to disable both features to free up the hardware virtualization resources.
- Click Win + R to open the Run Dialog box, type in appwiz.cpl, and hit the OK button to open Programs and Features.
- Select the Turn Windows Features on or off button, and scroll down to locate Windows Hypervisor Platform and Virtual Machine platform.
- Ensure that the boxes of both features are unchecked, and hit the Ok button to apply the changes.
Once done, reboot the PC, and check if the issue is resolved.
Read: How to access and use BIOS in VMware Workstation
4] Re-import the VM

In situations where the issue is caused by corrupted VMX files or other configuration-related issues, re-importing the VM can help resolve the issue. When a VM is imported, it resets the configuration and addresses compatibility issues between the host system’s configuration and VMware Workstation.
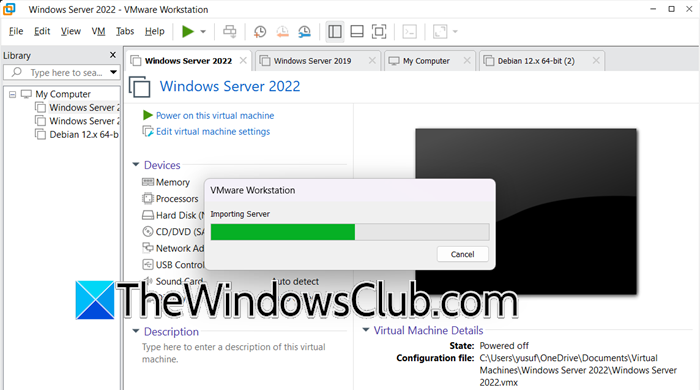
- Launch the VMWare Workstation, click on File, and select Open. Alternatively, click Ctrl + O to do the same, then navigate to where the exported Virtual Machine is stored. For example: Desktop> Exported VM
- Select the OVF file, and click Open to launch the Import Virtual Machine Wizard. Now, enter the name of the Virtual Machine, select the storage path, and hit the Finish/OK button. This will launch the import and users can see the status bar.
- This will take some time to import, and once done, the Virtual Machine will be visible in the Virtual Machine Library.
5] Consult VM support
Lastly, if none of the above solutions could resolve the issue, then we recommend consulting VM support. They have access to advanced diagnostic tools and can offer tailored assistance. To consult VM support, log in to the VMware account, access the VMware Support Portal (support.broadcom.com), and submit a support request with detailed error logs, or contact them via chat or phone for real-time assistance.
That’s it!
Read: How to run Hyper-V, VirtualBox and VMware on same computer?
How do I reset the power option in VMware?
To reset the power option in VMware, launch the VMware Workstation, navigate to the Virtual Machine, and right-click on it. Select the Power option, and click on the Reset option from the list. This will restart the guest Operating system without shutting it down.
Also Read: How to install Debian on VirtualBox in Windows 11.