After moving a virtual machine to another hardware or after starting a freshly created virtual machine, we encountered an error that says that Module ‘VPMC’ Power on failed on VMware Workstation. In this post, we will see what is VPMC module and see how you can resolve this error.
VMware Workstation does not support virtualized performance counters on this host.
Module ‘VPMC’ power on failed.
Failed to start the virtual machine.
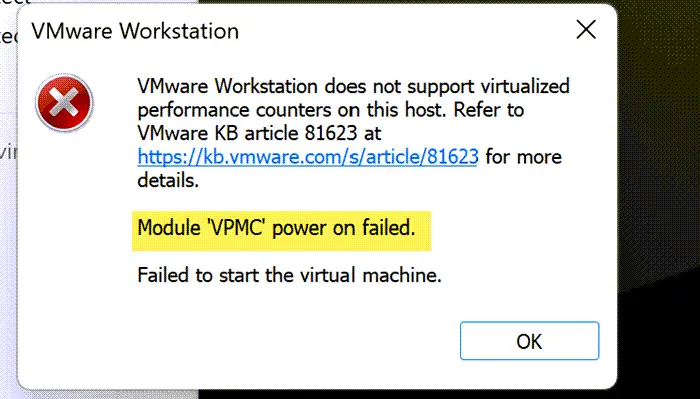
Module ‘VPMC’ Power on failed on VMware Workstation
The VPMC module stands for Virtual CPU Performance Monitoring Counters in VMware. These counters monitor and measure the performance of virtual CPUs within a virtual machine (VM). If you see Module ‘VPMC’ Power on failed on VMware Workstation, you can follow the solutions mentioned below.
- Disable the CPU performance counters
- Disable Hardware Virtualization
- Import the virtual machine image again
- Disable Hyper-V
Let us talk about them in detail.
1] Disable the CPU performance counters
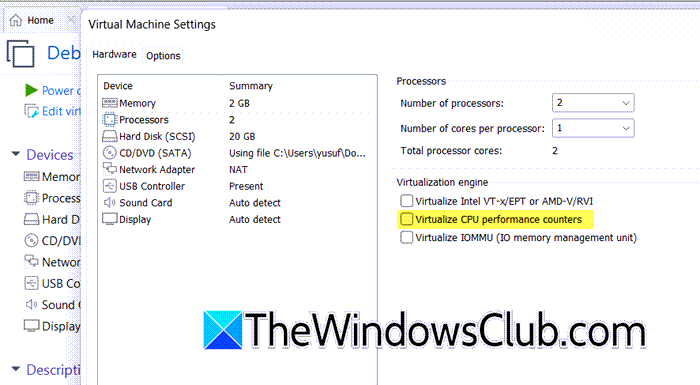
CPU Performance Monitoring Counters (PMCs) help software track and measure how well the processor performs. Tools like software profilers often use these counters. to disable the CPU Performance counter, you can either edit the virtual machine setting from the VMware Workstation application or make changes to the VM configuration file, that is .vmx file, by setting VPMC=False.
Follow the steps below to edit the properties of the virtual machine from the VMware Workstation and disable CPU performance counters.
- First of all, open VMware Workstation, right-click on the virtual machine and select Power > Power off.
- Now, right-click on the virtual machine and click on Settings.
- Then go to the Hardware tab.
- From the Processors section, go to the Virtualization engine, and then untick the option that says Virtualize CPU performance counters.
- Now, click on the Ok button to acknowledge the changes.
- Finally, power on the virtual machine and see if the issue persists.
If this is a deployment virtual machine and you want to repair this issue by making changes to the .VMX file, navigate to the directory where your virtual machine is stored. Usually, it is stored in the home directory, it would be something like your-home-directory/Virtual Machines/Debian 12.x 64-bit, in my case, it is C:\Users\yusuf\OneDrive\Documents\Virtual Machines\Debian 12.x 64-bit. Right-click on the VMX file, and then add or modify the line: vpmc.enable = “FALSE”.
2] Disable Hardware Virtualization
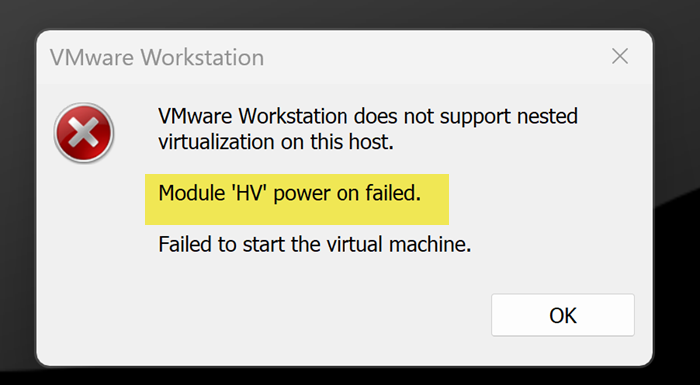
In some cases, disabling CPU Performance Monitoring Counters triggers another error that Virtual machine failed to start because nested virtualization is not supported and Module ‘HV’ power on failed, to resolve this issue, you need to disable the hardware or nested virtualization from the virtual machine’s settings.
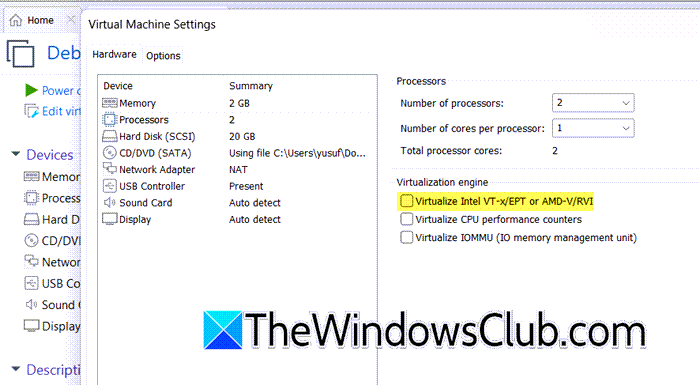
To do the same, you can follow the steps mentioned below.
- Open the VMware Workstation and power off your virtual machine.
- Once done, right-click on your VM and click on the Settings option from the context menu.
- Go to Hardware > Processors tab.
- Look for Virtualize Intel VT-x/EPT or AMD-V/RVI from the Virtualization engine section and untick it.
- Click on Ok to save the changes you have made.
Finally, start the virtual machine and see if the issue is resolved.
3] Import the virtual machine image again
The solutions mentioned earlier are a workaround as, ideally, CPU Performance Monitoring Counters should not cause any issues; also, if you disable it, many features, such as the Qemu appliances, will cease to work. A plausible explanation for this problem would be that the virtual machine was on when creating the virtual image or moving it to a different hardware. Therefore, in this case, we recommend you power off the virtual machine and then change the .vmx file. Some users just scraped the VM, rebuilt it, and ensured VMware was fully closed before editing the .vmx file. Once they have the image, they can apply it to a freshly created virtual machine; you can do the same and see if that helps.
Read: Failed to lock the file, Module Disk power on failed on VMWare
4] Disable Hyper-V
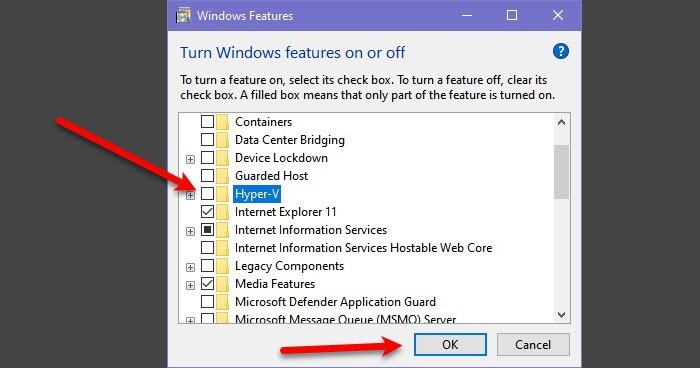
Hyper-V is a Windows Hypervisor utility that should be enabled if you use Hyper-V Manager to create virtual machines. Since we are trying to create a virtual machine using VMware Workstation, we recommend you disable it. Follow the steps mentioned below to do the same.
- Open Control Panel.
- Change View by to Large icons.
- Click on Programs and Features > Turn Windows features on or off.
- Then look for Hyper-V and then disable it.
- Click Ok.
Finally, create the virtual machine and see if the issue is resolved.
Hopefully, you can resolve the issue using the solutions mentioned in this post.
Read: Unable to open kernel device \\.vmcidev\vmx in VMware
How to solve Module VPMC power on failed?
The VPMC Power on failed error can be resolved by disabling the Virtualize CPU performance counters option as your virtual image doesn’t support this feature. However, we recommend you follow the solutions mentioned in this post to resolve the issue as you may encounter some other error when trying to resolve this issue.
Read: VMware does not support the user level monitor of this host
How to Auto Power On VMware Workstation Virtual Machine?
To automatically power on your VM, click on virtual machines in the VMware Host Client inventory and right-click on a virtual machine from the list. To configure autostart options, select Autostart and then choose Configure. To set the default timing and startup order for the virtual machines, select your preferred option from the pop-up menu, you can set it to Start delay, Stop delay, Stop action, and Wait for heartbeat, and click on Save.
Leave a Reply