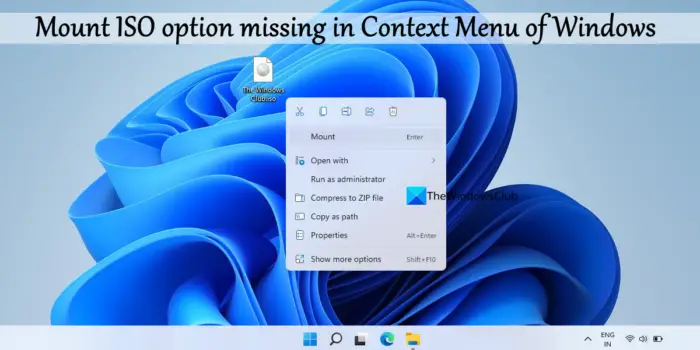
Windows 11/10 OS comes with a built-in feature to mount an ISO file to access the content stored in that image file. When you right-click on an ISO file, a Mount option is visible there. Clicking on that option mounts the ISO image and a new drive letter is assigned to it. But some users have complained that the Mount ISO option is missing in the context menu of their Windows 11/10 system. It might have happened after some update or installing a tool. Whatsoever would be the cause, this post will help you bring back the Mount ISO option as well as use other options to mount the ISO files.

Mount ISO option missing in Context Menu of Windows 11/10
If the Mount ISO option is missing in the context menu of your Windows 11/10 system, you can use the following solutions:
- Double-click on the ISO file
- Set Windows Explorer as the default opening application for ISO files
- Set Windows Disc Image Burner as the Default app for ISO files
- Use ISO file Properties window
- Use a third-party ISO Mounter tool.
Let’s have a look at these options one by one.
1] Double-click on the ISO file
This option can come in handy when you need to access ISO file contents quickly. All you have to do is double-click on the ISO file and it will mount as a separate virtual drive on your Windows 11/10 computer. The mounted ISO drive is opened automatically or you can open File Explorer and access that particular drive and its contents.
2] Set Windows Explorer as the default opening application for ISO files

This is one of the best options that you can use to get back the Mount ISO option in the right-click context menu of your Windows 11/10 PC. It has solved this problem for many users and it will surely be helpful for you too. Here are the steps:
- Right-click on an ISO file stored on your PC
- Access the Open with context menu
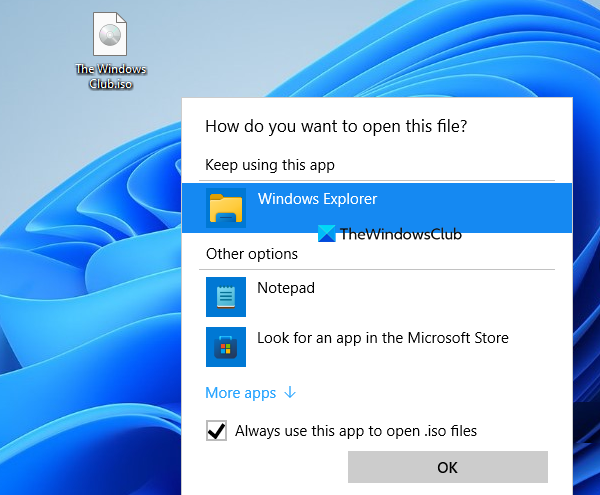
- Click on the Choose another app option in that menu. This will open a How do you want to open this file pop-up
- In that pop-up, select the Windows Explorer option. If you don’t see that option, then click on the More apps option or More options in that pop-up, and Windows Explorer will visible in that list. Select it
- Next, checkmark the Always use this app to open .iso files option
- Press the OK button.
The ISO file will be mounted and the drive will open instantly. And, Mount ISO option will also be visible in the Windows context menu.
Related: Couldn’t Mount File, The disk image isn’t initialized
3] Set Windows Disc Image Burner as the Default app for ISO files

The most probable cause why Mount ISO is not visible in the Windows context menu is that the built-in Windows Disc Image Burner tool is removed as the default app for burning the ISO files. If this is the case, then you need to set Windows Disc Image Burner as the default app for ISO image files to solve this problem. For doing that, follow these steps:
- Open the Settings app of Windows 11/10. Press Win+I hotkey or use your preferred way to open it
- Select the Apps category
- Click on the Default Apps
- Scroll down the list of applications
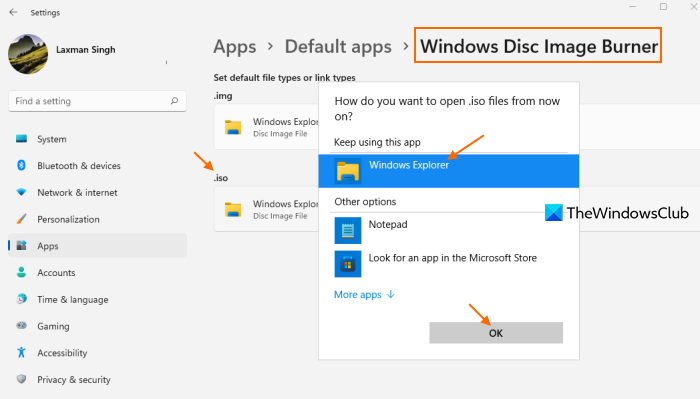
- Click on the Windows Disc Image Burner option. If you are using Windows 10, then you need to press the Manage button after that and go to the next step
- Click on the option available for .iso. It will prompt you How do you want to open .iso files from now on in a pop-up. Select Windows Explorer in that pop-up. In the option is not visible, use the More apps option to expand the options and then select the Windows Explorer option
- Use the OK button.
Now the Mount option should appear in the right-click menu of Windows.
4] Use ISO file Properties window

Another handy option to show the Mount option for ISO files is by using the ISO file properties window. To do this, you need to use the following steps:
- Open a folder or access a drive where the ISO file is present
- Right-click on the ISO file
- Select the Properties option
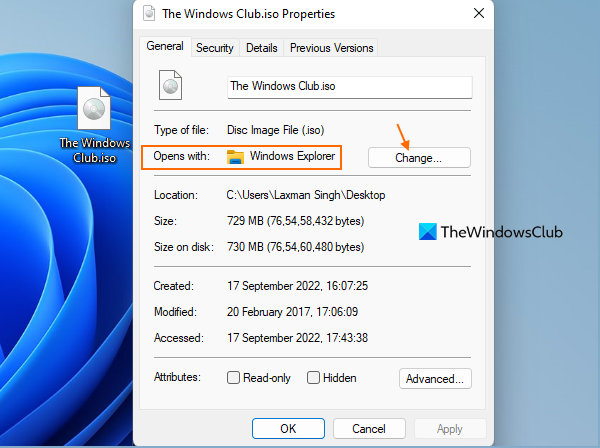
- In the Properties window of the ISO file, switch to the General tab
- Click on the Change button available for Opens with section and a pop-up will appear. See if the Windows Explorer option is there. If not, click on the Look for another app on this PC option in that pop-up. An Open with box will be in front of you. There, go to C:\Windows
- Select explorer.exe application
- Press the Open button and you will come back to the Properties window of the ISO file. You will notice that Opens with option is now set to Windows Explorer
- Press the Apply button
- Press the OK button.
This should bring back the Mount ISO option in the right-click menu of Windows 11/10.
5] Use a third-party ISO Mounter tool
You can use also use some third-party tool that lets you mount ISO as well as other image types (BIN, VCD, DMG, etc.). There are some free ISO mounter tools that you can use to access the data stored in your ISO file. WinCDEmu, PassMark OSFMount, Virtual CloneDrive, etc., are some good options to use.
Hope this helps.
Also read: Best Free ISO Burners for Windows PC
Why is there no mount option for ISO files?
If there is no Mount option for ISO files on your Windows 11/10 context menu, then it could happen because the Windows Disc Image Burning tool is not set as the default program or application for ISO files. In that case, you need to set Windows Disc Burner Image burner for ISO files as the default application using the Settings app. The steps for that option and other solutions to fix this issue are covered in this post above.
Can not mount ISO Windows 11?
If you are not able to mount an ISO file on Windows 11 or Windows 10 OS, then most probably there is a problem with the image file itself. So, if you can’t mount ISO because the disc image file is corrupted, then you should download the disc and try again. Or else, you can also unmount existing virtual drives and check. On the other hand, if you receive the error couldn’t mount ISO because was a problem mounting the file, then, in that case, you need to find and delete UpperFilters and LowerFilters Registry keys associated with that problem.
Read next: How to Burn ISO files using Command Prompt in Windows.
Leave a Reply