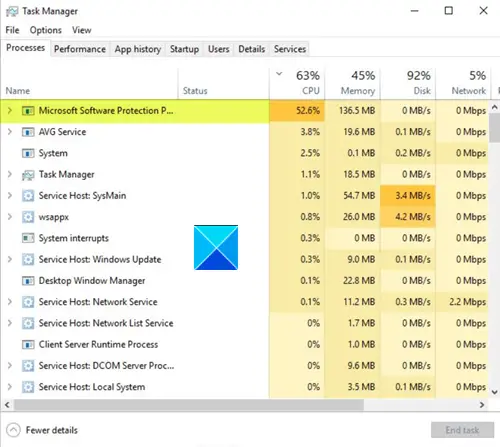
In Windows, you may often come across file names you never heard of and so, find them suspicious. However, not all of them should be dismissed as viruses or malware. Most of them are legitimate files necessary for some processes. One such instance is of MPSigStub.exe file. At times this file is known to cause high CPU usage.

MPSigStub high CPU usage in Windows 11/10
MPSigStub.exe is a file to help install Windows Updates. It is better known as Microsoft Protection Signature Stub. The file’s function is to extract the downloaded Windows Update on your PC mainly. This activity may result in high CPU usage, but the issue lasts only for a few minutes. If you face this issue often, here are a few things you could try:
- Check if a Windows Update is in Progress
- Check file location
- Force delete malware file
- Replace the legit file.
The MPSigStub can be found under C:\Program Files. Sometimes, its title may appear extended by a bunch of random letters and numbers or similarly sized strings of numbers and letters. There’s nothing to worry about it since these are all temporary files created by Windows Update as part of the updating process.
1] Check if a Windows Update is in Progress
As the file is associated with Windows Update, you can see a spike in CPU usage when the update process is running.
Give it some time – it will settle down.
If it continues to show the spike for an extended period, try installing the update manually via the Microsoft Update Catalog website.
2] Check file location
The legit MPSigStub.exe OS file is found in the following location”
C:\Windows\System32
If it is found elsewhere it could be malware.
In this case, you could, using the Task Manager > Locate the process > Right-click on it > Open file location, navigate to the folder where this file is located.
Once there you could scan the file with your antivirus software. You could also use a second-opinion portable malware removal tool, if in doubt.
Running a full PC AV scan should remove the malware completely.
3] Force delete malware file
If you find that the file is located in a non-system folder you could use a third-party tool to force delete this malware file.
Some folks have reported that they found the malware file in the following hidden location:
c:\8c7dc26a331d59f4b1fa75799e
You need to make Windows show hidden files and then if you see it here, you could delete this one safely.
4] Replace the legit file
It is also possible that the legit MPSigStub.exe file may have got corrupted. In this scenario, you could use run SFC to replace this potentially corrupted file only.
If this does not help, you will have to follow this procedure to fix a corrupted system file in Windows.
NOTE: We do not recommend that you delete the legit MPSigStub.exe system file or modify its file permissions.
I hope it helps!
Leave a Reply