Network-attached storage (NAS) devices are network-connected storage solutions that offer a centralized repository for storing and sharing data across networks. It’s like having a private cloud that provides all the benefits of a public cloud on-site, giving you complete control. The latest Windows 11 version seamlessly integrates NAS drives and simplifies data access and management. But recently, some users have complained that their NAS drive is not showing on the network in Windows 11. Fortunately, you can follow some simple suggestions to fix the error.
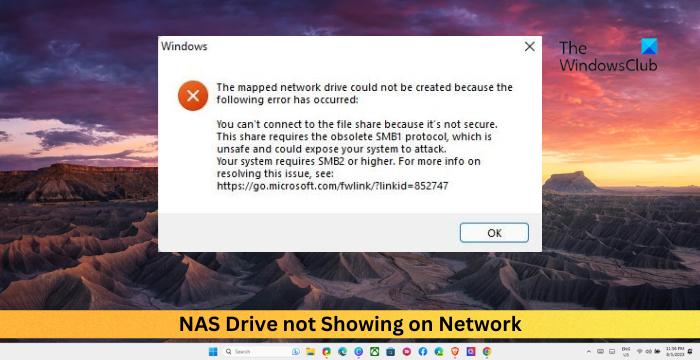
Fix the NAS Drive not Showing on Network in Windows 11
If the NAS drive is not showing in Windows 11, follow these suggestions to fix the issue:
- Check your Network Connection
- Modify Advanced Sharing Settings
- Restart related Windows Services
- Turn On SMB 1.0 in Windows Features
- Delete the HardwareID key in the Registry Editor
- Make Modifications in the Local Security Policy
- Disable Windows Firewall
- Run these Network Commands
Now, let’s see these in detail.
1] Check your Network Connection
Start by checking if you’re connected to a stable internet connection. Network drives may face errors because of an unstable or slow internet connection. Check your connection by performing a speed test. If the speed is less than the plan opted for, restart your modem/router and see or contact your service provider.
2] Modify Advanced Sharing Settings
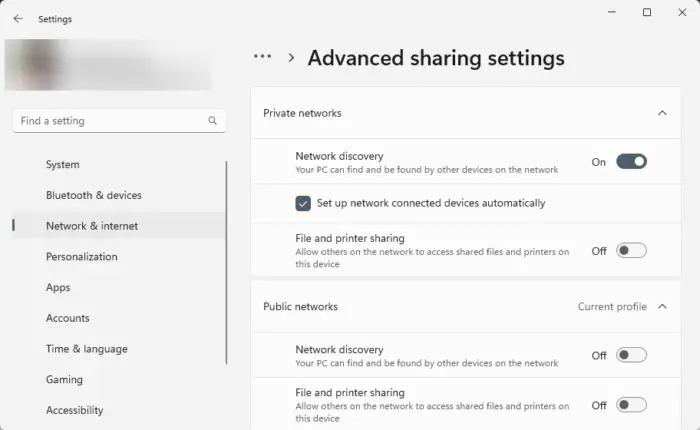
Next, modify the Advanced Sharing Settings and see if the NAS drive starts showing up. Here’s how:
- Press the Windows + I combination to open Settings.
- Navigate to Network & internet > Advanced network settings > Advanced sharing settings.
- Here, under Private networks, toggle the switch beside Network discovery to On.
- Now, expand the All folders option and switch On the toggle beside Public folder sharing.
3] Restart related Windows Services
The related services will clear files and cache data related to the service and help resolve the NAS drive not showing on the network error. Here’s how you can do it:
- Press the Start button, type Services, and hit Enter.
- Search for Function Discovery Resource Publication, SSDP Discovery, and UPnP Device Host.
- Right-click on these services one by one and select Restart.
4] Turn On SMB 1.0 in Windows Features

Server Message Block or SMB is a client-server communication protocol used for sharing access to files, printers, etc. Turning it on in Windows devices can help fix the NAS drive not showing on network error in Windows. Here’s how:
- Open the Control Panel, click on Programs and select Turn Windows features on or off.
- Select the SMB 1.0/CIFS File sharing support option and click on OK to save the changes.
- Restart your PC once done and see if the error’s fixed.
5] Delete the HardwareID key in the Registry Editor
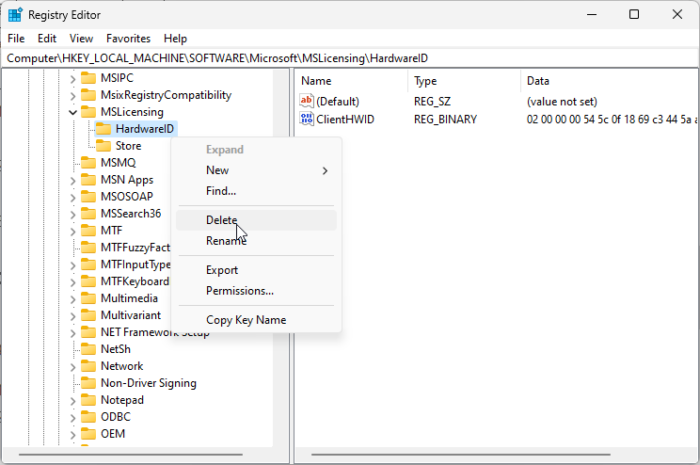
You can also fix the NAS drive not showing errors by making some modifications in the Registry Editor. To do so, you’ll have to delete the HardwareID key. Here’s how:
- Click on Start, search regedit and hit Enter.
- Once the Registry Editor opens, navigate to the following path:
Computer\HKEY_LOCAL_MACHINE\SOFTWARE\Microsoft\MSLicensing\HardwareID
- Right-click on the HardwareID key in the left pane and then click on Delete.
- Once deleted, check if the NAS drive starts showing.
6] Make Modifications in the Local Security Policy
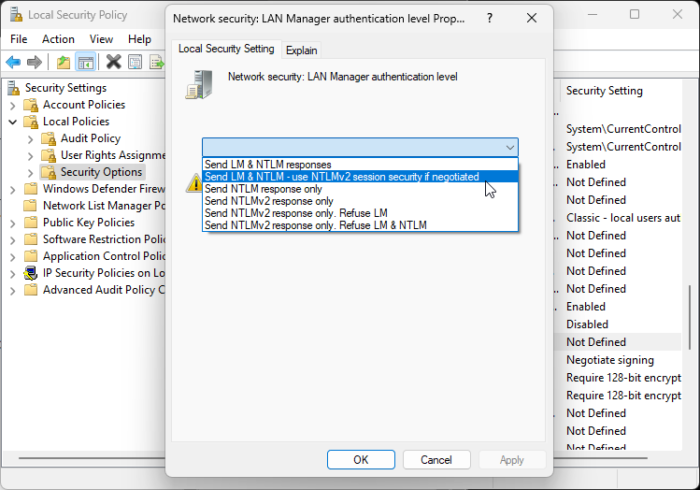
Next, try enabling the LAN Manager authentication level policy in the Local Security Policy and setting it to use NTLMv2. Here’s how:
- Click on Start, search Local Security Policy and hit Enter.
- Navigate to the following path:
Local Policies > Security Options
- Double click on Network security: LAN Manager authentication level to modify it.
- A drop-down with different options will now appear; choose Send LM & NTLM- use NTLMv2 session security if negotiated.
- Click on Apply and then on OK to save the changes.
7] Disable Windows Firewall
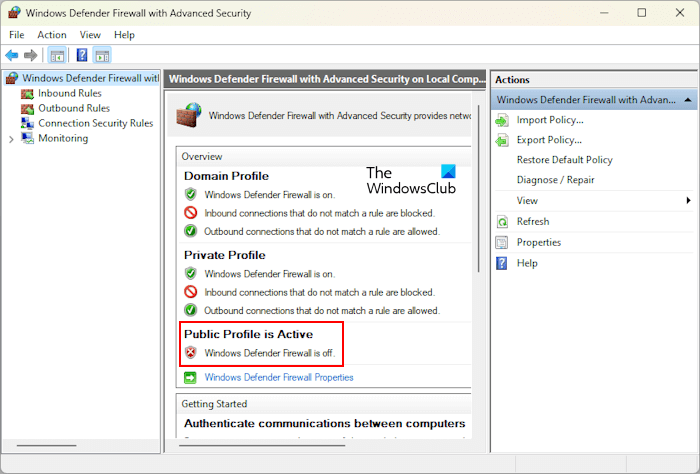
Windows Defender Firewall sometimes makes games and apps malfunction. Turn it off and check if it fixes the NAS drive not showing an error. Here is how you can do it:
- Click on Start, search for Windows Defender Firewall and select Open.
- Click on Turn Windows Defender Firewall on or off in the left pane.
- Now, check the option that says Turn off Windows Defender Firewall under both Private and Public network settings.
- Click on OK to save the changes.
8] Run these Network Commands
Lastly, run these network commands. It will reset the TCP/IP stack, renew the IP address, Reset Winsock and flush the DNS client resolver cache. Here’s how you can do it:
Press the Windows key, search for Command Prompt, and select Run as Administrator.
Type the following commands one by one and hit Enter.
netsh winsock reset
netsh int ip reset
ipconfig /release
ipconfig /renew
ipconfig /flushdns
Restart your device once done.
Read: exFAT drive not showing up on Windows 11
I hope these suggestions help you.
Why is NAS not visible on network?
The NAS drive not visible can occur due to misconfigured network settings or user modifications to the Windows system settings. However, it can also occur if the recently installed Windows update was corrupted.
How do I map a NAS drive in Windows 11?
To map a NAS drive in Windows 11, open File Explorer > This PC and click on Map network drive in the top menu. Next, select a drive letter, enter the network path of the NAS drive and click on Finish.
Leave a Reply