If you’re experiencing network connectivity issues on your Windows 11/10 computer, and in your attempt to troubleshoot the issue, you see the Device Manager error Code 31 for the Network Adapter (Wi-Fi or Ethernet), then this post will help you resolve the issue on your system.

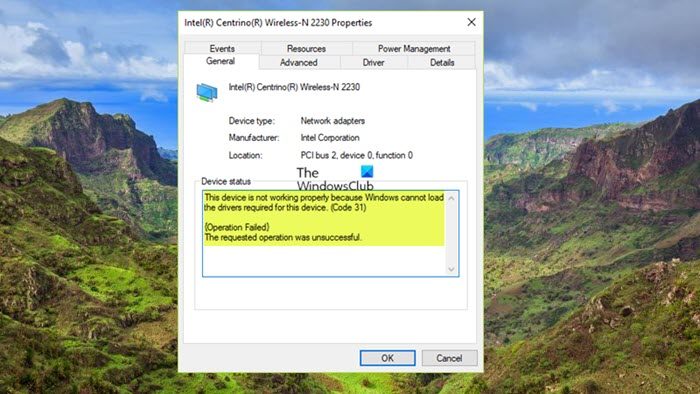
When this Device Manager Error Code occurs on your computer in either of the network adapter, in Device Manager, you will first see the corresponding device appear with a yellow exclamation mark sign (which can also appear for the Unknown device error) next to it. When you now check the properties of the network card, you will see the full description of the error in the Device status information box that reads as follows:
This device is not working properly because Windows cannot load the drivers required for this device. (Code 31)
{Operation Failed}
The requested operation was unsuccessful.
This device is not working properly because Windows cannot load the drivers required for this device. (Code 31)
This error can be fixed by simply updating the drivers for the device. You can obtain and install the latest manufacturer-supplied drivers for a device with the Code 31 error. Among other possible fixes, if the Code 31 error is related to the MS ISATAP adapter not working correctly, you can reinstall the Microsoft ISATAP network adapter on your computer.
You are likely to encounter this error on your computer due to the following reasons.
- An incorrect driver for the network adapter is installed.
- The network adapter driver is corrupted or outdated.
- Invalid/corrupted network key present in the Windows registry.
That said, in some cases, the error could still occur even though the correct driver of the network adapter is already installed.
Fix Network Adapter Code 31 error
If you see the Code 31 error and the yellow exclamation mark for the Wi-Fi or ethernet network adapter installed on your Windows 11/10 PC in Device Manager while troubleshooting network-related issues, our recommended solutions, presented below in no particular order, should help you easily resolve the issue.
- Update network adapter drivers
- Reset Network adapter
- Remove invalid network registry keys & reinstall network adapter drivers
- Install the correct driver for the network adapter
Let’s look at the description of the process as it relates to each of the listed solutions. Before you get right to the solutions below, we suggest you make sure Windows is updated.
1] Update network adapter drivers

The first step you can take in your attempt to fix the Network adapter Code 31 error on your Windows 11/10 computer is to update the Network drivers. Since you need an internet connection for this task, depending on if the issue is with the Wi-Fi or ethernet adapter, you can use any of the following methods:
- Manually update drivers via Device Manager if you have already downloaded the .inf or .sys file for the driver.
- Update driver via Command Prompt.
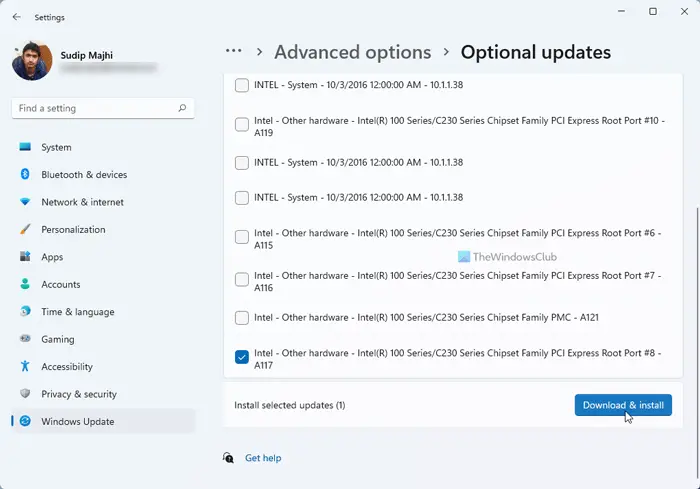
- Get the driver updates on the Optional Updates section under Windows Update.
- Download the latest version of the driver from the manufacturer’s website.
- Automatically update your drivers using any of the free Driver Update Software.
If, however, both network adapter is affected or the problematic adapter is just the only network card installed on the PC, then you can use a USB network adapter dongle and carry out the instructions above for the inbuilt network card or from another computer, navigate to your computer’s manufacturer support site (if you own a branded PC or laptop) or to the motherboard’s support site (for onboard network adapters) and download the latest driver version for the network controller. After the download, copy the driver to a USB drive and then transfer the downloaded driver to the problematic computer and run the package.
2] Reset the Network adapter

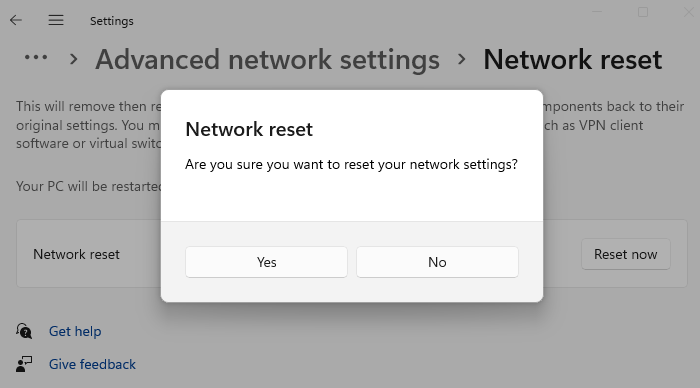
Assuming your network drivers are updated but the issue at hand persists, then it’s likely the network adapter settings are corrupted on the computer. In this case, to see if the issue will be resolved, you can use the Network Reset feature in Windows 11/10 to reinstall Network adapters & set networking components to default settings. After your PC restarts, any network adapters are reinstalled, and the settings for them are set to the defaults.
3] Remove corrupted network registry keys & reinstall network adapter drivers
The Config registry key for the network stores the network configuration settings for both the wireless and ethernet connections on your Windows 11/10 PC. If you’re having a missing or unstable network connection, it could be that this registry key is corrupted – deleting this key may help resolve the issue. The registry key will be regenerated when next you restart the computer.
This solution requires you to remove the corrupted network config registry keys & then reinstall the network adapter driver. To perform this task, first, make sure to back up the registry or create a system restore point as necessary precautionary measures. Once done, you can proceed as follows:
- Press the Windows key + R to invoke the Run dialog.
- In the Run dialog box, type regedit and hit Enter to open Registry Editor.
- Navigate or jump to the registry key path below:
HKEY_LOCAL_MACHINE\SYSTEM\CurrentControlSet\Control\Network
- At the location, on the right pane, right-click on the Config key REG_BINARY type.
- Select Delete from the context menu.
- Exit Registry Editor.
Next, open the Run dialog box, type devmgmt.msc, and hit Enter.
In the Device Manager, scroll down through the list of installed devices and expand the Network adapters section.
Next, right-click on the problematic network adapter and choose Uninstall from the context menu to remove the hardware from Device Manager.
Now, restart the PC or click Action on the menu bar and select Scan for hardware changes for Windows to re-scan and install the network adapter driver automatically.
If you use third-party drivers for your network adapter or if Windows cannot find the appropriate driver for the network adapter or if you have deleted the driver during the device uninstall, then you have to download and install the latest driver version for your network card from the manufacturer’s support site or using the accompanying CD.
Read: The network adapter is not functioning properly in Windows
4] Install the correct driver for the Network adapter
At this point, if the issue you’re currently facing isn’t resolved, it’s safe to assume that somehow, the incorrect driver for the network adapter is being installed on the computer. So, to make sure the correct driver is manually downloaded and installed for the problematic network adapter, do the following:
First, you need to find the network adapter Hardware ID.
- Open Device Manager.
- Scroll down through the list of installed devices and expand the Network adapters section.
- Next, right-click on the problematic network adapter and select Properties.
- Next, switch to the Details tab.
- Next, click the Property drop-down and select Hardware IDs.
- Now, in the Value box, right-click and copy the last value which would look something like this PCI\VEN_10EC&DEV_D723&CC_0280 depending on the hardware for the PC brand.
Next, do a Google search with the exact hardware ID you copied to download the correct drivers.
Once downloaded, install the driver.
Reboot the PC when done.
Read: Hardware ID binding is beyond the level of tolerance 0xC004F00F
I hope this post helps you!
How do I fix a Network adapter error?
One of the easiest and most common fixes is to update the network adapter driver. In Device Manager, select the network adapter, press, and hold (or right-click), then select Update driver and then follow the instructions. After installing the updated driver, if you’re prompted to restart, select Start > Power > Restart, and see if that fixes the connection issue.
These posts might interest you:
Leave a Reply