At times, the Ethernet Adapter might not be working in Windows 11/10 PC due to some reasons. If an exclamatory sign is appearing on the Network icon in the Taskbar or the Ethernet connection is not working, you can follow this linked guide. On the other hand, if your computer is not detecting the Ethernet port or the network adapter, you can follow the following solutions.
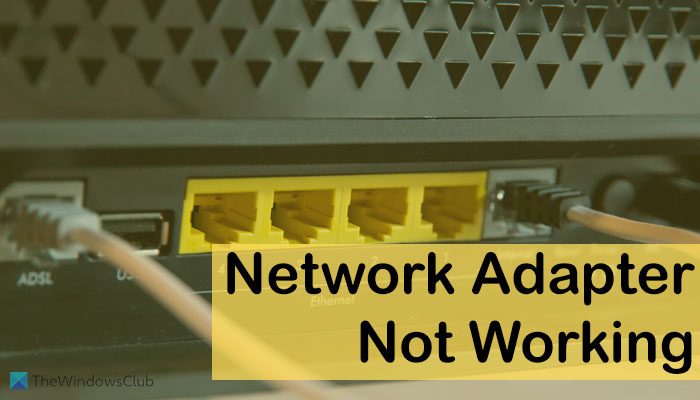
Network Adapter not showing up, working or detected in Windows 11/10
If your Windows 11/10 computer is not detecting the Ethernet Port or the Network Adapter, follow these sugegstions to fix the issue.
- Check router
- Enable Ethernet adapter
- Verify external Ethernet adapter
- Run Troubleshooter
- Install driver
- Uninstall from Device Manager
- Reset Network settings
To learn more about these solutions, continue reading.
1] Check router and cable
It is the first thing you need to check if the Network adapter is not working or your computer is not detecting the Network adapter at all. If your PC is connected to a WiFi router via an Ethernet cable, all the things must be working correctly in order to use the internet. That is why you can try a different cable or port on your router to ensure that there are no issues with the cable and router.
2] Enable Ethernet adapter
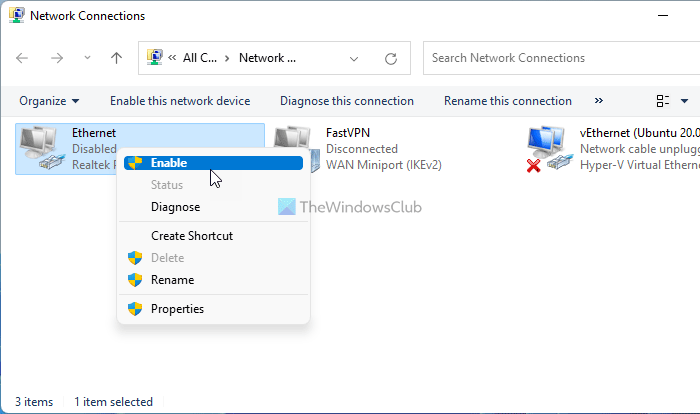
It is possible to enable or disable a particular Ethernet adapter or Network adapter on your computer. Whether it is the Ethernet or WiFi adapter, you can turn it off without any third-party application. However, if you have done the same mistakenly in the past, your computer won’t be able to detect the adapter. Therefore, you can follow these steps to enable Ethernet adapter:
- Press Win+R to open the Run prompt.
- Type ncpa.cpl and press the Enter button.
- Right-click on the disabled Ethernet adapter.
- Select the Enable option.
Then, you will be able to use your Ethernet port without any problem.
3] Verify external Ethernet adapter
Cheap external Ethernet adapters go out of order very soon. If you are using such a device to connect your Ethernet cable to your computer, you need to verify that the device is working correctly or not. For that, you can connect it to another port or PC.
Also, most of the external Ethernet adapters come with a driver. If you haven’t installed it earlier, it is recommended to install the driver. Most of the manufacturers provide a CD containing the driver. If you haven’t got anything like that, you can download the driver from the official website of the manufacturer.
4] Run Troubleshooter
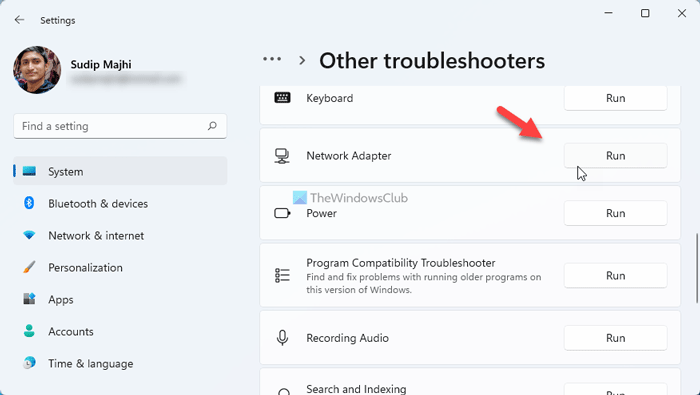
The included troubleshooters often fix most of the common problems within moments. That is the reason you can try running a Troubleshooter when the Network adapter is not working on your PC. For that, do the following:
- Press Win+I to open Windows Settings.
- Go to System > Troubleshooters > Other troubleshooters.
- Find the Network Adapter Troubleshooter.
- Click the Run button.
Then, it displays some information and solutions on your screen. You need to follow the screen instructions in order to get rid of this problem. As there are countless reasons why your computer is not detecting the Network adapter, this Troubleshooter can show more than one fix at a time.
5] Install driver
In most cases, you might not need to install the Network driver on your computer running Windows 11 or Windows 10. However, as you are getting problems with the connection, it is recommended to install the corresponding driver in order to use the adapter fluently. It is meaningless to mention that you can find the driver in your motherboard CD.
6] Uninstall from Device Manager
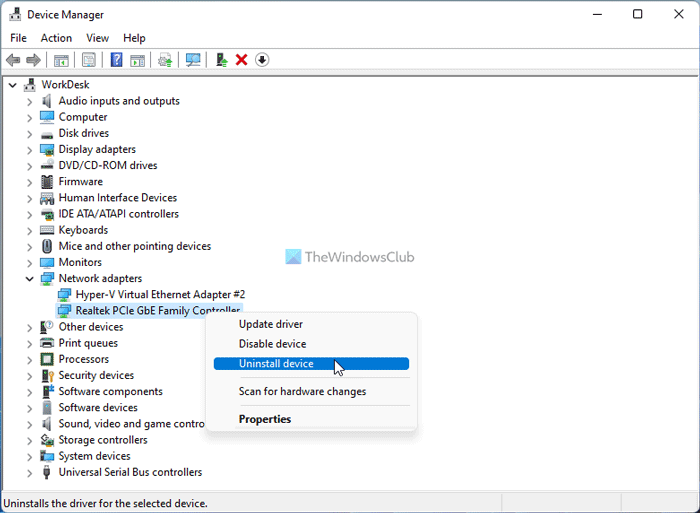
You can completely uninstall a Network adapter from your computer. You could try this solution even if the Network Adapter Troubleshooter didn’t recommend you to do that. For that, follow these steps:
- Press Win+X and select Device Manager.
- Expand the Network adapters section.
- Right-click on the network adapter.
- Select the Uninstall device option.
Then, you need to remove the Ethernet cable from your computer and re-plug in. Once done, you may need to install the driver again.
7] Reset Network settings
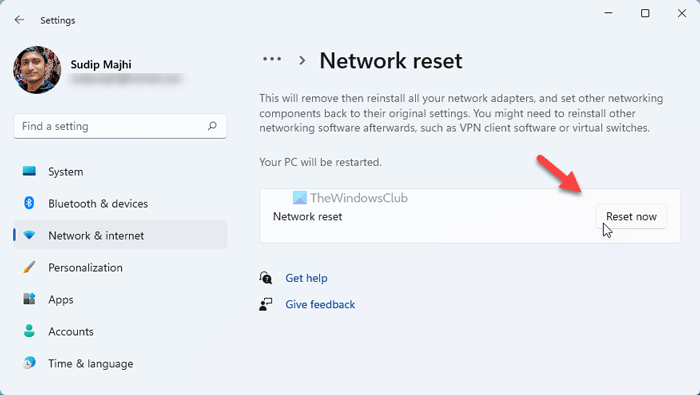
If none of the aforementioned solutions worked for you, you could try resetting the Network settings on your computer. If there are some conflicts behind this issue, you can get rid of them by following this guide. For that, do the following:
- Press Win+I to open Windows Settings.
- Go to Network & internet > Advanced network settings > Network reset.
- Click the Reset now button and confirm it.
Read: Windows could not find a driver for your Network Adapter
How do I fix the network adapter in Windows 11/10?
If there are some problems with the network adapter in Windows 11, you can fix them by following the above-mentioned solutions. You can start by using the Troubleshooter. Then, you can verify the external adapter, install the driver, and reset the network settings.
How do I fix my wireless adapter driver in Windows 11?
If you get problems with the wireless adapter in Windows 11, you need to do a few things. For example, you can use the Network Adapter Troubleshooter, update WiFi adapter drivers, replace the adapter, reset the WiFi adapter, etc. You can also follow this detailed guide if the WiFi adapter is not working in Windows 11/10.
That’s all! Hope this guide helped.
Leave a Reply