When opening the classic Network and Share Center, if all you get is a blank screen and cannot access the File Sharing or other features this post will help you. Microsoft has changed a lot when it comes to Sharing files or accessing computers over a home network, and it seems to have caused a breakdown.
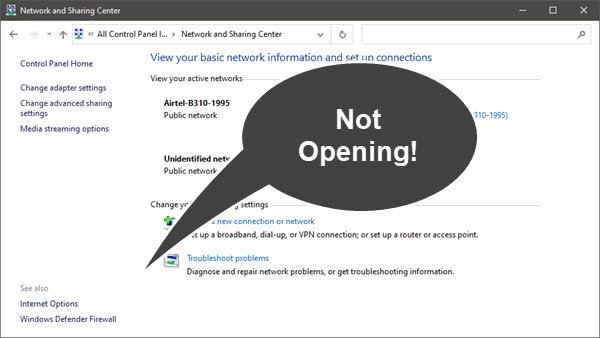
Network and Sharing Center is a classic and important feature of Windows OS that helps to view your active networks, check the status of an active network, speed, bytes sent and received, access Properties to set the Security type, Encryption type, view the Network security key, etc. It also helps to set up a new connection, manually connect to a wireless network, connect to a workplace, and more.
There are multiple ways to open Network and Sharing Center in Windows 11/10. For example, if you want to open it from CMD or PowerShell window, then you need to execute control.exe /name Microsoft.NetworkAndSharingCenter command. You can also use the Run Command box and enter the same command to open the Network and Sharing Center. And, if you want to open Network and Sharing Center from the Control Panel window, then click on the Network and Internet category, and select Network and Sharing Center option. But, if you are not able to open it, then the solutions covered in this post will be helpful.
Network and Sharing Center not opening
Follow these suggestions to resolve the problem with the Network and Sharing Center. The problem occurs when someone visits any of the options that open any of the options under Settings > Network and internet > Status > Advanced Network settings. Try the following suggestions:
- Run System File Checker
- Reset Network
- Configure the Windows firewall to allow Network Discovery.
- Create a New Local Admin account
You will need admin permission to resolve—this problem.
1] Run System File Checker
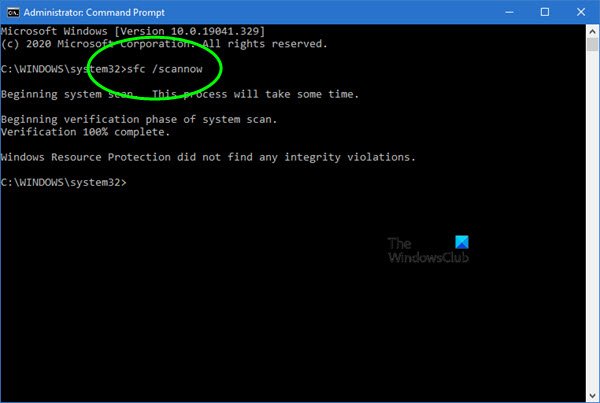
System File Checker can fix any corruption in the system file. Run the sfc /scannow command in an elevated command prompt.
Once it finds the corrupt files, they will be replaced after a computer reboot.
2] Reset Network
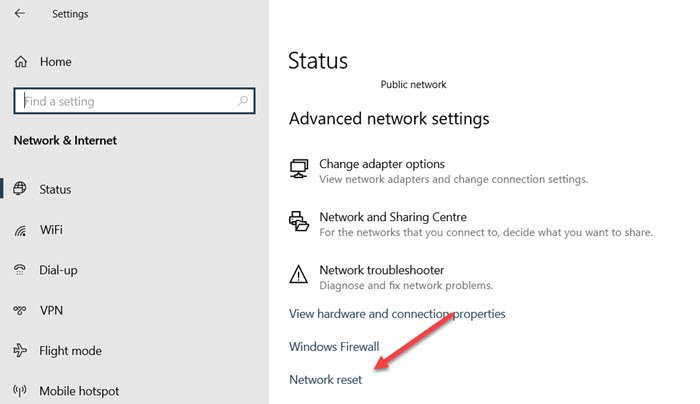
Go to Windows 10 Settings ( Win + I), and navigate to Network and Internet. At the end of the Status screen, click on the Network Reset link. It will reset everything to default, and you should access the classic Network and Sharing control panel. Try this on all the computers, and computers should now find each other in the network.
If you need to use this Network Reset feature in Windows 11, take the following steps:
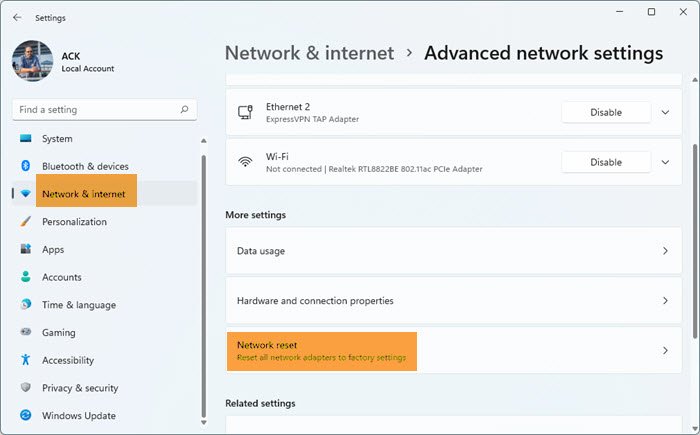
- Open Windows 11 Settings
- Click open Network and internet settings
- On the right, scroll down till you see Advanced network settings and then click on it
- Again scroll down on the next screen till you see More settings
- Here click on Network reset
- On the next screen, click on the Reset now button and wait for the process to complete.
- Restart your computer.
3] Configure the Windows Firewall to allow Network Discovery
Open the Control Panel by typing “Control” in the Start menu, and click to open when it appears. Next, click on System and Security, and then click Windows Firewall.
In the left pane, click Allow an app or feature through Windows Firewall. Click Change settings. You will be prompted to enter an admin password or agree to UAC.
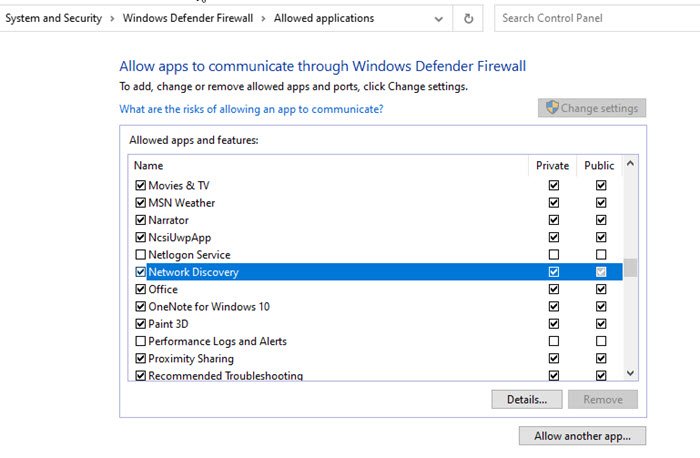
Then, select Network discovery, and then click OK. Locate Network Discovery in the list, and allow it for private and public.
Make sure to go to Services snap-in and confirm if the DNS Client, Function Discovery Resource Publication, SSDP Discovery, and UPnP Device Host are running.
4] Create a New Local Admin account
If nothing else works, we suggest creating a new local admin account and checking if that account can open the Network and Sharing Center. Follow our guide on how you can create an admin account.
I hope the post was useful and easy to understand. One of the suggestions should help you resolve the problem.
Hope this helps.
Leave a Reply