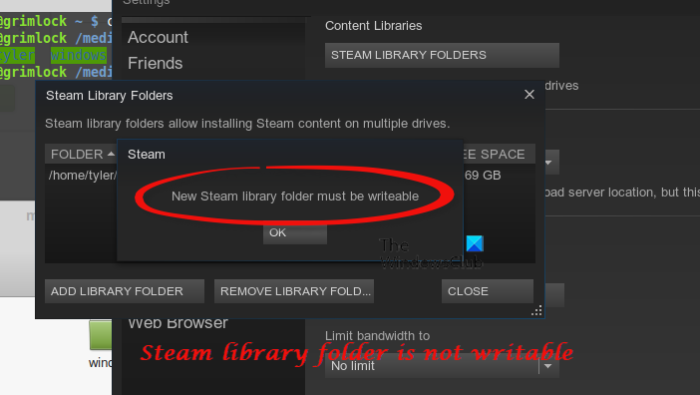
Many users are reporting that when they try to create a new library they receive an error message that says New Steam library folder must be writable or Steam library folder is not writable. In this article, we will talk about ways to change Steam library foldable from Read-only and make it writable.
Why is Steam saying my drive is read-only?
The Steam folder on your computer is at the following location.
C:/Program Files/steam/steamapps/common
This folder should be writable for you to create new libraries. And if you are facing this issue, then maybe your Steam library folder is only read-only. The reason why they can’t be writable is uncanny, but we know how to fix the issue.
Steam library folder must be writable
If the Steam Library folder is not writable, you can make it writable with the method given here:
- Make Steam Library writable
- Clear Download Cache
- Repair Steam Library folder
- Fix Hard Drive
Let us talk about them in detail.
1] Make Steam Library writable
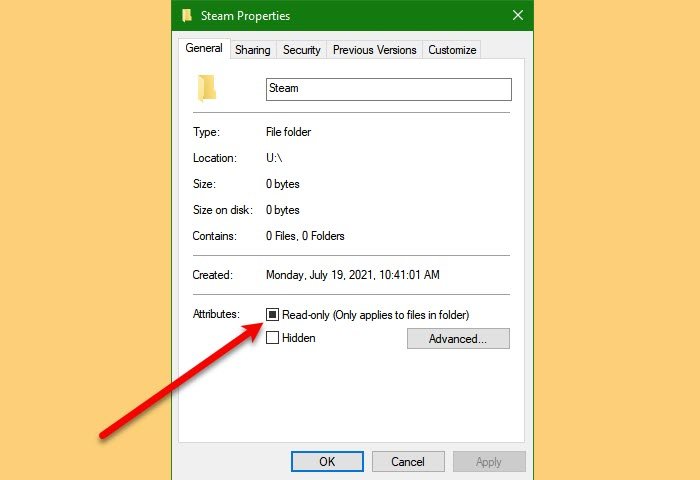
Pretty self-explanatory, if Steam library is read-only, make it writable. For that, you need to follow the given steps.
- Go to the “Steamapps” folder in the File Explorer.
- Right-click on it and select Properties.
- Make sure, you are in the General tab, tick “Read-only“, and click Ok.
Finally, restart the application and see if the issue is fixed. If the issue persists, you need to delete the folder of the game that’s giving you trouble. That folder will have a number associated with it. So, if you don’t the number of the game you are about to delete, check out steamdb.info/apps.
If you can’t delete the folder, follow the given instruction to earn the privilege to do that.
- Right-click on that folder and select Properties.
- Move to the Security tab and click Advanced.
- Now, click Change, write “Administrator“, and click Check Names.
- Click “Ok” and close all the windows.
Retry deleting the folder, hopefully, you will succeed this time.
2] Clear Download Cache
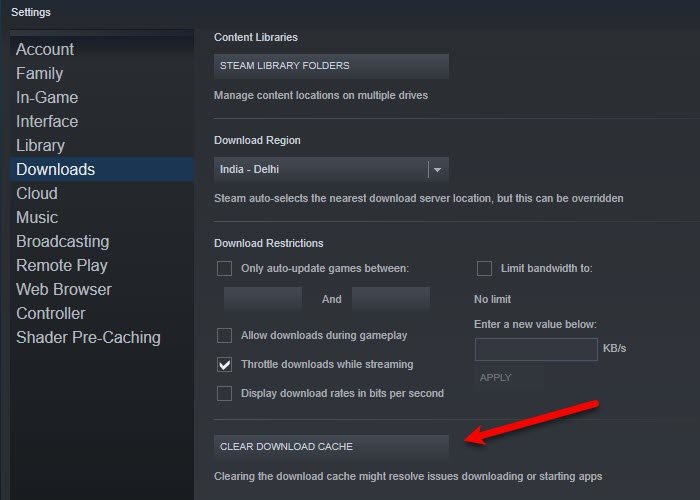
The problem can be because of corrupt data. In that case, we have to remove the Download Cache to resolve the error. To do that, you can follow the given steps.
- Launch Steam.
- Click Steam (from the top-left corner of the window) > Settings.
- Go to the Download and click CLEAR DOWNLOAD CACHE.
Do this and check if the issue persists.
3] Repair Steam Library Folder
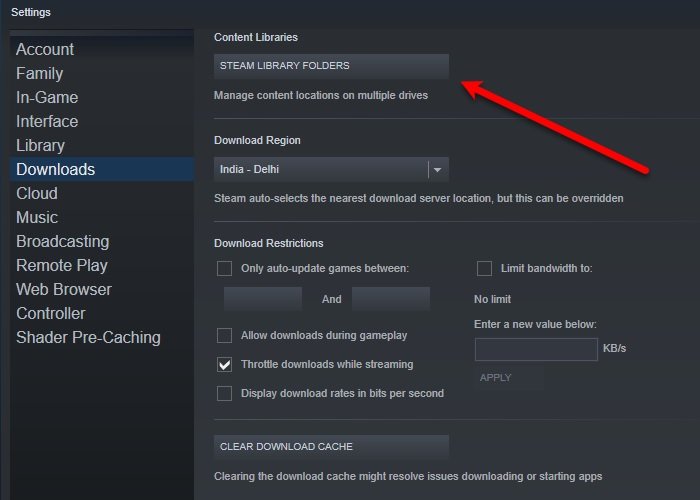
The Steam application on your computer has a feature that allows you to repair the Steam Library folder with the click of a button. To do so, follow the given steps.
- Launch Steam.
- Click Steam (from the top-left corner of the window) > Settings.
- Go to the Download and click STEAM LIBRARY FOLDERS.
- Right-click on the folder that’s giving you trouble and select “Repair Library Folder”.
Wait for Steam to repair the folder and see if the issue is fixed.
4] Fix Hard Drive
If none of the solutions work for you, the issue may be on your hard drive. This error is usually not serious and can be fixed by executing the following command in Elevated Mode Command Prompt(as an admin).
chkdsk C: /f
Note: Replace “C” with the drive you want to check.
Hopefully, these solutions will rectify the error for you.
How to clean the Steam Library folder?
If you delete a game, its residual file will be there on your computer. If you want to clean the Library folder, you need a clear. Two of the following free apps can do the job for you.
These applications will help you to clean the Steam Library folder.
How to add a new Library folder?
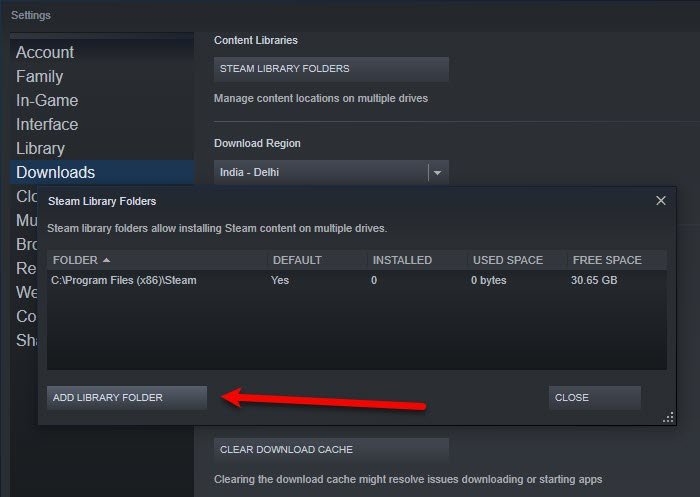
You can add a new Library folder in Steam with the help of the following methods.
- Launch Steam.
- Click Steam (from the top-left corner of the window) > Settings.
- Go to the Download, click STEAM LIBRARY FOLDERS > ADD LIBRARY FOLDER.
- Select the location where you want to create a library folder and create a new Library folder.
That’s it!
Read Next: SteamVR keeps telling to update the Graphics driver.
Leave a Reply