Users have reported that while trying to launch the Sandbox feature in Windows 11/10, they encounter the error No hypervisor was found, Please enable hypervisor support. This prevents them from using the Sandbox feature.
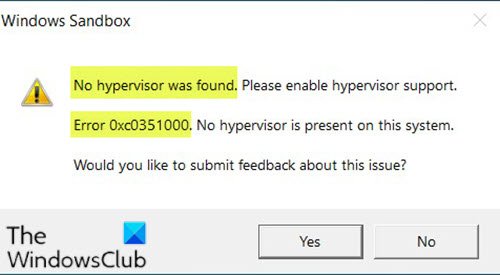
If you’re encountering the Windows Sandbox error message No hypervisor was found with error code 0xc0351000 on your Windows computer, then this post is sure to help you. When you encounter this issue, you’ll receive the following full error message:
Windows Sandbox
No hypervisor was found. Please enable hypervisor support.
Error 0xc0351000. No hypervisor is present on this system.
The Sandbox feature is a virtual, disposable environment that allows users to run programs in isolation from the Windows host. This is useful for testing suspicious or unverified programs. All files opened in the Sandbox environment are deleted when you close its window.
The error in the discussion is caused when the virtualization technology required for launching and using the Sandbox feature is either absent from the system or is disabled in the BiOS.
If the feature is absent in the system itself, there isn’t much you can do about it. However, it is rare that a computer wouldn’t support virtualization technology. Unless you are using an obsolete system, it is highly probable that the system would support virtualization.
Fix No hypervisor was found; Error 0xc0351000 Sandbox error
If you’re faced with this issue when running Windows Sandbox, you can try our recommended suggestions to resolve the issue:
- Make Sure Virtualization is Enabled
- Turn on Windows Features
- Ensure hypervisor is configured to run automatically at computer startup
Let’s take a look at the description of the process involved concerning each of the listed solutions.
1] Make Sure Virtualization is Enabled
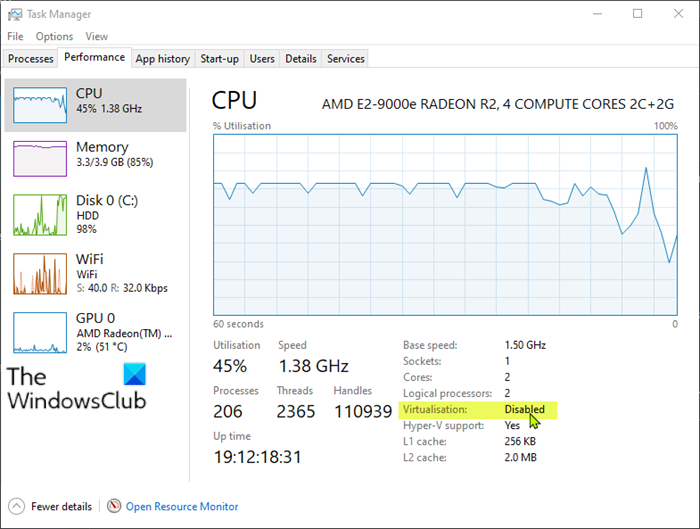
To check CPU Virtualization, you need to open the Task Manager first by right-clicking the Start button and choosing Task Manager from the menu. In the pop-up window, click the Performance tab and you can see the status of Virtualization.
If Virtualization is shown as disabled here, go ahead to enable it in BIOS or UEFI setting.
The procedure to enable the feature from the BiOS. The arrangement of option in the BIOS depends on the brand of the computer. However, the general procedure is explained below.
Restart your system and boot into the BIOS mode. For my system, I use the Assist button to enter the BiOS mode. For HP system, users press F10 immediately after the system restarts. It depends on the brand of the computer.
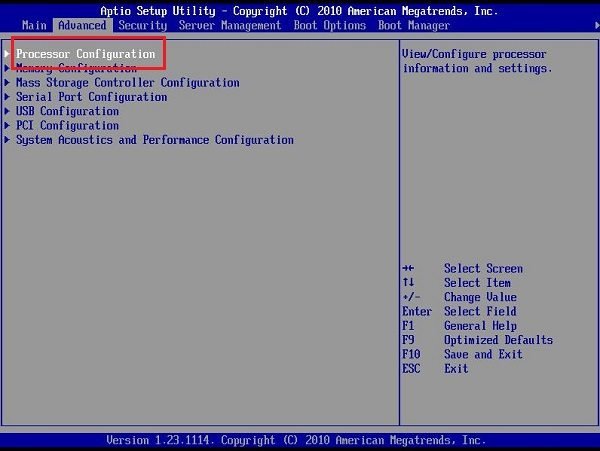
In the Advanced tab, click on Processor Configuration.
Search for Intel Virtualization Technology, Intel® VT for Directed I/O, or Virtualization Technology from the list. Use the arrow keys to navigate to the option and press Enter to activate the Enable/Disable switch.
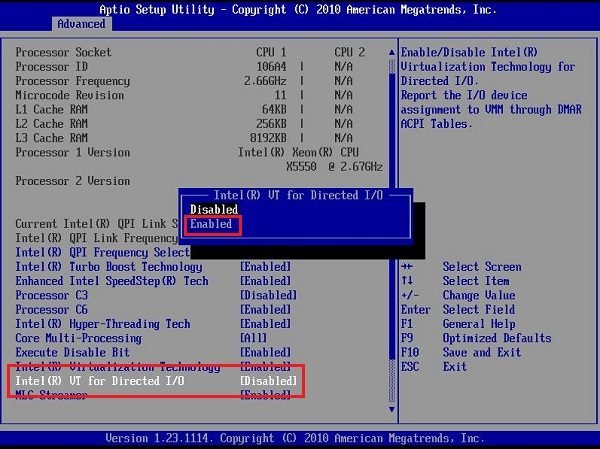
Select the Enable option. Save these settings by hitting F10 on the keyboard. Alternatively, you can select the Save option in the BIOS.
Exit the BIOS mode and boot into the Windows 10 OS. Check if the issue is resolved.
You also need to enable Hyper-V on your computer. Also, make sure that you have the SLAT or Second Level Address Translation support enabled on your CPU.
2] Turn on Windows Features
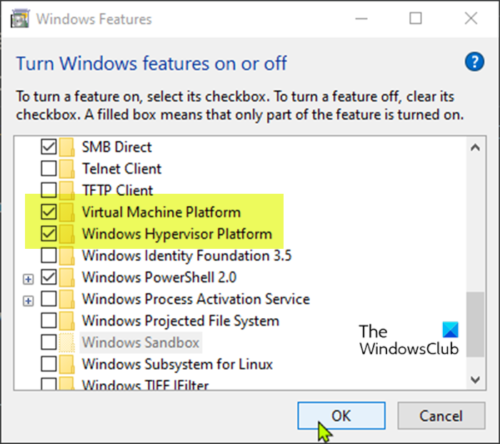
Windows Sandbox can run successfully with the help of some operating system-based features.
Do the following:
- Type Windows Feature in the search box.
- Choose Turn Windows features on or off among the listed apps to open it.
- Locate the features labeled Virtual Machine Platform and Windows Hypervisor Platform, and select the check boxes beside them.
- Click OK button to save changes.
Reboot your computer to see if the No hypervisor was found with error code 0xc0351000 issue has been resolved.
3] Ensure hypervisor is configured to run automatically at computer startup
This solution requires you to ensure the hypervisor is configured to run automatically at computer startup. In order to make this configuration, you need to add an entry to the Boot Configuration Data (BCD) in Command Prompt.
Do the following:
- Press Windows key + R to invoke the Run dialog.
- In the Run dialog box, type cmd and then press CTRL + SHIFT + ENTER to open Command Prompt as admin.
- In the command prompt window, type the command below and press Enter.
BCDEDIT /Set {current} hypervisorlaunchtype auto
- Reboot your computer and run Command Prompt again as above.
- Now type the command below and press Enter.
bcdedit
In the output, ensure the item hypervisorlaunchtype status is showing Auto. This means that hypervisor has been set to run at computer startup.
Restart your computer. The issue should now be resolved.
I hope this helps!
Leave a Reply