Microsoft Windows provides users with the facility of adding multiple accounts on one PC. If users want, they can also remove the added accounts from their system. But some users have reported that they were unable to remove their account because the Remove button was missing on their system. If you are experiencing such a problem, this post will help you solve the issue.
Remove button for Microsoft Account is missing
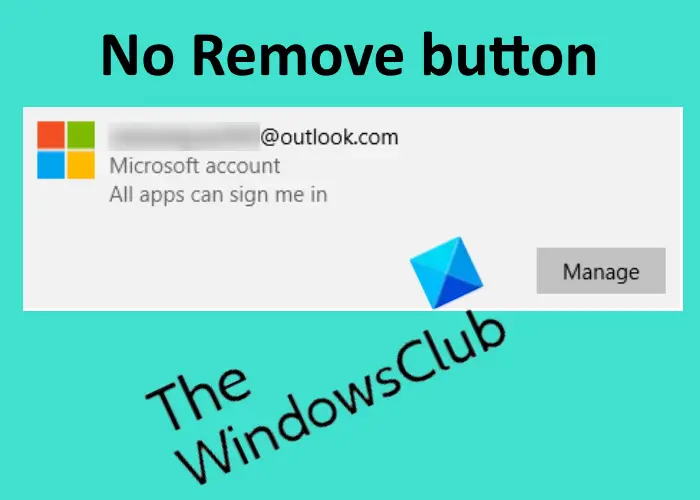
No Remove button for Microsoft Account in Windows
To remove an account, go to “Settings > Accounts > Email & Accounts.” Now, select the account you want to remove and click on the Remove button. But according to the users, they did not find the Remove button there; only the Manage button appeared.
The following methods will help you remove your account:
- Use the “Stop signing in to all Microsoft apps automatically” option.
- Unlink/Disconnect your account.
- Delete the account online.
- Remove account via Control Panel.
- Remove the account from the Advanced User Accounts Control Panel.
- Delete account via the Registry Editor.
1] Use the “Stop signing in to all Microsoft apps automatically” option
Many users have found this method useful. Maybe it will also work for you.
Open the Settings app on your system and click on Accounts. Now, click on Your info on the left pane. There you will find a link named Stop signing in to all Microsoft apps automatically. Click on this link. After that, Your info will display Local Account instead of your email.

Click on the Email & Accounts on the left pane and select your account to delete. The Remove option should be available now.
2] Unlink/Disconnect your account
If you have added your school or work account to your computer, you can remove it simply by disconnecting the account. Go to “Settings > Accounts > Access work or school” and click on the account which you want to remove. There you will see the Disconnect button. Click on it and follow the on-screen instructions.
3] Delete the account online
If you want to remove a Family user account but are unable to do so because of the missing Remove button, you can delete the account online. We have listed the process to do so.
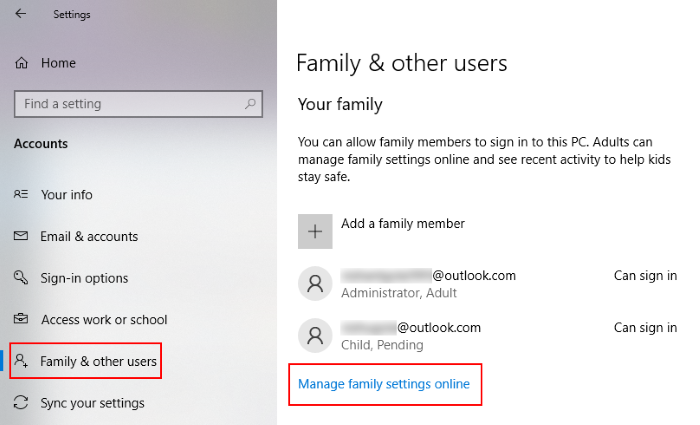
Launch the Settings app on your system. After that, click Accounts and select the Family & other users option from the left pane. You will see the “Manage family settings online” link on the right side. Click on that link. It will open a page in your default web browser.
In your web browser, you have to sign in to your Microsoft account as an administrator. Under the Family tab, you will see all the added accounts to your Windows computer. To remove the account of a particular member of your family group, click More options and select Remove from Family Group.
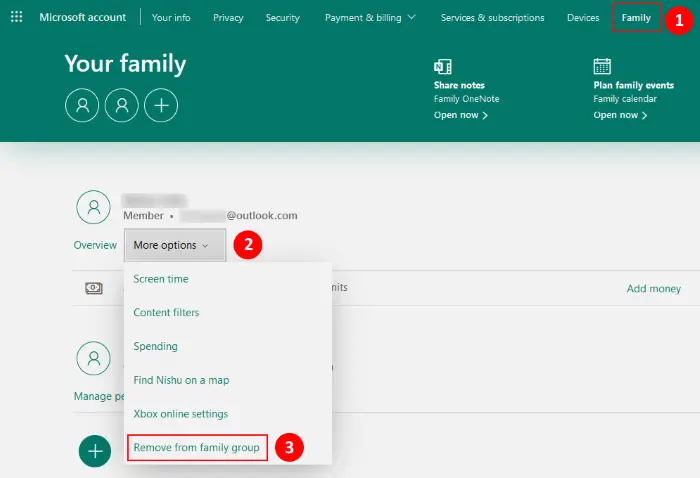
This will also delete the account from your computer.
If you are a member of the Family account, you do not have administrative privileges. In such a case, you can remove your account by selecting the Leave family group option after signing into your Microsoft Family account.
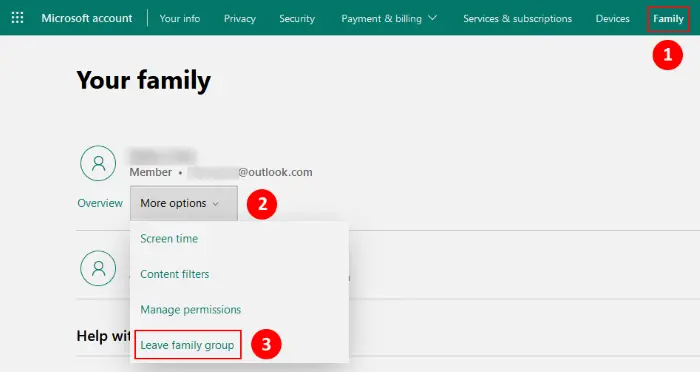
Follow the instructions:
- Go to “Settings > Account > Family & other users.”
- Click on the “Manage family settings online” link on the right pane. This will open a page in your web browser.
- Sign in to your Family account.
- Click on the Family tab and then click the More option under your account.
- Now, click Leave family group. You will see a popup window in which you have to click on the Remove button.
This will remove your account automatically from the computer on which you have added it.
4] Remove the account via Control Panel
You can also delete an account via Control Panel. Before you begin, make sure that you are currently signed in as an administrator. You can check this in the Settings app. For this, launch the Settings app and go to “Accounts > Your info.” If you are signed in as an administrator, Windows will display Administrator under your name.
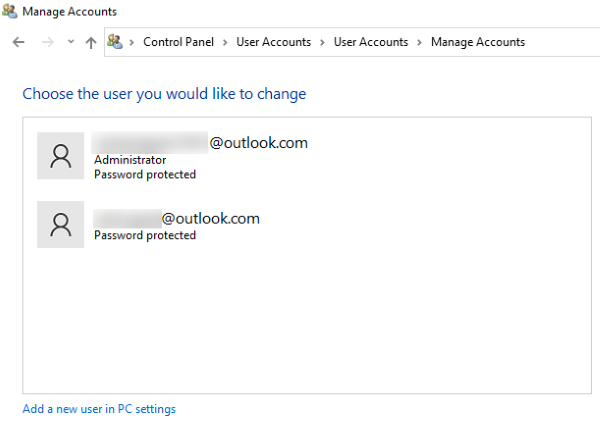
Now, follow the below-listed steps:
- Launch the Control Panel and go to “User accounts > Remove user accounts.” You will see there the list of all the accounts that you have added to your computer.
- Click on the account which you want to remove and select the Delete the account option.
- After that, Windows will display two options, Delete files and Keep files.
- If you select the Delete files option, all the files associated with that particular account will be deleted. If you do not want to delete the files and data along with the account, you can select the latter option.
You have to restart your system to let the changes take effect.
5] Remove the account from the Advanced User Accounts Control Panel
You can also use the Advanced User Accounts Control Panel to delete the user accounts from your system. First, sign in to Windows by using your administrative account’s details.
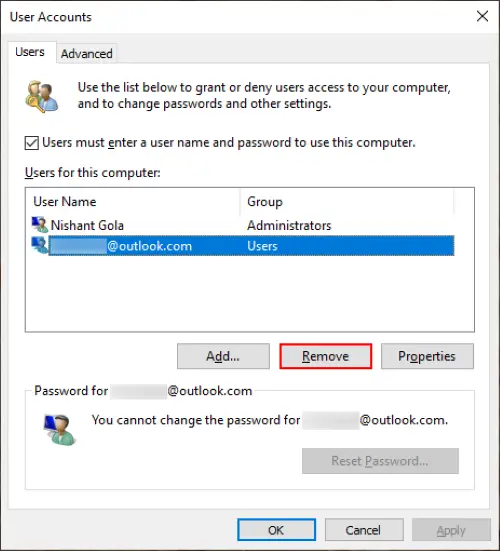
Follow the below-listed steps:
- Press Win + R keys to launch the Run command box. Now, type
netplwizand press OK. This will open the Advanced User Accounts Control Panel window. - Select the user account that you want to remove and click on the Remove button.
- Click Apply and then OK to save the settings.
- Restart your system and see if it helps.
6] Delete account via Registry Editor
If you are signed into your system as an administrator, you can delete any account by using the Registry Editor. Before you proceed, we suggest you create a system restore point and backup your registry.
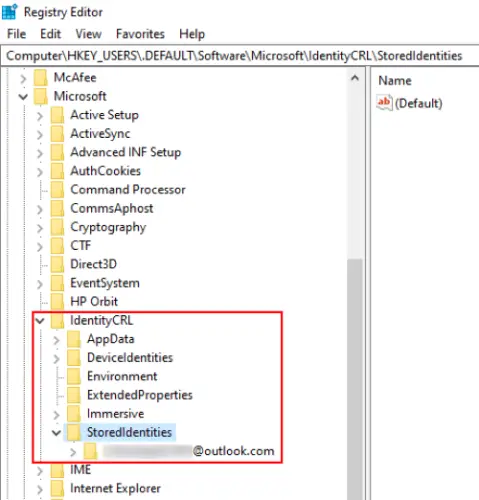
Follow the instructions given below carefully:
Press Win + R keys to launch the Run command box. Type regedit into the box and click OK. This will open the Registry Editor.
Navigate to the following path:
HKEY_USERS\.DEFAULT\Software\Microsoft\IdentityCRL\StoredIdentities
Expand the StoredIdentities key. There you will find all the Microsoft accounts that you have added to your computer. Right-click on the account which you want to remove and select Delete. Click Yes in the confirmation box.
Restart your system.
Hope it helps.
Related posts: