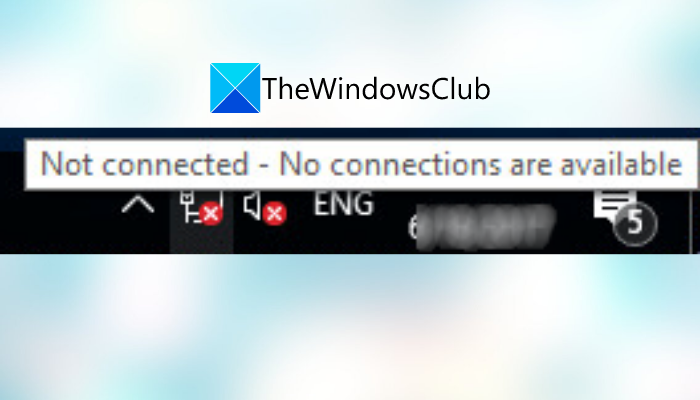
Here is a full guide to fix the Not connected, No connections are available error on Windows 11/10. Windows users encounter various network errors and problems. One of such errors is the error pop-up that says “Not connected, No connections are available.” You see a cross (X) mark in red on the WiFi icon and when you hover the mouse over the WiFi icon, you see this error message. This error occurs even when there are network connections available.

Internet is a necessity in the modern world as almost every task and activity needs you to be connected to the internet. This error prevents you from connecting to a network connection leaving you frustrated. So, it becomes crucial to get the problem fixed as soon as possible. If you are encountering the same problem, this article will help you, In this guide, we are going to mention all the possible fixes to resolve the “Not connected, No connections are available” error on your Windows 11/10 PC.
Before trying the solutions we have mentioned, you can try some standard practices to fix the problem like:
- Restart your PC to counter some temporary glitches.
- Make sure your WiFi is turned on.
If that doesn’t fix the problem, go ahead with the methods we have listed below.
Why is my computer showing No network connections?
The reason for this error message might vary for individuals. As per user reports, here are the possible causes that might result in the “Not connected, No connections are available” error on Windows 11/10 PC:
- This error might be linked to faulty and out-of-date network drivers on your system. In that case, you should be able to fix the error by updating your network adapter drivers.
- Some users have faced the problem after a driver update. If the scenario is applicable, you should be able to fix the issue by rolling back to the older driver.
- The problem might be caused due to router cache or some other internet problem. You should be able to fix the error by resetting your router if the scenario applies.
- It can also be caused if the power mode for your network adapter is set to the power-saving mode. To fix the problem, change your power settings.
- In some instances, the error might be triggered due to antivirus protection hindering your network connection.
Now, let us check out the solutions.
Not connected, No connections are available in Windows 11/10
Here are the methods that you can try to fix the “Not connected, No connections are available” error message in Windows 11/10:
- Restart your router.
- Run Network Troubleshooter.
- Change power management settings.
- Update network adapter drivers.
- Reinstall your network drivers.
- Rollback to the older diver.
- Disable your firewall.
- Flush your DNS cache.
- Remove the problematic application.
Let us discuss these solutions in detail now!
1] Restart your router
The problem might be related to your router. So, the first thing you should do to fix the error is to reset your router. In case the issue is caused because of a temporary glitch with your router, this should fix the problem.
You should try power cycling your router. For that, unplug your router and then wait for about a minute to let it shut down completely. After that, plug it back and restart the router. This will clear the router cache and reset the networking device.
See if the connection error notification still pops up when you click on the WiFi icon. If it does, you should try some other method to fix the problem.
Read: WiFi is turned off and won’t turn on in Windows 11/10.
2] Run Network Troubleshooter
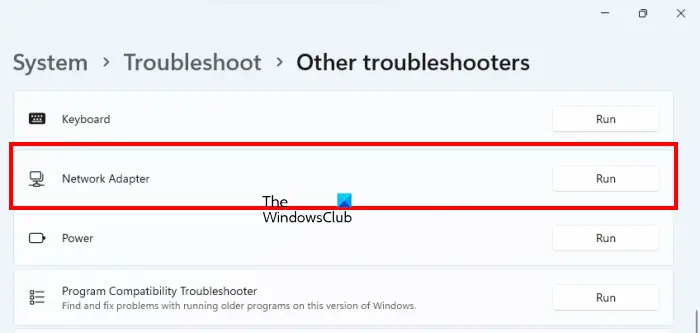
Windows 11/10 has automated troubleshooting tools, known as troubleshooters. You can run a dedicated troubleshooter on your system depending on the problem you are experiencing on your Windows device. Network Troubleshooter is one such troubleshooter that helps you resolve network problems (if possible). The steps to run Network Troubleshooter are provided below:

- Open Windows 11/10 Settings.
- Go to “System > Troubleshoot.”
- Click Other troubleshooters. In Windows 10, you will find Additional troubleshooters in place of Other troubleshooters.
- Select Network Adapter and click Run.
3] Change power management settings

This error can be a result of your power management settings. If the power mode for your wireless adapter is not set to maximum performance, it might cause this problem. So, try changing your power management settings if the scenario applies. Here are the steps to do that:
- Firstly, click on the taskbar search button and then enter Change plan settings in the search box.
- From the appeared results, click on the Edit power plan option.
- Now, tap on the Change advanced power settings option to open up the Power Options window.
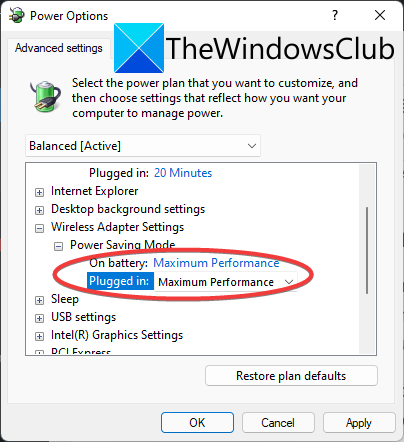
- In the Power Options window, locate the Wireless Adapter Settings drop-down and expand it.
- Next, expand the Power Saving Mode option and then set the On Battery and Plugged in options to Maximum Performance.
- Finally, click on the Apply > OK button to apply changes.
See if this method fixes the problem for you.
4] Update network adapter drivers
This problem is most likely to be associated with your network adapter drivers. As we know, faulty and out-of-date drivers are known to cause various errors and issues on the system. If the scenario applies to you, you should try updating your network adapter drivers and see if the problem is fixed.
You can manually update drivers in Windows 11/10 or use a free third-party driver updater to update drivers automatically. Besides that, you can also visit the official website of the manufacturer and download the latest version of your drivers from there. I would recommend you to opt for the latter method.
After updating your network adapter drivers, reboot your PC and then check if the issue is fixed or not. If not, move on to the next potential fix to resolve the error.
See: WiFi Adapter not working on Windows 11/10 computer.
5] Reinstall your network drivers
If you are unable to fix the problem by updating your wireless card driver, the problem might be caused due to corrupted or faulty driver installation. In that case, you should be able to fix the error by reinstalling your network drivers. So, first, uninstall the driver and then reboot your PC. The new driver should be automatically installed on the next startup. If not, you can get the latest drivers from the official website of the device manufacturer and then install the driver. Hopefully, this will fix the issue for you.
6] Roll back to the older diver
In some cases, the error might be triggered due to a recent driver update. As reported by some affected users, they were able to fix the error by rolling back to the older version of your driver. In case you are dealing with the same problem, this solution might work for you as well, so try doing that. You can roll back your driver using this guide.
Read: How to fix Unidentified Network in Windows 11/10.
7] Disable your firewall
Some users have suggested that the problem is caused due to their firewall. It might be interfering with your system and leading to the “Not connected, No connections are available” error notification. If that is the case, you can try disabling your firewall temporarily to fix the problem.
To disable your firewall, simply open the Windows Defender Firewall and then select the Turn Windows Defender Firewall on or off option from the left panel. Now, choose the Turn off Windows Defender Firewall (not recommended) option for both Private and Public networks. If the problem is resolved after doing so, your firewall was the main culprit. To fix the issue, you will have to change some settings in your firewall. If that doesn’t help, maybe it’s time to consider some other firewall software for your system.
See: Internet or WiFi gets disconnected after Sleep in Windows 11/10.
8] Flush your DNS cache
Flushing the DNS cache clears IP addresses and other DNS records from your system. This action is helpful in many cases, like when you are experiencing network issues. If the problem still persists, we suggest you flush your DNS cache and see if it helps.
9] Remove the problematic application
There might be some problematic application on your PC that is interfering with your network connections. It could be your third-party antivirus, firewall, or some other third-party suite. Some users have reportedly faced this problem with Zone Alarm Firewall and they were able to fix the issue by uninstalling it.
You can try troubleshooting the problem in a clean boot state. Perform a clean boot and then check whether the problem is resolved. If yes, the problem is most likely caused by software conflicts. You will have to remove the software causing the conflicts to resolve the problem. You can manually uninstall the programs via the Settings app, or use a free software uninstaller to completely remove the program.
To start your system in a Clean Boot state, you have to disable all the third-party apps and services via MSConfig. After starting your system in the Clean Boot state, check if you can access the internet or get the same error. If the error does not occur in the Clean Boot state, any third-party software or service is the culprit. Now, enable some of the startup apps and services, and start your system in a normal state. See if the problem persists. If yes, one of the startup apps and services that you have just enabled is the culprit. In this way, you can identify the problematic third-party app and service.
Why can’t connect to this network Windows 11?
If your Windows 11 PC is unable to connect to a network, make sure the problem is system-related, not network-related. Try connecting to the same network on a different device like your mobile and see if you are able to connect to the network. If you are able to connect to the network on other devices, the problem is with your system. You can try rebooting your computer, adding the network again, disabling the firewall, updating your Windows, rolling back your driver, or running the Network troubleshooter.
Check out this guide to fix the error.
Read: Fix No internet, Secured WiFi error on Windows 11/10.
That’s it!
Now read:
Leave a Reply