If you notice that the NVIDIA Control Panel is missing on your computer after you upgraded to Windows 11 or Windows 10 or installed new updates on your Windows PC, then this post is intended to help you. In this post, we will identify the possible causes and provide the most appropriate solutions you can try to help you remediate this issue.
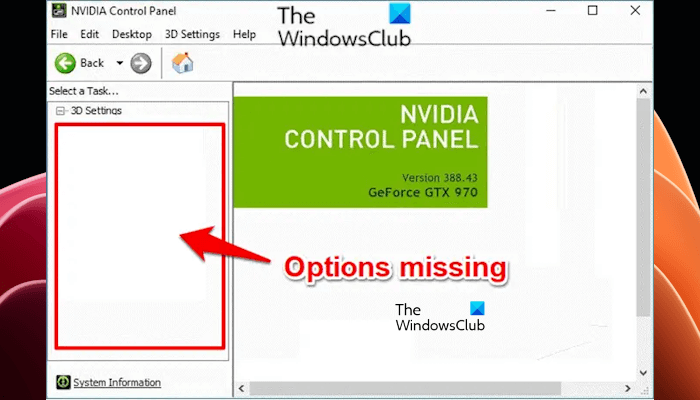
The main cause of this issue seems to be Windows Update or Upgrade, which makes the graphics drivers incompatible with the new update. But the issue could also be because of outdated drivers, corrupt NVIDIA Control Panel, missing registry subkeys, values, or some random error.
What is NVIDIA Control Panel?
It is software offered by NVIDIA to manage graphics settings on the computer, which is using NVIDIA GPU. It can be the integrated GPU or a dedicated graphics card. The software works on both. You can configure GPU settings and optimize for the best experience for gaming, movies, and reading.
NVIDIA Control Panel missing
The control panel offers to enhance the Geforce Experience on Windows PCs with an NVIDIA graphics card. If the NVIDIA Control Panel is missing on your Windows 11/10 computer, you can try our recommended solutions below in no particular order and see if that helps resolve the issue.
- Copy the NVDisplay.Container file to the Startup folder
- Manually open NVIDIA Control Panel
- Restart NVIDIA Services
- Unhide your NVIDIA Control Panel
- Uninstall and reinstall NVIDIA Graphics Driver
- Reinstall NVIDIA Control Panel app from Microsoft Store
Let’s take a look at the description of the process involved concerning each of the listed solutions. Remember, there might not be a permanent solution
1] Copy the NVDisplayContainer file to the Startup folder
When you place a file or a program exe in the Startup folder, Windows will open that file and launch that program automatically on system startup. The first thing that you can try is to place the NVDisplayContainer file in the Startup folder and see if this works.
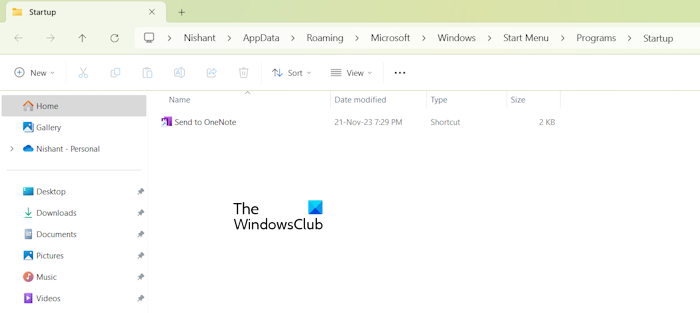
Press Windows key + E to open File Explorer. Navigate to the directory below:
C:\Program Files(x86)\NVIDIA Corporation\Display.NvContainer
Note: If you cannot locate the NVIDIA folder in the Program Files (x86) folder, look for it in the Program Files folder.
- At the location, right-click the NVDisplay.Container file and copy it.
- Now, open the Startup folder.
- In the Startup folder that opened, do a right-click, and paste the copied NVDisplay.Container file.
- Next, right-click on the NVDisplay.Container file you pasted in the Startup folder and set the file to run as administrator.
- Restart your computer.
On boot, check to see if the NVIDIA Control Panel is back on your desktop context menu and system tray.
Read: NVIDIA Graphics driver automatically uninstalls after reboot.
2] Manually open NVIDIA Control Panel
You can also try opening the NVIDIA Control Panel manually and see if it helps. The following instructions will guide you on this:
Press Ctrl + Shift + Esc together to open Task Manager. Locate the NVIDIA Container on the list. Right-click on the NVIDIA Container and select Open File Location from the context menu. Once you click on Open File Location, you will be taken to this location:
C:\Program Files\NVIDIA Corporation\Display.NvContainer
Make sure to click on the back button to navigate to the NVIDIA Corporation folder:
C:\Program Files\NVIDIA Corporation
Now, double-click on the Control Panel Client folder and find nvcplui.exe. Right-click on nvcplui.exe and select Run as administrator. Restart your computer.
On boot, check to see if the missing NVIDIA Control Panel is back on your desktop context menu and system tray. If not, continue with the next solution.
3] Restart NVIDIA Services
NVIDIA Services are crucial for the proper functioning of the NVIDIA Control Panel app on a Windows computer. If any of these services is not running or disabled, you will experience issues with the NVIDIA CControl Panel. Therefore, check if the NVIDIA services are running or not. If any of these services is not running, right-click lon it and select Start. If all these services are already running, right-click on them one by one and select Restart.
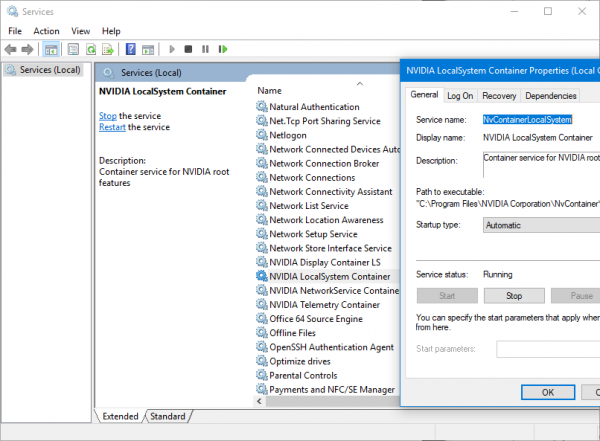
Press the Windows key + R to invoke the Run dialog. In the Run dialog box, type services.msc and hit Enter to open Services. In the Services window, scroll and locate the following services:
- NVIDIA Display Container LS
- NVIDIA LocalSystem Container
- NVIDIA NetworkService Container
- NVIDIA Telemetry Container
Now. Double-click on the NVIDIA Display Container LS entry to edit its properties. In the properties windows, click on Stop, then select Automatic from Startup type drop-down. Wait for a few minutes, then again click on Start to start the particular service.
Repeat the steps for all the other remaining services of NVIDIA. Restart your computer. On boot, check if the issue is resolved. If not, continue with the next solution.
4] Unhide your NVIDIA Control Panel
Do the following:
- Open the Run dialog box, then type control and hit Enter to open the Control Panel.
- Now from View by drop-down, select Large icons.
- Under Control Panel, select NVIDIA Control Panel.
- Once the NVIDIA panel opens, click on Desktop from the menu.
- Click on Add Desktop Context Menu to checkmark it.
Now check your desktop; the NVIDIA Control Panel should be present there.
5] Uninstall and reinstall NVIDIA Graphics Driver

This solution entails that you uninstall the NVIDIA GPU driver via Device Manager or use the Display Driver Uninstaller to reboot the system. Before running the DDU tool, download the latest version of the NVIDIA graphics card driver from the official website of NVIDIA. After rebooting the system, run the installer file to reinstall the NVIDIA graphics card driver.
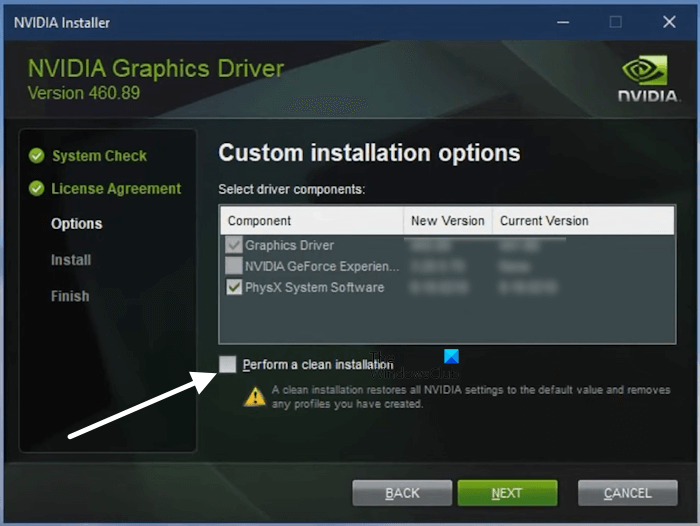
Alternatively, you can also perform a clean installation of the NVIDIA graphics card through the NVIDIA installer file. This will not require you to install the third-party DDU utility. To do this, run the installer file you have downloaded from NVIDIA’s official website. Now, on the installation wizard, select the Custom Installation option. After that, select the Perform a clean installation checkbox and then click NEXT.
FIX: NVIDIA Control Panel not opening.
6] Reinstall NVIDIA Control Panel app from Microsoft Store
If the NVIDIA Control Panel is already installed on your system, first, you need to uninstall it. The following instructions will help you uninstall the NVIDIA Control Panel on your system.
- Press the Windows key + I to open Settings.
- Click on Apps.
- Click on Apps & Features from the left menu.
- Search the NVIDIA Control panel in the search box.
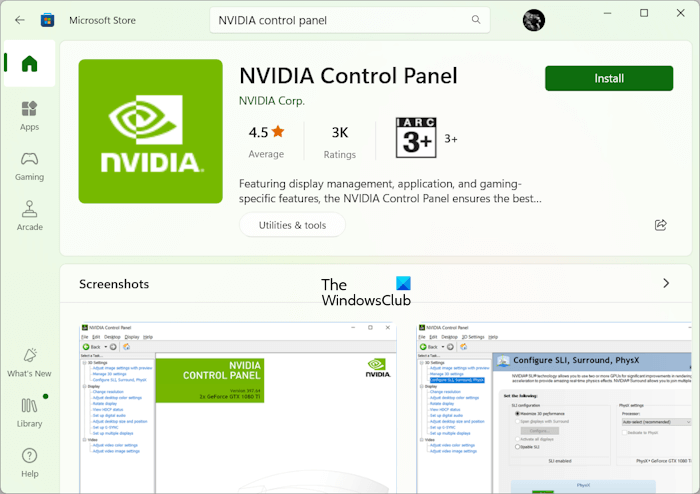
After uninstalling the NVIDIA Control Panel, open the Microsoft Store, and search for the NVIDIA Control Panel. When it appears in the list, install it. Onde installed. You can further configure it by finding it in the Start menu and launching it. After the installation, the issue should be resolved.
NVIDIA Control Panel app is useful when you need to configure the graphics experience in Windows 11/10. It offers tons of features to tweak the visual effects and the overall performance of games. It also offers an easy-to-use interface, but at times it may not work as expected. This is where the solutions come into the picture. I hope you tried it, and it helped.
That’s it. I hope this helps.
How do I add the Nvidia control panel to right-click in Windows 11?
By default, the NVIDIA Control Panel is added to the right-click context menu in Windows 11. However, if it is not there, you can add it manually. You can do this via the NVIDIA Control Panel app. Open the NVIDIA Control Panel app and then click on Desktop on the Menu bar. Now, select the Add Desktop Context Menu option. The same can also be done via Windows Registry. However, the Registry method can be complicated for some users.
Does my PC have NVIDIA?
There are multiple ways to check whether your PC has an NVIDIA graphics card. Open the Device Manager and expand the Display Adapters branch. You will see there which graphics card is installed on your system. For example, on my laptop, I have an AMD Radeon graphics card. You can also check the same via the System Information app. Open the System Information app and expand the Components branch. Now, select the Display option. You will see the name of your graphics card on the right pane.
Read next: GeForce Experience driver installation failed.
Leave a Reply