Are you unable to save settings in NVIDIA Control Panel on Windows? If you have an NVIDIA graphics card, NVIDIA Control Panel is installed on your PC. It enables you to manage and control graphics driver configurations and other settings related to NVIDIA utilities. It is a handy application, but it is not devoid of issues and errors. Some NVIDIA users have reported that they cannot save new settings in NVIDIA Control Panel. While they can change the values, the settings won’t save. Why doe this issue occur, and how can we get rid of it? Let us learn in this post.

How do I save NVIDIA Control Panel settings?
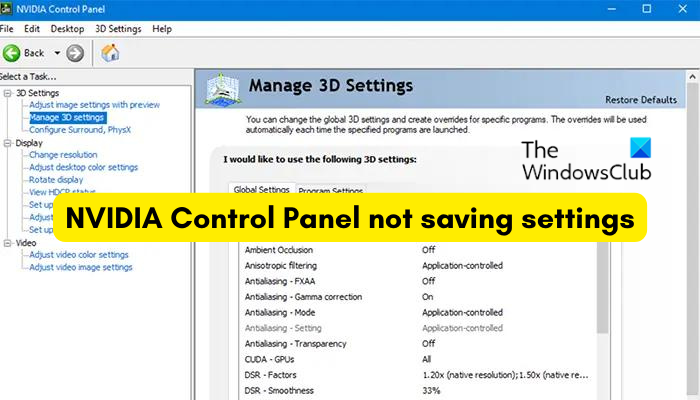
To save NVIDIA graphics settings, right-click on your desktop and choose NVIDIA Control Panel. Now, click on the 3D Settings option and then select the Manage 3D settings option. After that, you can modify the required graphics options from Global Settings and Program Settings. Once done, click on the Apply button to save new settings. Similarly, you can also save Display and other settings.
But, some users have reported being unable to apply and save new NVIDIA graphics, display, and other settings on their PC. Whenever they click the Apply button, the changed settings don’t save.
This issue mainly occurs when you don’t have administrator rights to modify settings. So, make sure you have the necessary permissions to make changes. You can try logging in or launching NVIDIA Control Panel with admin rights and see if it works.
Apart from that, there might be a conflicting third-party program that is causing the issue. If you started experiencing this issue after installing an app recently, you can analyze the culprit and then disable/uninstall it to check if the problem is gone.
Outdated graphics drivers or your corrupted NVIDIA drivers can also cause this issue.
NVIDIA Control Panel not saving settings
If you can’t save settings in NVIDIA Control Panel on Windows 11/10 PC, you can use the following fixes to resolve the issue:
- Modify permissions for the NVIDIA Corporation folder.
- Update your NVIDIA graphics driver.
- Reinstall the NVIDIA driver.
- Disable your antivirus software temporarily.
1] Modify permissions for the NVIDIA Corporation folder

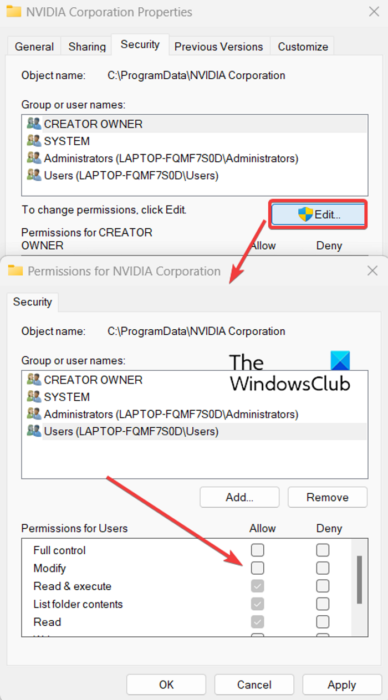
You will not be able to apply and save settings in NVIDIA Control Panel if you lack the required permissions to make changes to NVIDIA graphics settings. So, make sure you are signed into Windows with an administrator account. If you are already logged in with an administrator account but the issue continues, you can try changing permissions for the NVIDIA Corporation folder on your PC to fix the issue. Here are the steps to do that:
Firstly, open File Explorer using the Win+E hotkey and navigate to the following location: C:\ProgramData
Now, scroll down to the NVIDIA Corporation folder and right-click on it. From the appeared context menu, choose the Properties option.
After that, move to the Security tab in the Properties window and click on the Edit button.
In the opened dialog window, select your username and tick the checkboxes present under the Allow column.
Once done, press the Apply > OK button to save changes and exit the Properties window.
You can now open NVIDIA Control Panel and see if you can save new settings or not. If the issue persists, use the next solution to fix it.
See: NVIDIA Control Panel missing on Windows.
2] Update your NVIDIA graphics driver

The problem that you are unable to save NVIDIA settings might be caused due to out-of-date graphics card drivers. So, if the scenario applies, you can update your NVIDIA graphics driver to its latest version. You can check for available updates in your Windows Settings. Press Win+I to open Settings, go to the Windows Update tab, and click on Advanced options > Optional updates. Look for NVIDIA graphics driver updates and download and install them.
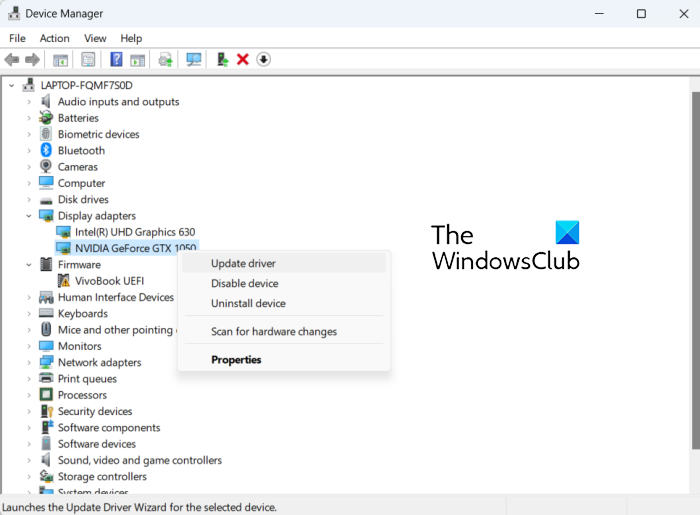
You can update NVIDIA drivers using Device Manager using the below steps:
- First, press Win+R to open Run and enter devmgmt.msc in it to open the Device Manager app.
- Now, expand the Display adapters category and right-click on your NVIDIA driver.
- Next, select the Update driver option from the context menu.
- In the next prompt, choose the Search automatically for drivers option and then follow the onscreen instructions to update the driver.
- Once done, restart your computer and check if you are able to save NVIDIA graphics settings or not.
If the issue remains the same, you can move on to the next fix.
Read: NVIDIA custom resolution not supported by your display.
3] Reinstall the NVIDIA driver
In case updating your NVIDIA graphics driver doesn’t help, there are chances that the driver is corrupted or damaged which is why it is causing issues like this. So, in such scenarios, uninstalling the corrupted driver and then reinstalling a clean copy of it back on your PC would help you fix the problem.
To do that, you can follow a similar procedure as we did in method (2). Launch Device Manager, expand Display adapters, right-click on NVIDIA driver, and select the Uninstall device option. Then, follow the prompted instructions and once the uninstallation is complete, you can reboot your computer. Windows will automatically reinstall the missing NVIDIA driver on the next startup. You can then check if the problem is resolved.
See: NVIDIA Control Panel Access denied error.
4] Disable your antivirus software temporarily
It might be your overprotective antivirus suite that is interfering with the NVIDIA Control app and preventing you from saving NVIDIA settings. In most cases, third-party antivirus tools cause such issues due to a false positive alarm against a process related to the app. Each antivirus has certain rules and signatures to identify threats and viruses on your computer. However, it can be wrong in some cases.
Now, if you want to check the same, you can temporarily turn off your antivirus software. After that, open NVIDIA Control Panel and check if you can save settings or not. If yes, you can be sure it was your antivirus that is causing this problem. In that case, you can permanently resolve the issue by whitelisting NVIDIA Control Panel through your antivirus.
You can navigate to the exception/exclusion/whitelist settings of your antivirus. For example, Avast users can move to the Home > Settings > General > Exclusions section and add NVIDIA Control Panel here. Similarly, you can add it to Home > Settings > Components > Web Shield > Exceptions in AVG.
Hopefully, this will help.
Read: NVIDIA Image Scaling not showing or working in Windows.
Why does Nvidia Control Panel only show 3D settings?
If you see only 3D Settings in NVIDIA Control Panel, the problem might be caused due to a temporary glitch with the process. So, in that case, you can restart the NVIDIA Control Panel process from Task Manager. Open Task Manager using Ctrl+Shift+Esc and select the NVIDIA Control Panel task in the Processes tab. After that, press the End task button to close it and then relaunch it to check if the issue is resolved. You can also update the graphics driver and disable the onboard graphics card to fix the issue.
Now read: How to fix NVIDIA Control Panel not opening on Windows?
Leave a Reply