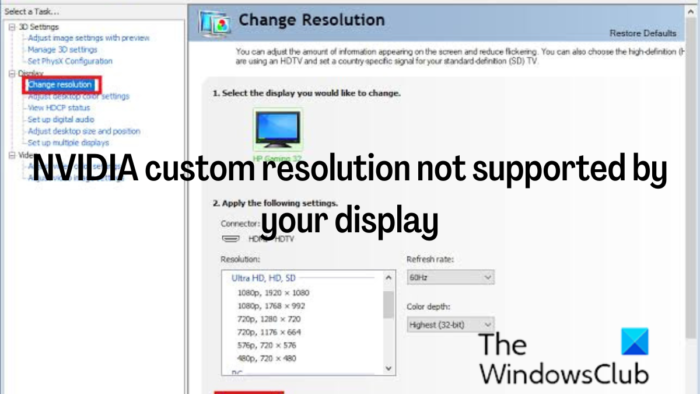
Is your NVIDIA Control Panel Custom Resolution greyed out? If Custom Resolution is not showing up in the NVIDIA Control Panel, then this post will help you resolve the issue.
Users may sometimes want to set a custom display resolution on their monitor. With NVIDIA, you can set any resolution you prefer for your display as long as your monitor allows it. Some users face issues while trying to set a custom resolution for their display on NVIDIA GPU. Now, if the NVIDIA custom resolution is not supported by your display, follow the procedures discussed below to set a custom resolution on your Windows computer without any issues.

Fix NVIDIA Custom Resolution not supported by your display
When setting a custom resolution on your PC, what you do is force your monitor to display a particular resolution than what it supports. But if your NVIDIA Control Panel Custom Resolution is greyed out or not showing up, then follow these suggestions:
- Update your NVIDIA display driver
- Set Scaling Device as GPU
- Enable resolution not supported by display and set your custom resolution
These solutions are arranged in the way you should observe them, and you are to use the three solutions together to be able to fix this issue.
NVIDIA Control Panel Custom Resolution is greyed out or not showing up
1] Update your NVIDIA display driver

If you experience the NVIDIA custom resolution not supported by your display issue, the very first thing you should do is update the NVIDIA display driver on your computer. This is because your PC may be using an outdated NVIDIA display driver that may conflict with your display. Hence follow the steps below to update the NVIDIA driver:
- Right-click the Start menu and tap on Device Manager.
- On the Device Manager window, navigate to the Display adapter option and double-click it.
- Right-click the NVIDIA display driver option and select Update driver.
You can also download the latest NVIDIA drivers and install them.
Read: How to create and set Custom Resolution on Windows
2] Set Scaling Device as GPU

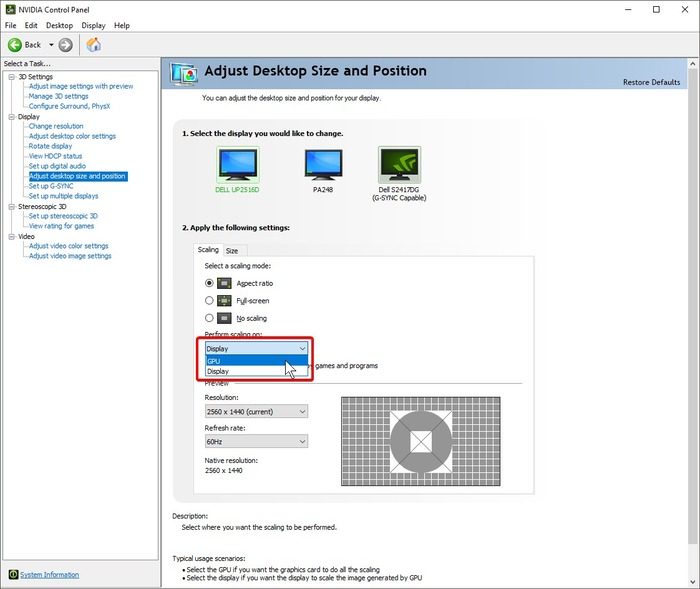
After successfully updating the NVIDIA display driver, the next thing you should do is set your PC scaling device as GPU. Here is how to go about it:
- Right-click on a space on your desktop screen and tap on the NVIDIA Control Panel.
- On the control panel, select Adjust desktop size and position on the left pane.
- Now, click on the box under Perform scaling on and choose GPU.
Fix: Resolution not supported Monitor error
3] Enable resolution not supported by display

Following the above procedure, you should enable resolution not supported by display using the below steps.
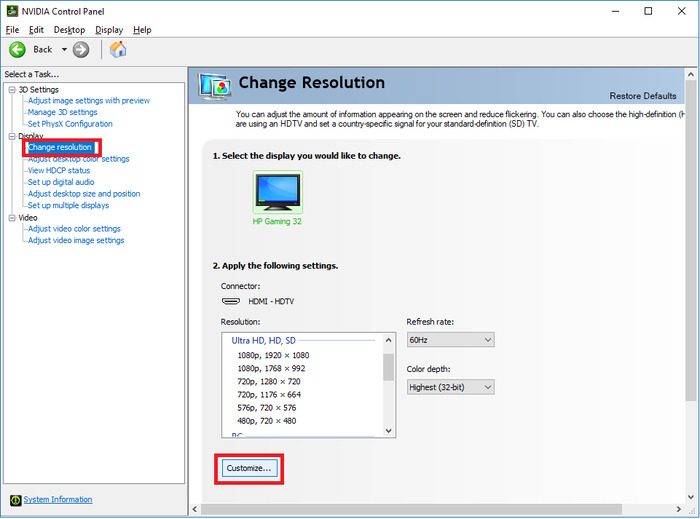
- Open the NVIDIA Control Panel and tap on Change resolution under the Display section.
- Select Customize at the bottom of the action pane.
- On the resulting dialogue box, check the Enable resolutions not exposed by the display option and click on Create Custom Resolution below it.
- Type your preferred resolution on the following page and tap on Test.
Wait until you get redirected to the Customize page, where you should check the box created for the resolution you just set and tap OK afterward.
After this, you will find the custom resolution you created on the NVIDIA Control Panel window.
We recommend that you restart your computer after finishing those three procedures so that the changes you made can take effect without issue.
Read: Fix Screen Resolution problems in Windows
Note: If you cannot change your display resolution in the NVIDIA control panel, it’s probably due to a corrupt or outdated NVIDIA display driver on your computer. Hence, it’s recommended that you update the driver. In some cases, uninstalling and reinstalling the graphics driver will be the best way to resolve the issue.
How do I force custom resolution in NVIDIA?
Sometimes you want to set your display resolution to a value that wasn’t preset on your display settings or GPU control panel. Thankfully, this is possible on GPUs like NVIDIA’s, and we’ve discussed the steps to do it in the article. You need to go to Display > Change resolution to find the corresponding option.
Fix: Screen Resolution problems in Windows
How do I force custom resolution for my monitor?
To change your display resolution through Windows settings, follow the steps below.
- Press Windows + I to open Windows Settings.
- Tap on System and select Display.
- Under Scale & layout, you will see the Display resolution option.
- You simply have to click on the resolution option next to it to change your PC resolution.
I hope this helps.