If you’re a PC gamer, then there’s a good chance you’ve heard of G-Sync. It’s a proprietary adaptive sync technology designed by NVIDIA, and arguably, it’s the best in the business despite stiff competition from AMD’s FreeSync. G-Sync is all about eliminating screen tearing in video games, but to take advantage of this, you’ll need a G-Sync supported computer monitor. Additionally, since G-Sync is hardware based, gamers will have little reasons to activate the software-based V-Sync.
Over the years, NVIDIA has come under attack due to the proprietary nature of G-Sync since free alternatives are available. Whatever the case may be, this adaptive sync technology is still arguably the best, but it does come with a few problems.

NVIDIA G-Sync not working
Is your computer powered by Windows 11/10? If that’s the case, then maybe you’re one of the many folks who has come across issues with G-Sync. We understand that some gamers are unable to locate the service in the NVIDIA control panel.
For others, it’s not showing up, while for some, the service is completely broken. The question is, then, what should be done to set things back to normalcy. We can say for certain that there are several ways to fix your G-Sync problems, so continue with us.
Install the newest G-Sync driver
It’s always important to keep your drivers updated because many problems can be fixed with a simple update. Just visit the Nvidia G-Sync website here, download the latest driver, install it, then select the option that says Custom Install.
After doing that, choose Clean install then follow onscreen options to move forward and complete the installation.
What if I have the latest driver installed already?

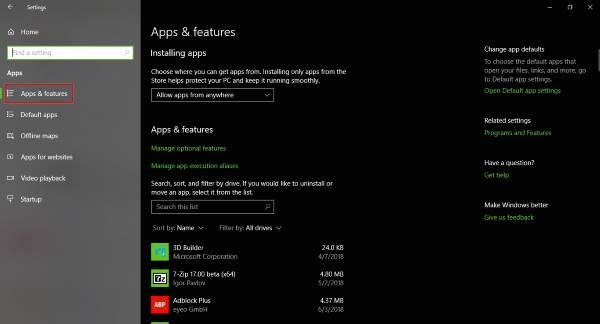
OK, so if you already have the latest driver installed and G-Sync is acting up, then it could be that the newest driver is at fault. The best option, then, is to revert to the older driver by pressing the Windows Key + I, then navigate to Apps & features.
From there, you can search for the required driver/program and remove it, no problem.
Now, when you’re done, visit the Nvidia website and download the previous driver version, then complete your task by installing it. After that, restart your Windows 10 computer and check carefully if G-Sync is up and running again.
Activate V-Sync
Some users claim one of the few ways to fix G-Sync when it’s not working, is to actually turn-on V-Sync. Doing this doesn’t make a lot of sense, but we’re suspecting it might be due to a bug on Nvidia’s part.
To activate V-Sync, then, simply launch the Nvidia Control Panel, then navigate to Manage 3D settings. After that, go to Global Settings and click on the Vertical sync option, then set this option to On, and finally, click Apply.
Restart your Windows 11/10 computer, and from there, things should be working as intended.
Is G-Sync configured properly?
It’s very important for Windows 10 gamers to check from time to time if G-Sync is working as it should.
To do this, just turn on your G-Sync-supported computer monitor and turn off your system. Make sure the monitor is off while the PC off for this is important. Now, check if your monitor is in G-Sync mode.
Restart your computer and navigate to the Nvidia Control Panel. Here you’ll need to turn off then turn on G-Sync again, and finally, restart your computer.
If nothing works, then the last best option is to contact Nvidia support in hopes to get some help from the actual experts.
Pros of clickbaiting like you just did:
This time, you got my click.
Cons:
I’m blocking you from my news feed, I’ll never visit this place ever again, and if I ever hear about you in the future, I’ll say your site is pure utter garbage.
.. Very interesting way of doing business and growing an audience though.
“Nvidia G-Sync not working in Windows 10”
– Is this statement true? No.
It’s a pure clickbait.
It is 100% true for some. For example it was true for me. Could the title be more specific? Sure. But the fact remains that G-Sync not working in Windows 10 is happening to a lot of people