If your installed NVMe SSD is not being detected in Windows 11 or Windows 10 computers, here is how you can resolve the issue. There could be several reasons why your computer is not detecting NVMe SSD. Here we have demonstrated some of the possible reasons and solutions so that you can fix the issue within moments.

NVMe SSD not detected in Windows 11/10
If NVMe SSD is not detected in Windows 11/10, follow these steps:
- Reinstall the SSD
- Format SSD
- Change drive letter
- Install drivers
To learn more about these steps, continue reading.
1] Reinstall the SSD
It is the very first thing you need to do. If there are some hardware issues, you won’t be able to solve them by following other solutions mentioned below. As NVMe SSD gets installed directly on the motherboards, you need to check two things. First, if there is some issue with the motherboard port. Second, if the SSD’s port has any issue or not.
If you find any problem at first glance, you need to head to contact the manufacturer or visit the corresponding service center. However, before doing that, it is recommended to unplug the SSD and reinstall it.
In case you are not good with hardware, take the help of a professional since a slight change might cause big issues.
Read: Diskpart not recognizing SSD in Windows
2] Format SSD
There are multiple ways to format a hard drive or SSD, or NVMe SSD. This solution works when SSD is visible in the Disk Management, but it won’t appear on the File Explorer.
The best way to format an SSD is by using the Disk Management tool. It is pretty straightforward and less time-consuming. On the other hand, you can also use the Diskpart tool to get the job done.
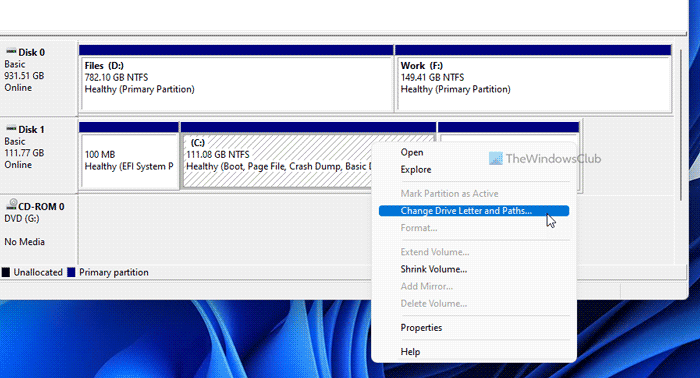
3] Change drive letter

Like formatting an SSD, you can change the drive letter in different ways. For example, you can use Disk Management, Windows PowerShell, Command Prompt, Registry Editor, etc. The main goal of this solution is to assign a different drive letter to the SSD. At times, your computer might create a conflict due to having the same drive letter from the past. If so, you will be able to resolve the issue by changing the drive letter.
4] Install drivers
Every motherboard comes with a driver CD, which is mandatory when using NVMe SSD. Unlike other drives, NVMe SSD needs to establish a connection between your system and motherboard. The best way to do that is by installing the drivers. Therefore, it is recommended to insert the motherboard’s driver CD and install all the mandatory drivers.
In case you have already done that, it is suggested to check for the driver update and install them if available.
Apart from these solutions, you can also check the BIOS. Some manufacturers include an option to show or hide the NVMe SSD. If your motherboard has such an option, you need to use it to show the SSD.
Why is my PC not detecting my NVME SSD?
As said earlier, there could be various reasons why NVMe SSD is not detected on your computer. From faulty hardware or rust to lack of drivers, anything could be held responsible for this error. That is why it is recommended to follow all the aforementioned solutions one after one.
How do I get Windows 11 to recognize a new SSD?
Windows 11 and Windows 10 detect a new SSD or any other hard drive automatically. However, if it is not detecting, you need to do two things. First, you can open the Disk Management and change the drive letter. Second, you can open the same Disk Management and format the SSD.
Read Next:
Leave a Reply