The Office 365 DNS Diagnostic Tool detects all the DNS records that are required by Office 365 services and identifies any known misconfigurations. In this post, we will describe the when and how to use the Office 365 DNS Diagnostic tool to help remediate issues.
You can run the Office 365 DNS Diagnostic on any computer that has Internet access. The tool queries the Office 365 DNS records from the computer’s default DNS server by using Nslookup.exe and then detects DNS misconfigurations. However, it doesn’t collect any data that is specific to the computer on which it is running.
Office 365 DNS Diagnostic Tool
According to Microsoft:
DNS misconfiguration is one of the top issues that are experienced by Office 365 customers. If DNS records are missing or are configured incorrectly, you may likely experience issues with mail flow issues, Outlook connectivity issues, Lync sign-in issues, or federation issues with external instant messaging (IM) providers.
1] When to use the Office 365 DNS Diagnostic tool
DNS misconfiguration is the top cause of the issues that are listed below. Microsoft strongly recommends that you run the Office 365 DNS Diagnostic to identify these issues:
a] Exchange Online issues
Issues with mail delivery
- Not receiving incoming mail from the Internet.
- Receiving nondelivery reports (NDRs).
Outlook client connectivity
- Issues that involve connecting Outlook and Exchange Online.
- Autodiscover not working.
b] Skype for Business Online (formerly named Lync Online) issues
- Lync client sign-in issues.
- Instant messaging (IM) failure with federated or public IM Connectivity (PIC) contacts.
- Outlook Web App IM or presence issues.
c] SharePoint Online issues
- Accessing the public-facing website that uses your domain name.
2] How to use the Office 365 DNS Diagnostic tool

To use the O365 DNS Diagnostic tool, follow these steps:
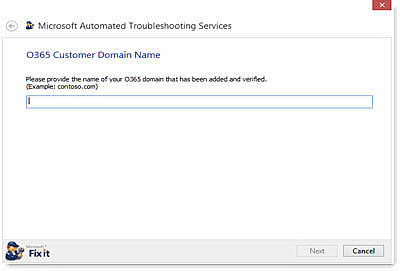
1] On the Offive365 Customer Domain Name page of the Office 365 DNS Diagnostic, type your domain name. The tool checks the DNS records for the domain.
Make sure that the domain is added to portal.Office.com and that the domain is verified.
2. On the Exchange Deployment Scenario page, select the scenario that applies to you. The options are Cloud Only and Co-exist/Hybrid.
If you have multiple domains, be aware that the scenario that you select applies to the domain that you entered in step 1.
- Select Cloud Only if all mailboxes of that domain were moved to Office 365.
- Select Cloud Only if you don’t have any Exchange Online mailboxes that use the domain.
- Select Co-exist/Hybrid if some mailboxes are hosted in the on-premises Exchange Server environment and some mailboxes are hosted on Exchange Online.
That’s it, folks! I hope you find this post informative enough.
TIP: Also take a look at Microsoft Support and Recovery Assistant.
Leave a Reply