This post will show you how to open File Explorer Options in Windows 11/10. File Explorer Options is referred to as Folder Options in Windows 8/7. Using the File Explorer Options, you can customize where File Explorer opens, configure clicks required to open items, set how Windows searches, and decide how you want the items in File Explorer to be displayed.
Open File Explorer Options in Windows 10
There are several ways to open Folder Options or File Explorer Options in Windows 10:
- Using Windows Search
- Via Control Panel
- Via Explorer File Menu
- Via Explorer Ribbon
- Using Run box
- Using Command Prompt or PowerShell
- Via Windows Settings.
Let us see how to do this.
1] Using Windows Search
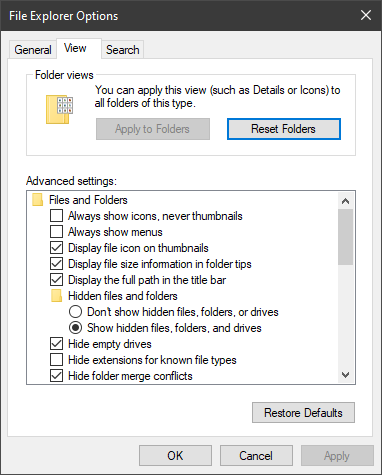
Simply type File Explorer Options in Windows 10 search bar and click on the result you see. The box will open.
Read: Windows 11 File Explorer Tips and Tricks.
2] Via Control Panel
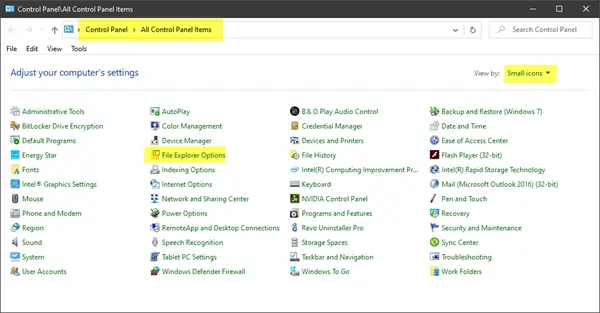
Open Control Panel > Small Icons View and click on the File Explorer Options applet.
3] Via Explorer File Menu
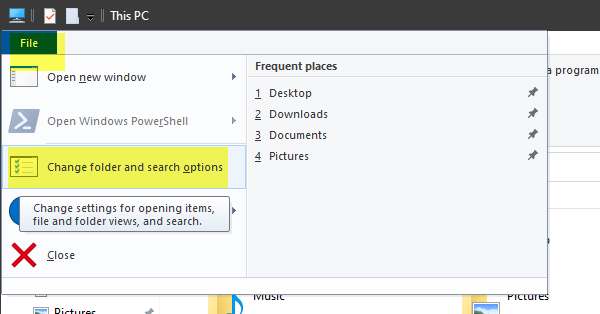
Open File Explorer and click on the File menu in the top left corner. Click on the Change folder and search options link to open it.
4] Via Explorer Ribbon
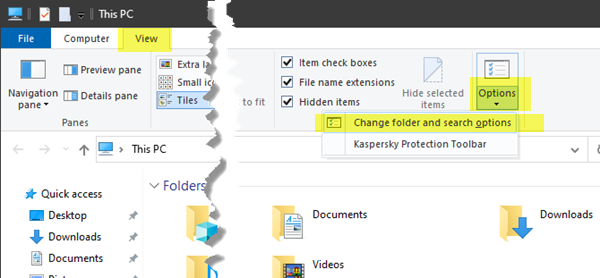
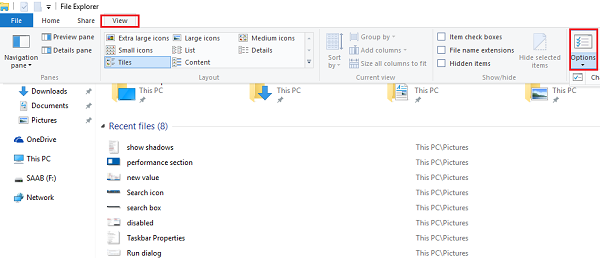
Open File Explorer and click on the View tab. Then select Options and then click on the Change folder and search options link to open it.
5] Using the Run box
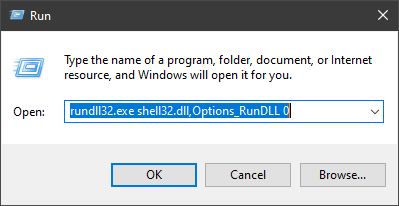
From the WinX Menu, open the Run dialog box, type the following and hit Enter:
rundll32.exe shell32.dll,Options_RunDLL 0
This command can also work in a Command Prompt or PowerShell.
6] Using Command Prompt or PowerShell
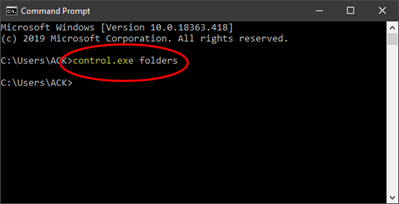
From the WinX Menu, select Command Prompt. Now type the following and hit Enter:
control.exe folders
This command can also work in a PowerShell or Run prompt.
7] Via Windows Settings
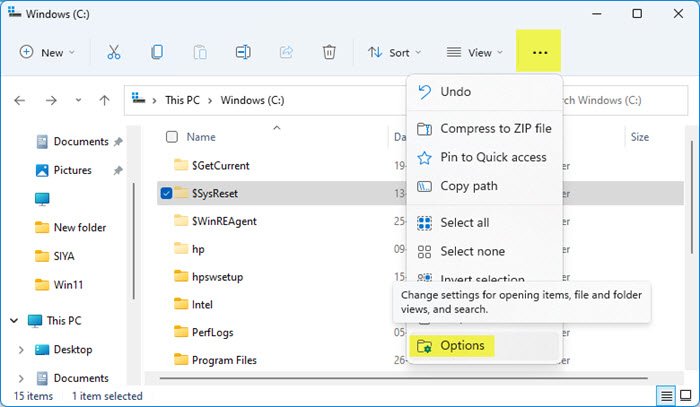
In Windows 11 Explorer, click on 3-dots and then select Options to open File Explorer Options.
In Windows 10 Explorer click on the View tab in Ribbon and then click on Options, and then Change folder and search options.
Have a nice day!
Leave a Reply