Apart from what is visible on the login screen, Windows OS tends to create several users and groups in the background to carry out several tasks on a computer. However, they are not visible to a normal user and are logged in in the background and serve a great deal in permission structuring. Let us learn how to see and to manage Local Users and Groups MMC Snap-in on a Windows 11/10 computer.
Open Local Users and Groups on Windows 11/10
The following methods will help you to open and view Local Users and Groups MMC Snap-in on Windows 11/10:
- Using the Computer Management utility
- Directly by using lusrmgr.msc.
Let us look at the procedure in detail. We will also take a look at how to add or remove Users from a Group.
1] Using the Computer Management utility

Open the WinX menu and select Computer Management.
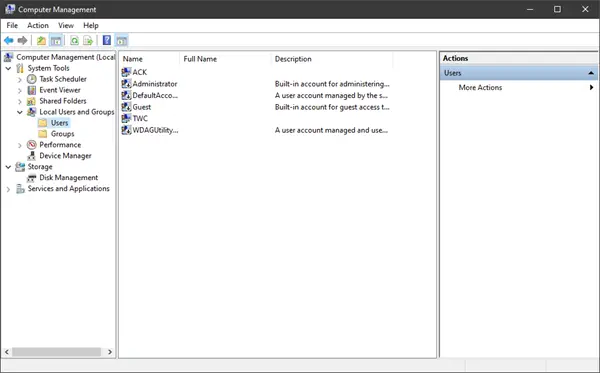
From the left side navigation panel, select Local Users and Groups under the expanded list of Computer Management (Local).
You will see two folders here:
- Users and
- Groups.
Expanding each will give you the required details.
2] Directly by using lusrmgr.msc
To open Local Users and Groups window, you have to invoke its process, which is called lusrmgr.msc, and you can do this in the following four ways.
Using the Run box
Hit the Windows Key + R button combination on your keyboard.
Type in lusrmgr.msc and hit Enter.
It will open the Local Users and Groups window.
Using Windows Search box
Hit the Windows Key + S button combination on your keyboard. It will launch the Windows Search Box.
Search for lusrmgr.msc and hit Enter.
The Local Users and Group window will now be open.
Using Windows Command Prompt
Open Windows Command Prompt and execute the following command:
lusrmgr.msc
You will arrive at your destination window.
Using Windows PowerShell command line
Open Windows PowerShell and execute the following command:
lusrmgr.msc
It will open at your destination window.
Add or remove Users from Group

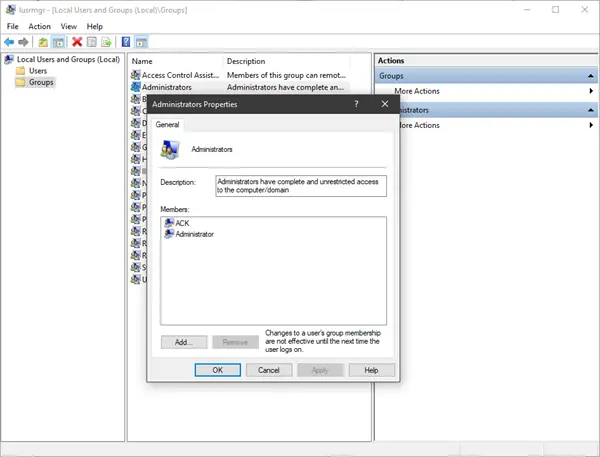
To add or remove Users from a Group:
- Open the Groups folder
- Select the Group
- Double-click on the group
- Under the Members box, select the user you want to delete.
- Click on the Delete button.
To add a User, click the Add button and follow the process.
Add a User to Group using Command Prompt
You need to execute the following command:
net localgroup "GROUP" "USER" /add
Replace GROUP and USER with the actual names.
Remove a User from a Group using Command Prompt
You need to execute the following command:
net localgroup "GROUP" "USER" /delete
Replace GROUP and USER with the actual names.
Add a User to Group using PowerShell
You need to execute the following command:
Add-LocalGroupMember -Group "GROUP" -Member "USER"
Replace GROUP and USER with the actual names.
Remove a User from a Group using PowerShell
You need to execute the following command:
Remove-LocalGroupMember -Group "GROUP" -Member "USER"
Replace GROUP and USER with the actual names.
Related: Local Users and Groups is missing from Computer Management
I hope this helps.
Windows 11/10 Home user? These links may interest you:
- Use freeware Lusrmgr tool to access Local User and Group Management in Windows Home
- Open and Manage Local User and Group Management in Windows Home using Command Prompt or PowerShell.