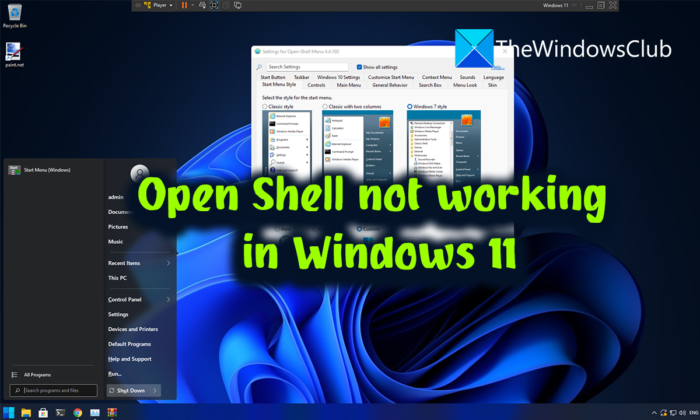
Do you know we can customize the Start menu on Windows 11/10 using some free programs? Open Shell is one program we can use to customize the Start menu and add a toolbar and status bar to Windows Explorer with some extra features. It was earlier Classic Start and is the alternative to Classic Shell, which does the same. When the Classic Shell stopped being active, volunteers on GitHub picked it and developed Open Shell based on it. It is being used by many Windows users. Some users are complaining that Open Shell is not working on their Windows 11. In this guide, we show you how to fix it and use Open Shell without any issues.
Open Shell not working in Windows 11

If the Open Shell is not working on your Windows 11 PC, you can use the following methods to fix it and customize your Start menu.
- Restart File Explorer
- Re-register Shell Experience
- Rebuild Windows Search Index
- Tweak Registry Settings
- Update Windows
- Reinstall Open Shell
Let’s get into the details of each method and fix the issue. Before that, restart your PC and see if there is any change.
1] Restart File Explorer
Some of the Open Shell users have seen Open Shell working after restarting File Explorer. When the Open Shell is not working on your PC, you need to restart the File Explorer and see if it fixed the issue.
To restart File Explorer on Windows 11,
- Right-click on the Start button to open the WinX Menu
- Select Task Manager from the list
- Locate the Windows Explorer process in the list of processes
- Right-click on it and select Restart
2] Re-register Shell Experience
Re-registering Shell Experience using the PowerShell on Windows 11 might also fix the issue where the Open Shell is not working on your PC.
To re-register the Shell Experience,
Click on the Start menu and type PowerShell
Click on Run as an administrator under Windows PowerShell in the results to open it. Click Yes on the UAC prompt.
Copy/paste the following command in the PowerShell and press Enter
Get-appxpackage -all shellexperience -packagetype bundle |% {add-appxpackage -register -disabledevelopmentmode ($_.installlocation + “\appxmetadata\appxbundlemanifest.xml”)}
See if it has fixed the issue with the Open Shell.
3] Rebuild Windows Search Index

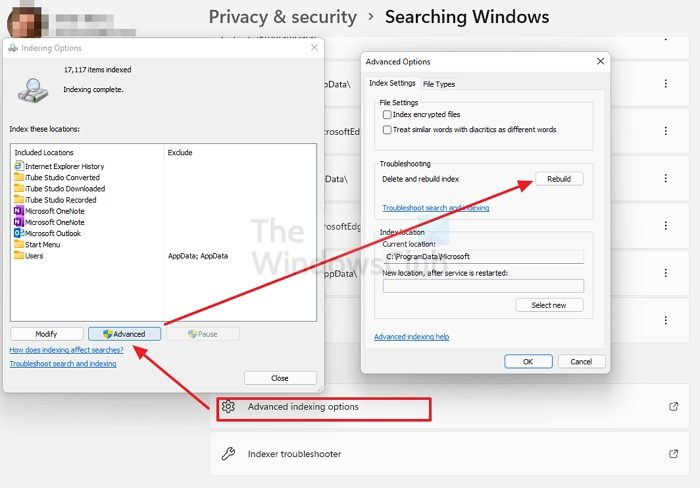
Rebuilding the Windows Search Index also can fix the Open Shell issues on Windows 11. You can rebuild the Windows Search Index following the steps below.
- Open the Settings app from the Start menu or use the Win+I shortcut
- Click on Privacy & security in the left sidebar and then click on the Searching Windows tab
- Scroll down and click on Advanced indexing options
- Click on the Advanced button to open a new window
- Click on Rebuild and wait for the process to complete
Check if rebuilding the Windows Search Index has fixed the Open Shell issue or not.
Read: Fix Search Indexer High Disk or CPU usage
4] Tweak Registry Settings
You can also fix the Open Shell not working issue using the Registry Settings. You just have to create a new DWORD file naming it EnableXamlStartMenu.
To tweak registry settings to make Open Shell work,
Press Win+R on your keyboard to open the Run box. Type Regedit and press Enter
Navigate to the following path in the Registry Editor
Computer\HKEY_CURRENT_USER\Software\Microsoft\Windows\CurrentVersion\Explorer\Advanced
Right-click in the path and choose New. Then, select DWORD (32-bit value). Name the file as EnableXamlStartMenu
Now, double click on the newly created DWORD file and set it value date to 0.
Restart your PC and see if the issue is fixed or not. If not, go to the same path in the Registry editor, find the Start_ShowClassicMode file there and delete it.
5] Update Windows
There might be some issue or bug in the Windows Update preventing the Open Shell from working. You need to update Windows to the latest version to fix the issue.
To check for updates on Windows 11,
- Open the Settings app using the Win+I shortcut on the keyboard
- Click on Windows Update in the left sidebar
- On the Windows Update page, click on Check for updates button to manually run Windows updates
6] Reinstall Open Shell
If none of the above methods fixed the Open Shell issue, you need to uninstall it from your PC and reinstall it. You can uninstall it in the Settings app or from the Start menu. Then, download Open Shell from GitHub and run it to install it.
These are the different methods you can use if the Open Shell is not working on your Windows 11.
How do I get Classic Shell to work on Windows 11?
Classic Shell was last updated in December 2017. You can just download it from the official website and install it on your PC, but it may not work as desired. As an alternative to Classic Shell, Open Shell is developed, which does what Classic Shell does on previous Windows versions.
Is Open Shell available for Windows 11?
Yes, Open Shell is available for Windows 11. You can download it from GitHub and use it to customize the Start menu, and do everything with it like on Windows 10 on previous versions. If you face any issues with Open Shell on Windows 11, you can follow the above methods.