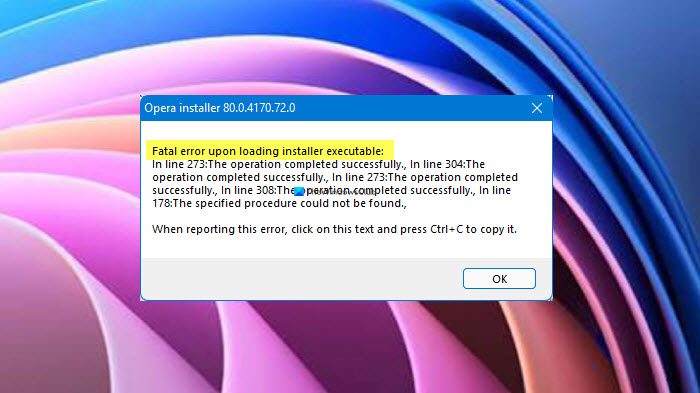
Opera browser users may see the following error message when opening their Windows 11 or Windows 10 computer with Opera installed.
Fatal error upon loading installer executable:
In line 273:The operation completed successfully., In line 304:The operation completed successfully., In line 199:The system cannot find the file specified., In line 273:The operation completed successfully., In line 308:The operation completed successfully., In line 178:The specified procedure could not be found.,
When reporting this error, click on this text and press Ctrl + C to copy it.

Note: The second paragraph might be a bit different in your case, but the first line will be the same.
There is no need to worry as in this article, we are going to show you how to resolve this issue with some basic solutions.
Why am I seeing Fatal error upon loading installer executable?
The error message only appears when you start your computer. Although it is doing no harm to your system, it is still annoying and should be resolved. It is usually a glitch that will go away after you click on OK and again restart your computer. Updating the Opera browser can resolve the issue, but if it does not, then you need to follow each and every solution that we have mentioned later in this article.
How to update Opera Browser in Windows?

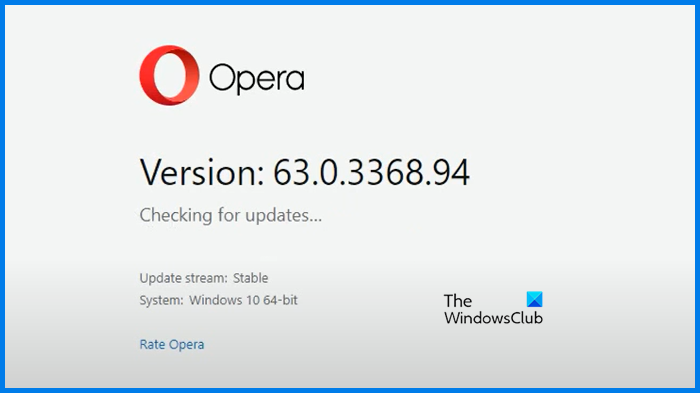
We need to update Opera to the latest build. To do that, open Opera, click on the Opera icon (also called “Customize and Control Opera), and go to Help > About Opera. It will check for updates and then you can download the latest version from there.
Fix Opera Fatal error upon loading installer executable
If you still continue to see Fatal error upon loading installer executable in Opera then these are the things you can do to resolve the issue.
- Disable Opera scheduled Autoupdate
- Clear Browsing Data
- Reinstall Opera
Let us talk about them in detail.
1] Disable Opera scheduled Autoupdate
If the issue is not because of a bug, then we need to disable Opera scheduled Autoupdate and see if that can fix the issue. To do that, follow the given steps.
- Open Task Scheduler by searching it out of the Start Menu.
- Now, go to Task Scheduler Library.
- Look for Opera scheduled Autoupdate, select it, and click Disable.
If this doesn’t solve then try the next solution.
Related: Opera browser not opening or loading pages in Windows 11
2] Clear Browsing Data

If the issue persists, then you may have to clear Browsing Data, you can follow the given steps to do the same.
- Open Opera.
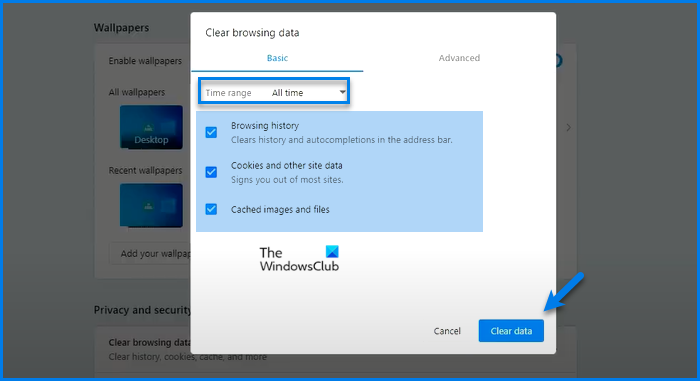
- Click on the menu from the top-right corner of the window and select Browsing data.
- Now, make sure all the options are checked and the Time range is set to All time.
- Finally, click Clear data.
After clearing the data, restart your computer and check if the issue persists.
Related: Opera Autoupdate folder keeps appearing; How to disable or stop it?
3] Completely uninstall and then reinstall Opera
Finally, if nothing works then reinstalling the browser should be your last resort. But just uninstalling the browser is not enough, you need to clear all its instances. So, make sure to go through all the points mentioned below and keep removing all the files related to Opera.
- Open Task Manager by Ctrl + Shift + Esc, right-click on Opera and select Uninstall.
- Delete Opera Installed folder. It can be in one of the following locations.
C:\Users\yourusername\AppData\Local\Programs\Opera
Or
C:\Program Files\Opera
- Remove temporary files of Opera, which are stored in either of the two locations.
C:\Windows\temp
Or
C:\Users\yourusername\AppData\Local\temp
- Open Registry Editor and navigate to all the following locations to remove any Opera-related string or keys.
HKEY_CURRENT_USER\SOFTWARE\Microsoft\Windows\CurrentVersion\Uninstall

HKEY_LOCAL_MACHINE\SOFTWARE\WOW6432Node\Microsoft\Windows\CurrentVersion\Uninstall

HKEY_CURRENT_USER\SOFTWARE\Microsoft\Windows\CurrentVersion\Run

HKEY_LOCAL_MACHINE\SOFTWARE\Microsoft\Windows\CurrentVersion\Run

HKEY_LOCAL_MACHINE\SOFTWARE\WOW6432Node\Microsoft\Windows\CurrentVersion\Run

HKEY_LOCAL_MACHINE\SOFTWARE\Clients\StartMenuInternet

HKEY_CURRENT_USER\SOFTWARE\Clients\StartMenuInternet

HKEY_CURRENT_USER\SOFTWARE\Classes\OperaStable

HKEY_CLASSES_ROOT\OperaStable

HKEY_LOCAL_MACHINE\SOFTWARE\Classes\OperaStable

HKEY_LOCAL_MACHINE\SOFTWARE\RegisteredApplications

HKEY_CURRENT_USER\SOFTWARE\RegisteredApplications

HKEY_CURRENT_USER\SOFTWARE\Opera Software
Now, you can uninstall Opera. To do that, open Settings and go to Apps. Look for Opera, for Windows 10, select it and click Uninstall, whereas, for Windows 11, click on the three dots and select Uninstall.
After removing Opera completely, you need to download the latest version of the browser and install it on your system. After doing that, see if the issue persists.
What does fatal error during installation mean?
A fatal error indicates that there are some issues with the installation. If you face a problem while installing the Opera browser, you must re-download the installer or set up file since the existing one includes some corrupt files. However, you can get the same issue while updating your browser as well.
That’s all! Hope it helped.