If you are a music producer, you may need to optimize your computer for the best performance. This article lists some suggestions that will help you optimize Windows 11 for music production. These tweaks will boost your productivity during music production.
Optimize Windows 11 for Music production
Follow these suggestions to optimize Windows 11/10 for music production.
- Disable your system sounds
- Select the High-Performance Power Plan
- Disable USB Selective Suspend
- Change the USB Controller Settings
- Disable background applications
- Pause Windows Updates
- Check for graphics card and audio driver update
- Change the Sleep Settings
I have explained all these tweaks in detail below:
1] Disable your system sounds
Music production is a difficult task that requires much time and attention. Therefore, no one wants to be interrupted while creating music. Windows 11 has built-in sound effects for different events, such as notification sounds and critical battery alarms.
System sounds can cause issues for you during music production. Therefore, it is better to disable all of them. You can re-enable them after your task is completed. Follow the steps provided below to disable system sounds:

- Open the Control Panel.
- Type sound in the Control Panel search bar and select Sound from the search results.
- When the Sound properties window appears, select the Sounds tab.
- Select No sounds in the drop-down and click Apply.
- Click OK and close the Sound properties window.
2] Select the High-Performance Power Plan
The next tweak is to change your default power plan and select the High-Performance power plan. You can do this via the Control Panel.
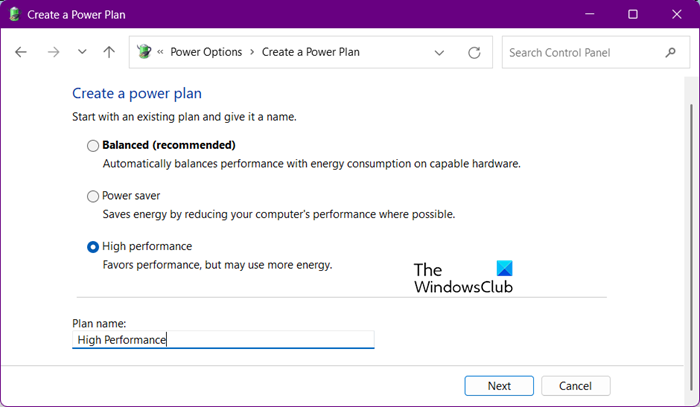
- Open the Control Panel.
- Type power in the Control Panel search bar and select Power Options from the search results.
- Now, select the High Performance Power Plan.
If only the Balanced Power Plan is available in the Control Panel, you can restore the missing default power plans by executing the required commands in the Command Prompt. These commands will not work if the Modern Standby Mode S0 is enabled on your system. In this case, you must disable the Modern Standby Mode S0 and then run the commands to restore power plans.
3] Disable USB Selective Suspend
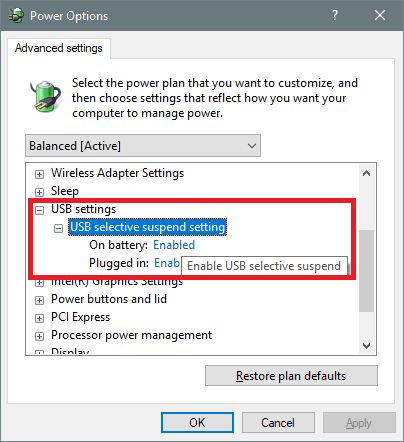
USB Selective Suspend is the feature in Windows 11 that puts USB devices in a low-power state when they are not in use. This feature is useful for laptop users, as it helps save battery power. However, for music production, this feature can cause glitches or issues. Therefore, it is better to disable it.
4] Change the USB Controller Settings
The next tweak is to change the USB controller’s Power Management settings. By default, Windows turns off the USB Host Controllers and USB Root Hub to save power, which can cause problems.
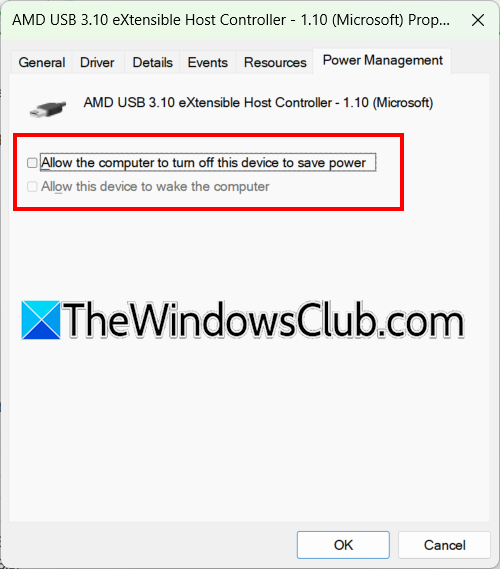
Follow the steps provided below:
- Open the Device Manager.
- Expand the Universal Serial Bus controllers branch.
- Double-click on a USB Host controller to open its properties.
- Go to the Power Management tab.
- Uncheck the Allow the computer to turn off this device to save power checkbox and click OK to save changes.
Repeat the above steps for all USB Host Controllers and USB Root Hubs.
5] Disable background applications
The next step is to disable the background applications. Some third-party applications keep running in the background and consuming system resources. Sometimes, these applications can conflict with other applications. Therefore, it is better to disable all of them during music production.
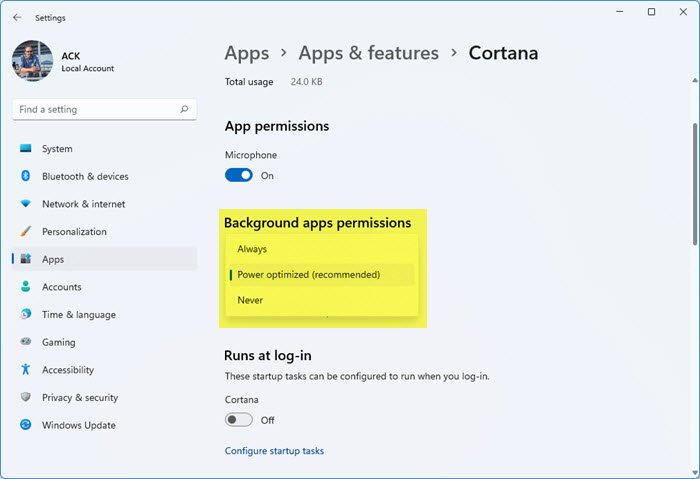
To disable background applications on Windows 11, open each app’s Advanced options in Windows 11 Settings and select Never in the drop-down menu.
6] Pause Windows Updates
Windows 11 keeps checking for Updates automatically. If the Windows Update is running in the background, you may experience glitches with the software you use for music production. Hence, check this. If Windows 11 has already started downloading and installing the update, let it finish. Otherwise, you can pause Windows Updates for one week or more.
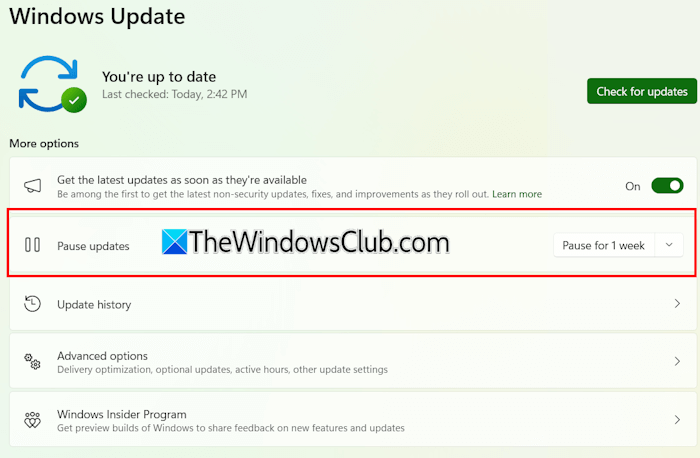
Open Windows 11 Settings and Select Windows Updates from the left side. Now, click on the Pause button next to the Pause Updates option.
7] Check for graphics card and audio driver update
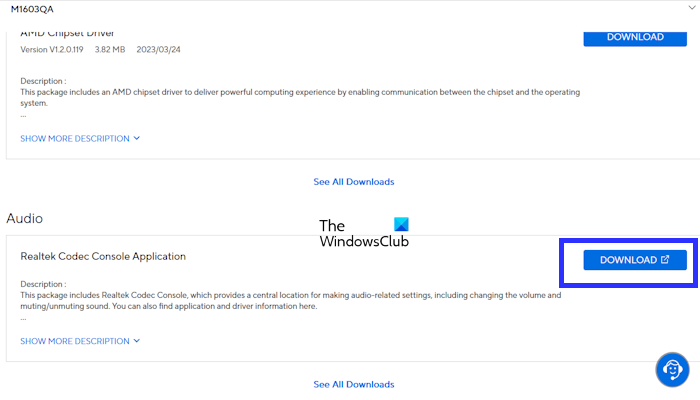
For optimum performance, the latest version of device drivers should be installed on your system. Check for graphics card driver and audio driver updates. You can check this on the official website of your computer manufacturer. If an updated version of the driver is available, download and install it.
8] Change the Sleep Settings
No one wants the screen to turn off automatically while processing a video. Therefore, it is recommended that you turn off your Sleep mode. You can turn it on later. Follow the instructions provided below:
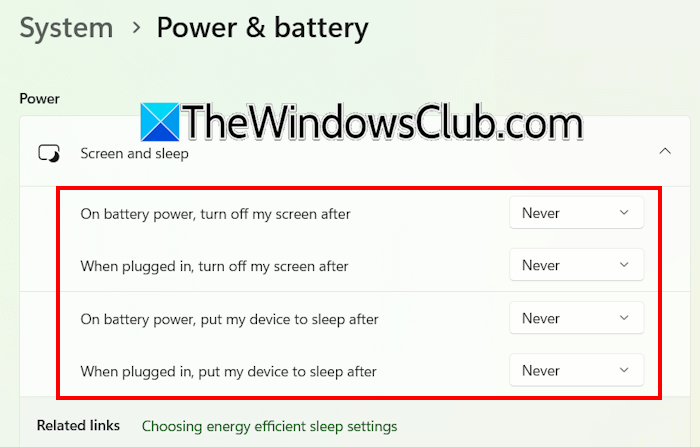
- Open Windows 11 Settings.
- Go to System > Power & battery.
- Expand the Screen and sleep tab.
- Select Never in all the drop-downs.
That’s it. You can perform these tweaks to optimize your Windows 11/10 computer for music production.
How do I optimize Windows 11 to use less RAM?
Every program that runs on a Windows 11 computer uses the required amount of RAM, and every background process and application consumes some amount of RAM. Therefore, disable unnecessary background applications and third-party services to optimize Windows 11 to use less RAM.
How to make Windows 11 faster and smoother?
You can improve the performance of your Windows 11 computer by tweaking it, like deleting temporary and unnecessary files, switching to the high-performance power plan, disabling unnecessary background services, etc. If your computer has an HDD, it is better to install an SSD for a smoother and faster experience on Windows 11.
Read next: How to show hidden Performance Overlay in Windows.
Leave a Reply