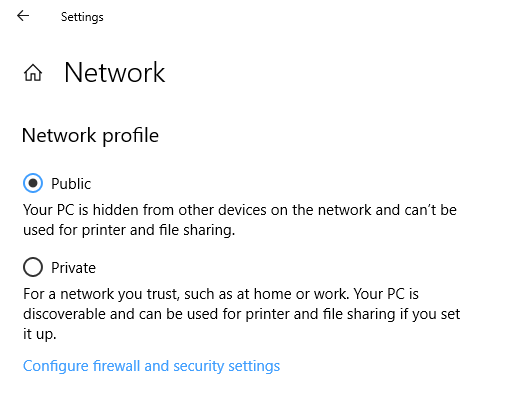
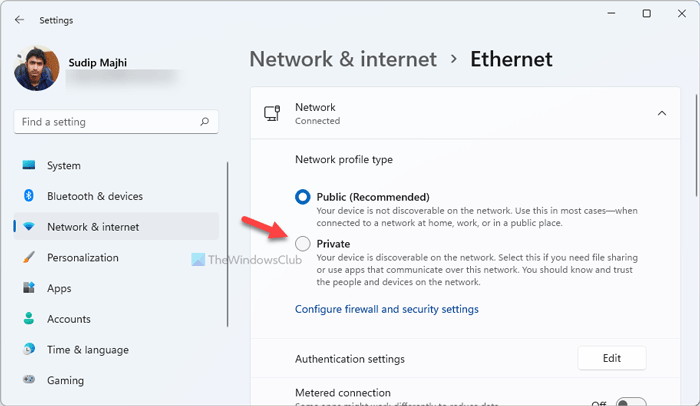
When you configure the Network on a Windows 11/10 computer, you can choose to make it Public or Private. However, if the option to change the Network from Public to Private is missing in Windows Settings, then here is how you can fix it. This setting is available under Settings > Network and Internet > Ethernet and shows up when you click on it.
Network Profile missing in Windows 11/10

Option to change Network profile from Public to Private missing in Windows 11/10

Sometimes this option to change the network profile goes missing. You either cannot open the settings or the option to change it is disabled. In its case, running System File Checker to fix potentially corrupted OS files could help. Nevertheless, you could use the following suggestions to change the Network Profile.
1] Change Network Profile using PowerShell

Since the option to change is missing or not possible through the UI, you need to use PowerShell with admin privileges.
Use WIN+X and then select PowerShell (Admin). Click on the Yes option when UAC appears.
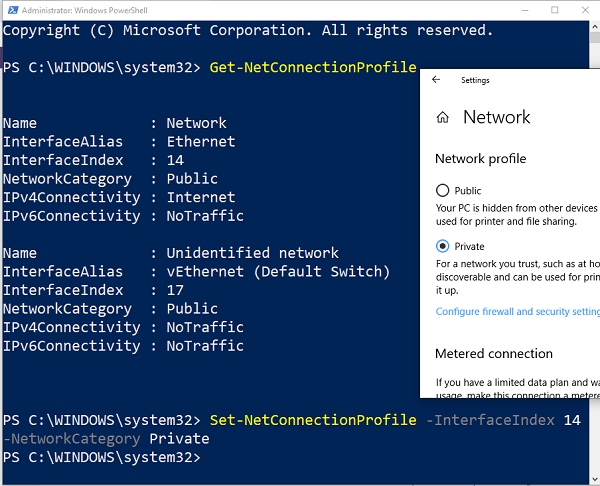
Then execute the following commands. The first gets you the index number, and the second lets you change the profile:
Get-NetConnectionProfile
Set-NetConnectionProfile -InterfaceIndex <index number> -NetworkCategory Private
Every network profile has an index number. To identify the network for which you want to change, check the label “Name”. In my case, it’s Network, and the index number is 14 (interface index).
Read: Network Profile keeps changing automatically on Windows
2] Change Network Profile using Registry

While PowerShell just works fine, you can also use a registry hack to change this setting. This is only for those who understand how to edit the registry. Always make a backup or system restore before editing the registry for anything.
In the RUN prompt, type regedit and hit Enter to open the Registry Editor.
Navigate to the following key:
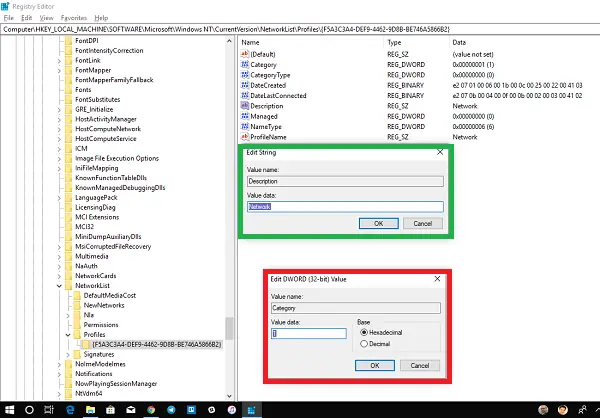
HKEY_LOCAL_MACHINE\SOFTWARE\Microsoft\Windows NT\CurrentVersion\NetworkList\Profiles
When you expand the Profiles key folder in the left pane, you may see one or more folders.
Expand each of them, and look for a sub-key “Description” which has a matching name with your network name.
Once you find it, in that folder, find about sub-key “Category“.
Double-click to open it, and then change the value from 0 to 1 to change from Public to Private and Vice Versa.
If you are stuck with no option to change from Public to Private missing in the network properties, these suggestions will make sure you can change it easily.
Read next: Different Ways To Change Network Status From Public To Private.
Leave a Reply