Outlook lets users print attachments directly from the Outlook app via the Quick Print option. However, if the Outlook Quick Print is not working in Windows 11/10, here is how you can troubleshoot the issue. You must follow these tips to enable Quick Print in Outlook and print attachments without leaving Outlook.
What is Quick Print in Outlook?
Quick Print lets you print an attachment in Outlook without leaving the interface. You do not need to open the attachment in order to print it on your computer. It uses the default printer to print the attachment. However, if the Quick Print option is not working anymore, or opening the wrong printer, or not opening any printer at all, the following suggestions would be handy for you.
Fix Outlook Quick Print not working
If Outlook Quick Print is not working for PDF, JPG, etc., on your Windows 11/10 computer, follow these suggestions:
- Set default printer
- Enable setting in Outlook
- Use Printer Troubleshooter
- Troubleshoot in Safe Mode of Outlook
- Print manually
To learn more about these steps, continue reading.
1] Set default printer
![Outlook Quick Print not working [Fixed] Fix Outlook Quick Print not working](https://www.thewindowsclub.com/wp-content/uploads/2022/07/outlook-quick-print-not-working.png)
By default, your computer manages all the assigned printers automatically, and this process works pretty well. However, if this system is not working for you or on your computer, you need to set the default printer manually.
No matter whether you have one or multiple printers attached to your computer, you can always use this option to choose one of them as your default printer. Following that, no matter which attachment you select, Outlook will use that printer to print the corresponding attachment.
To set the default printer in Windows 11/10, follow these steps:
- Search for control panel in the Taskbar search box.
- Click on the individual search result.
- Click on the Devices and Printers option.
- Right-click on the desired printer.
- Choose the Set as default printer option.
- Click the OK button.
Following that, check if the problem is resolved or not.
2] Enable setting in Outlook

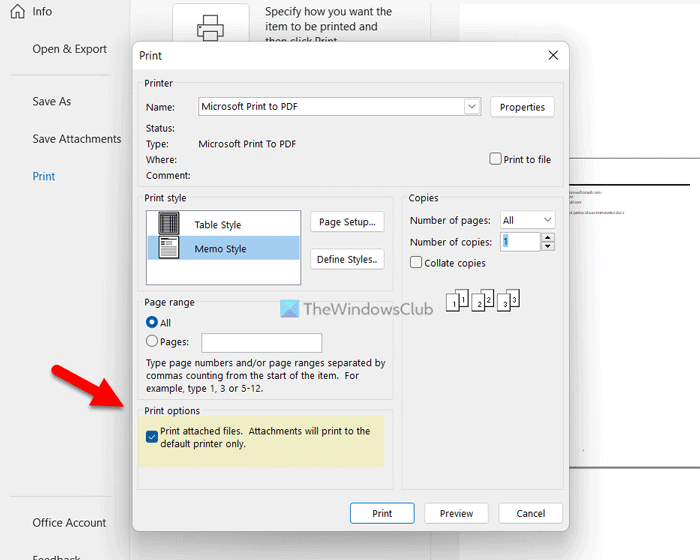
It is a manual method, but it works when you need to print the attachment as well as the entire email body. By default, Outlook doesn’t print the attachment, no matter whether you have an image, document, or anything else. However, if you enable this setting, Outlook will print your attachment as well.
For that, do the following:
- Open the email containing the attachment.
- Click on the File > Print.
- Click on the Print Options.
- Choose the printer you want to use.
- Tick the Print attached files checkbox.
- Click the Print button.
Now, Outlook will print the attachment alongside the email body.
3] Use Printer Troubleshooter

As this problem may belong to the printer setting itself, you may need to use the Printer Troubleshooter to get it resolved. There are two troubleshooters you can use. The first one is the common Printer Troubleshooter that you can find by following these steps:
- Press Win+I to open Windows Settings.
- Go to System > Troubleshoot > Other troubleshooters.
- Find the Printer Troubleshooter.
- Click the Run button.
Then, you need to follow the screen instructions to run this Troubleshooter.
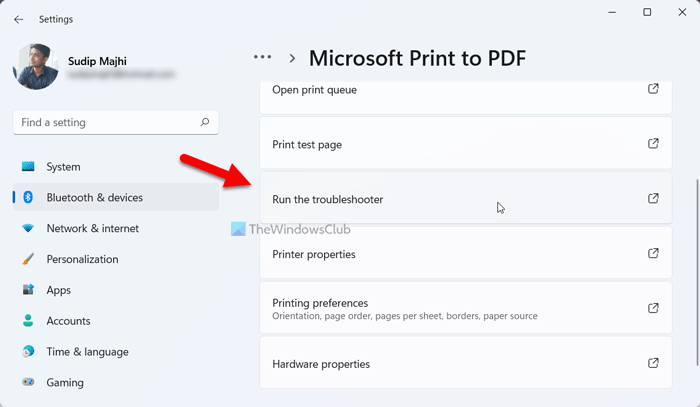
The second Troubleshooter is device-specific. For that, you need to follow these steps:
- Open the Windows Settings panel.
- Go to Bluetooth & devices > Printers $ scanners.
- Click on the printer.
- Click the Run the troubleshooter option.
It will run the Troubleshooter automatically and immediately.
4] Troubleshoot in Safe Mode of Outlook

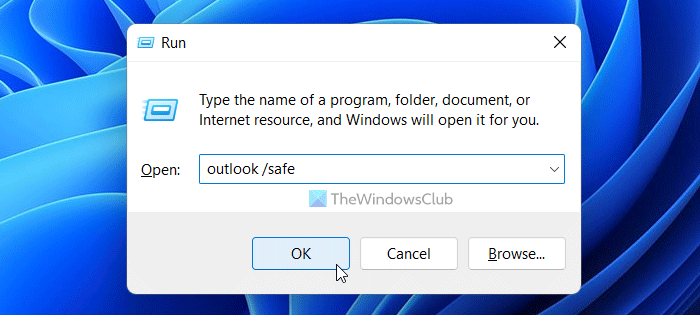
In case you don’t know, you can open Outlook in Safe mode. Like the Windows Safe mode, Outlook’s Safe mode also excludes all external add-ins and settings. To open Outlook in Safe mode, press Win+R to open the Run prompt, type outlook /safe, and hit the Enter button.
If you find the same problem here, you need to follow other steps. However, if you do not find the same problem here, you need to close the Safe mode and disable all Outlook add-ins.
5] Print manually
It is probably the last thing you need to do when none of the aforementioned solutions has worked for you. Although it is not a permanent solution, it works whenever you are in a hurry. For your information, you can always download the attachment and print it on your computers like any other document or image.
Read: Sent Items Folder missing or not found in Outlook; How to get it back?
How do I enable print options in Outlook?
There is no need to enable the Print options in Outlook since it is already turned on. In order to use the Print UI, you need to open an email and press Ctrl+P, which is the universal hotkey to open the Print dialog. Alternatively, you can click on the File menu and choose the Print option.
That’s all! I hope these solutions worked for you.
Read: The file cannot be opened message in Outlook – Outlook Data File.
Leave a Reply