There are several ways to upgrade Windows 11/10. You can use Windows Update service to download the feature update, or you can create an ISO, or you can use the Media Creation Tool. The last one helps you perform Windows 11/10 In-place upgrade. In this guide, we will share step by step method to do that.
Before we start, you will need to do the following:
- Ensure you are signed in and have admin privileges.
- Unplug all external peripherals except mouse, keyboard and LAN cable to download.
- Disable or uninstall any third-party antivirus or security solutions.
How to perform Windows 11/10 In-place upgrade
The term in-place means you can perform it without leaving your computer. When we say Windows 11/10 In-Place upgrade, we mean that you can upgrade your Windows to the next feature update without using any ISO. It is useful when you have an excellent internet connection to download the files.
1] Download Windows 11 or Windows 10 Installation Media

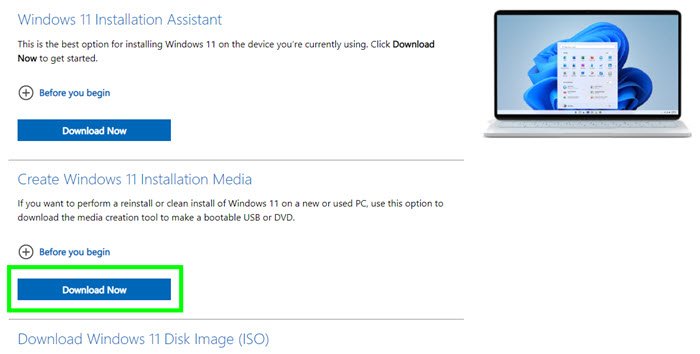
Go to Windows 10 or Windows 11 Download page, and click on Download tool now. It will download an executable file with name MediaCreationTool<version-no>.exe.
Once the download is complete, double-click to run the application. This exe file is responsible for downloading the latest version of Windows 10 files and installing it on your computer.
2] Windows In-Place Upgrade Process

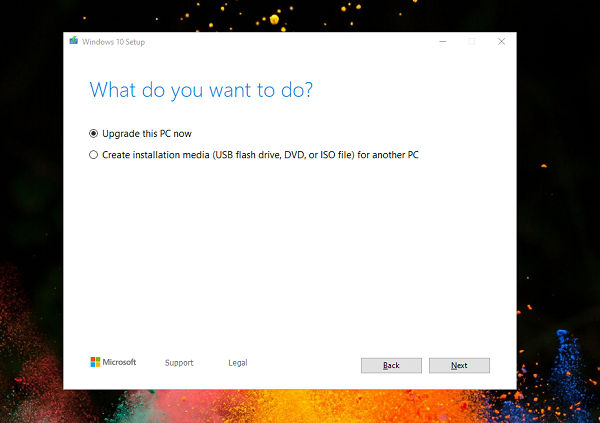
Once the process starts, you should see the Microsoft License terms. Accept it. Then the process will kick start a “Getting Ready screen.” Wait for it to complete. This analyzes your computer and then gives you two options-
- Upgrade PC Now
- Create installation media (USB, DVD, or ISO file)
For In-Place upgrade, select the Upgrade PC Now option. Click next, and the tool will start downloading the files. It will take a while, and it depends on your internet connection speed.
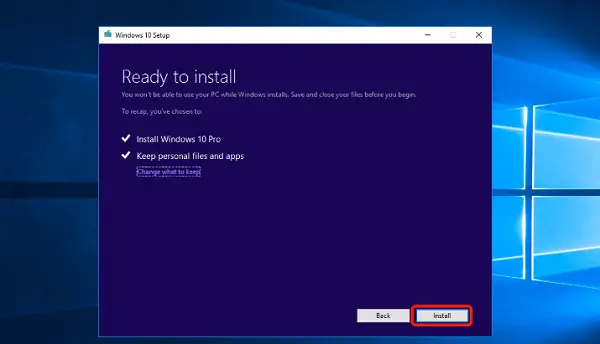
Once the download is complete, you can keep your personal files or start fresh.
If you are performing an in-place upgrade, I suggest keeping your files. That way, all your problem with previous installations will be gone, and your files will be there.

Post this, the computer will restart several times, and it will upgrade your existing Windows computer. After it’s complete, you will be able to go back to the login screen. Here, your account will be available.
Log in to the computer, and you will be greeted by the Privacy settings. Make your selections and proceed to the Cortana settings screen. You can follow Cortana’s voice-assisted method to change your language and make other choices. If you do not want to use Cortana, you can do everything manually.
Once it is complete, your Windows has completed the in-upgrade process, and you are all set to use Windows fresh.
It is best to use the Windows In-upgrade method to install the latest version of Windows, especially when you are having trouble downloading the feature update.
Read: How to reinstall Windows 11 using Windows Update
We hope the tutorial was easy to follow and that you can smoothly perform Windows 11/10 in-upgrade.
Leave a Reply