Did you know that the Microsoft Store allows you to pick a drive for installation when you choose to download large games or apps from it? Sure, most of us are aware that we can install all Windows Apps to another Partition, External Drive, USB, or SD Card by default or even Move Windows Apps to another Drive, but the Microsoft Store offers this option before the download is a relatively new option that not many of us may be aware of.

When you open the Microsoft Store and search for an app or game to download to your Windows 11/10 computer, you click on the Install button to download and install the app.
How to pick a drive for installation in Microsoft Store before downloading the app
To pick a drive for installation in the Microsoft Store before downloading the app or game, follow these steps:
- Open the Microsoft Store and get an app/game you want to install.
- Click the Install button.
- Expand the drop-down menu.
- Choose a drive.
- Click the Install button.
To learn more about these steps, continue reading.
To get started, you need to open the Microsoft Store and get an app or game you want to install on your computer.
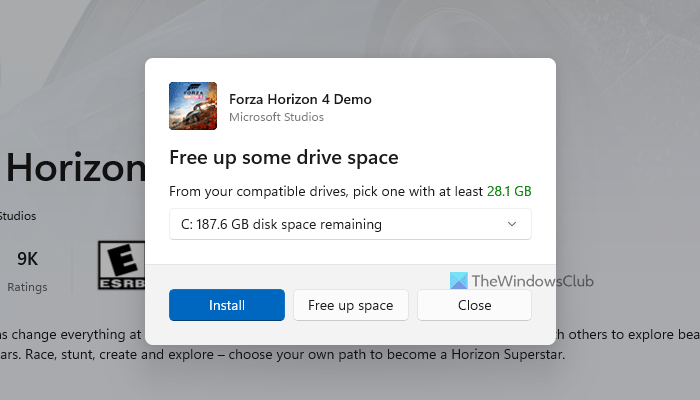
Then, click the Install button to start the installation process. When you click on the Install button, it displays a pop-up window like this:

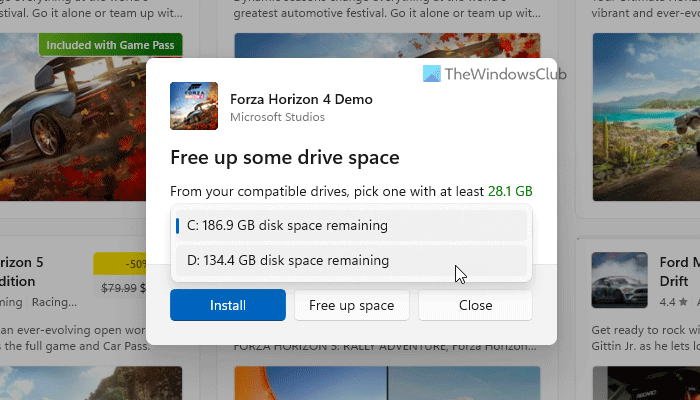
Now, you can expand the drop-down menu and choose the desired drive where you want to install the app or game.
Then, click the Install button. However, you have one more option called Free up space. If you click on it, it redirects you to Windows Settings > System > Storage.
From here, you can delete a few things to make some space for the new app or game.
You may not see this feature being offered for all the apps. It is available only for apps with a large download size.
I hope this helps.
TIP: You can also change the default Program Files installation directory location in Windows 11/10.
How do I choose which drive to install from Microsoft Store?
To choose which drive to install from the Microsoft Store, you need to search for an app or game you want to install. Then, click the Install button. Following that, it will display a pop-up window from where you can choose the drive. For that, you need to expand the drop-down menu and choose the drive as per your wish.
How do I change my default download drive in Microsoft Store?
To change your default download drive in the Microsoft Store, you need to press Win+I to open the Windows Settings panel first. Then, go to System > Storage > Where new content is saved. Expand the New apps will save to drop-down menu and choose a drive that suits your needs.
Read: We couldn’t move the app, Error code 0x80073cf4, when moving Microsoft Store apps
Leave a Reply