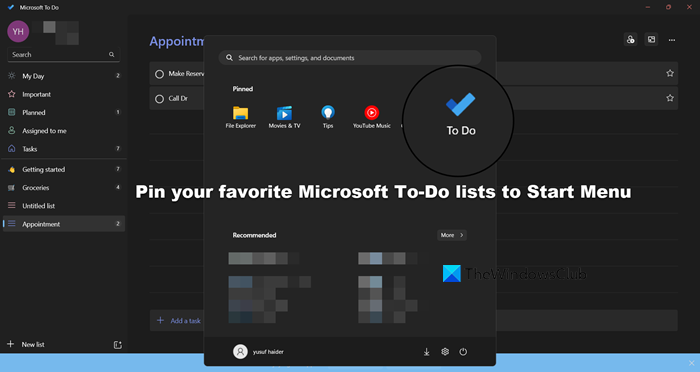
Microsoft To-Do is a handy application that allows you to quickly jot down tasks and keep a check on your work items. Microsoft has given its best to help you organize your tasks. In this post, we are going to aid Microsoft and you in the quest to organize your workspace by learning how to pin your favorite Microsoft To-Do lists to the Start Menu.
Microsoft To-Do
Microsoft To-Do is one of the best free task management applications available for Windows and other operating systems. Microsoft To-Do is very much like the Wunderlist app, it allows you to create a list for almost anything and everything. For instance, you can create a separate list for office work, schoolwork, and shopping. You can also add reminders, due dates, and notes to the lists – Microsoft To-Do lists make your life easy and sorted. Together with all the amazing features, this application makes it easy to always stay on top of your tasks and quickly hop to a particular list by pinning it to your Windows 11/10 Start menu.
In this Windows guide, you will see the steps to quickly pin the Microsoft To-Do lists to the Start menu on Windows 11/10.
Pin Microsoft To-Do Lists to the Start Menu
If you have multiple task lists in the Microsoft To-Do app, you need to open the app to view each list. This can be time-consuming and you may miss important deadlines if you forget to check the app. However, you can make things easier by pinning important tasks to the Start Menu.
Pinning your Microsoft To-Do lists on the Start Menu will let you view all your important tasks at the very beginning. Since all the pending tasks appear right in front every time you open your Start screen or Start menu on your PC you never miss out on important stuff that demands timely action.
To pin Microsoft To-Do Lists to the Start Menu, you need to follow the steps mentioned below.
- Open the Microsoft To-Do app
- Create a new task
- Pin your task
Let us discuss them in detail.
1] Open the Microsoft To-Do app.
You can pretty easily open the Microsoft To-Do app by searching it out of the Start Menu.
Please note:
- Microsoft To-Do app requires you to sign in with a Microsoft account. However, if you are already using a Microsoft account to sign in to Windows 11/10, the app automatically uses your Microsoft account upon installing it on Windows 11/10.
- If you do not have the Microsoft To-Do app you can download it from the Windows Store. This is a free app, just make sure that you are running the latest version of the application as well as Windows 11/10.
2] Create a new task
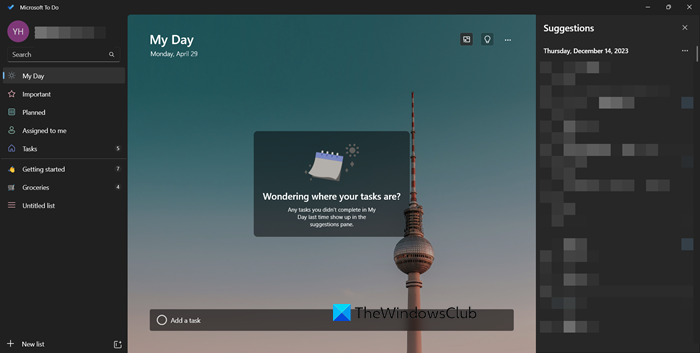
You can either create a new task or pin an existing one. If you don’t want to create a new task, skip it and move to the next step.
To create a new task, click on Add a task and then cultivate your list. To create a list, you can click on New list from the button left corner of your screen.
3] Pin your task
To start pinning your task lists to the Start Menu, right-click on the task list and select the ‘Pin to Start’ option.
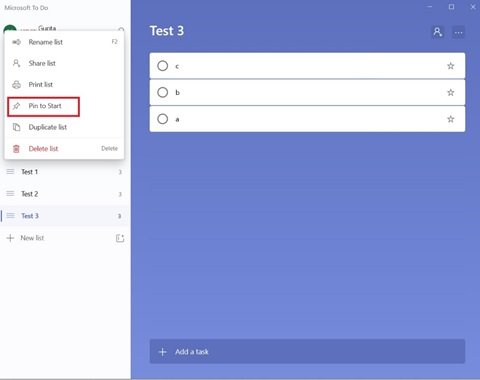
When you get the confirmation dialog, click ‘Yes’. This action is going to add your selected to-do lists to the Start Menu.

That is, it! Open the Start menu and you will see your Task list appearing as a new tile.
Click & drag the Microsoft To-Do list to the desire position
To change the position of the Microsoft To-Do list in Start, you need to follow the steps mentioned below.
1] Now open the ‘Start Menu’.
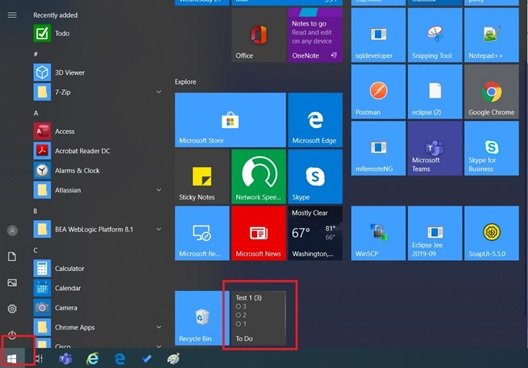
2] If you want to see the pinned To-Do list tile at the top or any other specific position on the Start Menu, simply click hold and move the tile.
3] Customize the tile by right-clicking on it, select the ‘Resize’ sub-menu, and choose your desired size from the options.
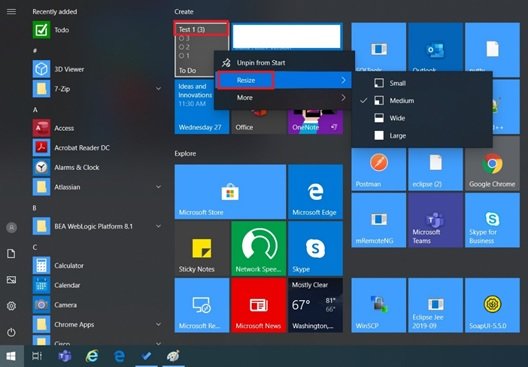
With Live To-Do tiles on your Start Menu, a single tap can launch the list and you can immediately jump to the selected list. This saves time and ensures you never miss the very important To-Do things. Also, when you are done with the tasks on one list and you do not need them on the Start Menu, simply unpin it. To do so, you can right-click on the tile and select ‘Unpin’ from the option.
If the pinned To-Do tile does not show lists?
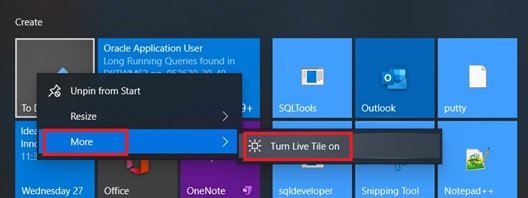
This could be the case because the live tiles feature is turned off. Right-click on the tile, click the ‘More’ option and then click the ‘Turn Live Tile On’ option.
We hope this guide helps you to stay at the top of your tasks.
Do let us know if you have more tips and tricks in the comments section below.
Related read: Best To-Do list apps for Windows 11.
Leave a Reply